Bringing a baby into the world is a journey filled with love, learning, and a whole lot of diaper changes! As a new parent, or someone looking to create a thoughtful gift for expecting parents, practicality and convenience are key. That’s where the Travel Changing Pad comes in – a must-have accessory for on-the-go diaper changes.
As a content creator at travels.edu.vn, I understand the needs of traveling families. And from my own journey into motherhood and sewing, I’ve learned firsthand the joy of creating custom baby essentials. Like many parents, I quickly realized the store-bought changing pads often fall short – they can be the wrong size, difficult to clean, or simply lack a personal touch. This realization sparked my desire to design and sew my own DIY travel changing pad, perfectly tailored to my needs.
This easy-to-follow sewing tutorial will guide you through creating your own portable and washable travel changing pad. It’s a fantastic project for beginner to intermediate sewers and allows for complete customization. Imagine a changing pad that is not only practical but also reflects your personal style or perfectly matches the nursery theme! Plus, homemade gifts carry an extra special sentiment, making this DIY travel changing pad an ideal present for baby showers or welcoming a newborn.
This tutorial is designed to be a foundation – feel free to get creative! Adjust the size, add extra padding for comfort, or incorporate different closure methods. The possibilities are endless to make this travel changing pad uniquely yours.
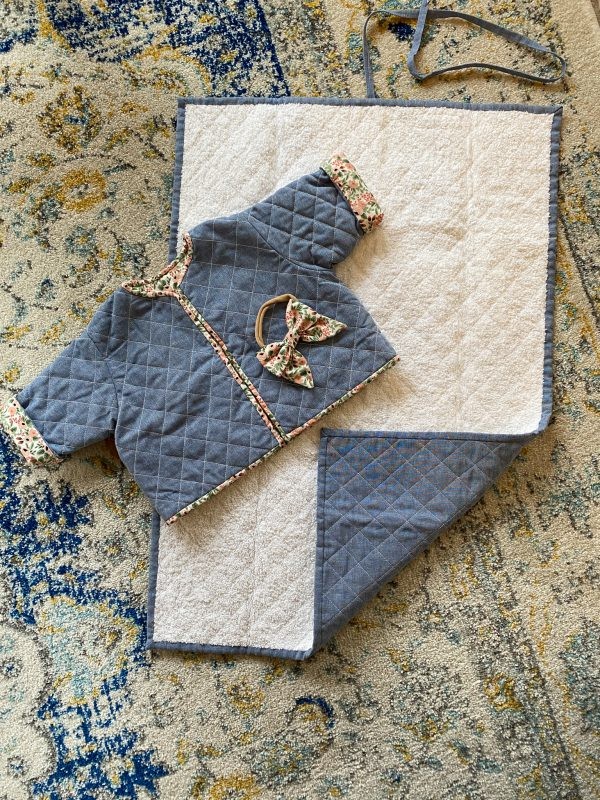 Close-up of the finished travel changing pad, folded and tied with a fabric strip.
Materials You’ll Need to Sew a Travel Changing Pad
Before you begin, gather these simple materials. You likely already have some of these items in your sewing kit!
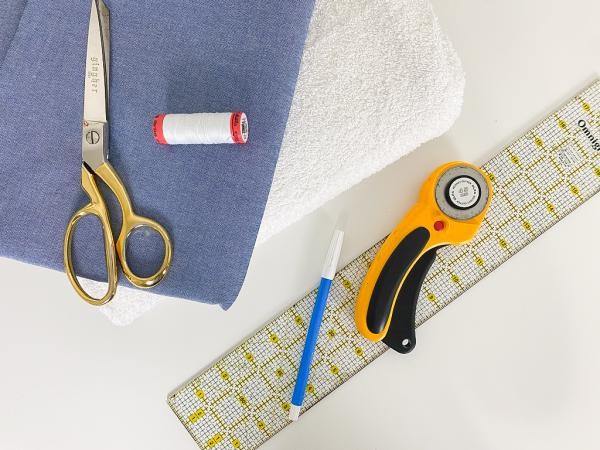 Materials laid out for sewing a travel changing pad: towel, fabric, ruler, rotary cutter, mat, scissors, pins, pen, thread, and BERNINA sewing machine.
- Towel: A standard hand towel works perfectly. Look for soft, absorbent materials. A towel from Target’s Room Essentials line was used in this example.
- Fabric Backing: 1 yard of fabric. Choose a fabric that is soft, durable, and easy to wash. Cotton or flannel are excellent choices.
- Quilting Ruler: For precise measurements and straight lines.
- Rotary Cutter: Makes cutting fabric quicker and easier, but scissors will also work.
- Cutting Mat: Protects your work surface while cutting.
- Fabric Scissors: Sharp scissors for clean fabric cuts.
- Pins: To hold fabric layers together while sewing.
- Water-Soluble Pen: For marking fabric – the marks will disappear with water.
- Coordinating Thread: Choose a thread color that matches or complements your fabric.
- Sewing Machine: A reliable sewing machine like the BERNINA 590 E will make this project a breeze.
Step-by-Step Guide: Sewing Your Travel Changing Pad
Follow these simple steps to create your own travel changing pad.
Step 1: Cut the Fabric and Towel
Lay your chosen fabric and towel flat on your cutting mat. Using the quilting ruler and rotary cutter (or scissors), cut a rectangle measuring 28 inches by 20 inches from both the fabric and the towel. These dimensions are ideal for a portable baby changing mat.
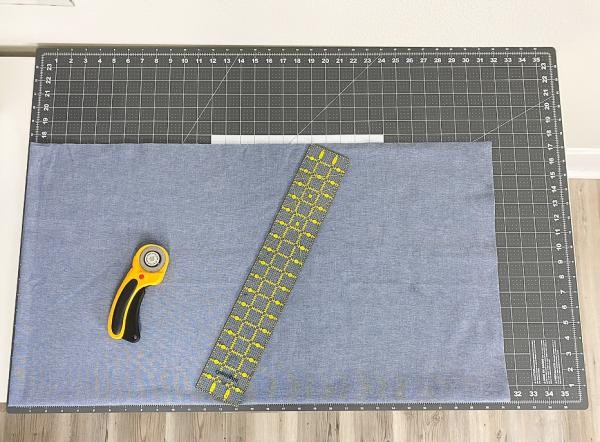 Cutting fabric and towel into 28×20 inch rectangles on a cutting mat.
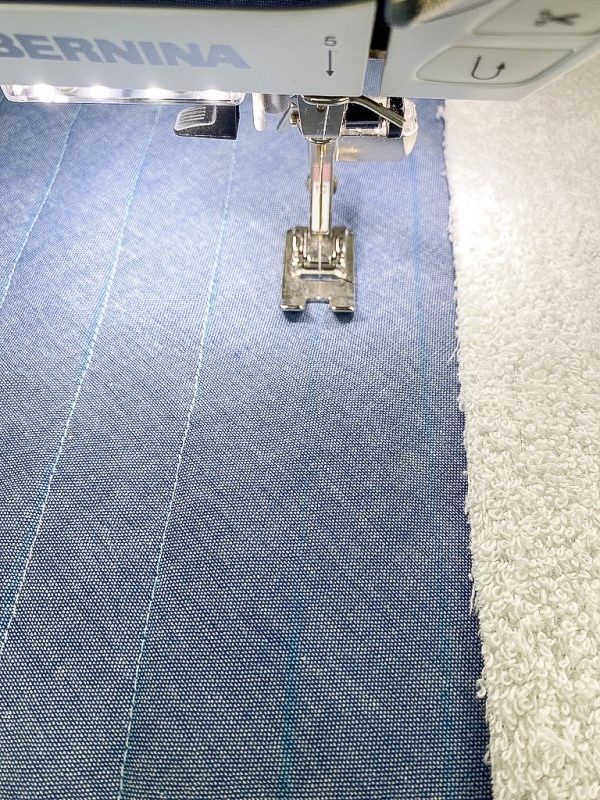
Step 2: Mark Diagonal Lines on the Fabric Backing
Take the right side of your fabric backing and, using the water-soluble pen and quilting ruler, mark diagonal lines 1 inch apart, from corner to corner. Start in the bottom left corner and work your way across the fabric. These lines will create a quilted effect on your portable changing pad.
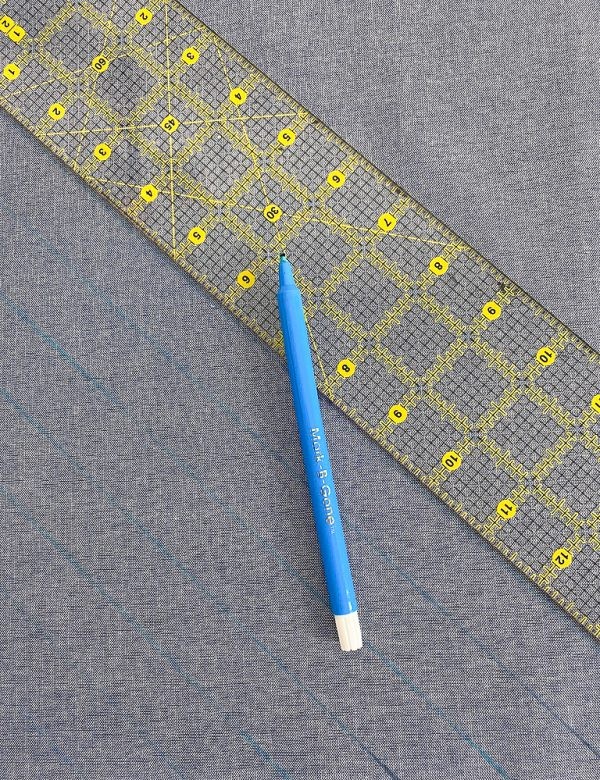 Marking diagonal lines on the fabric backing with a water-soluble pen and ruler.
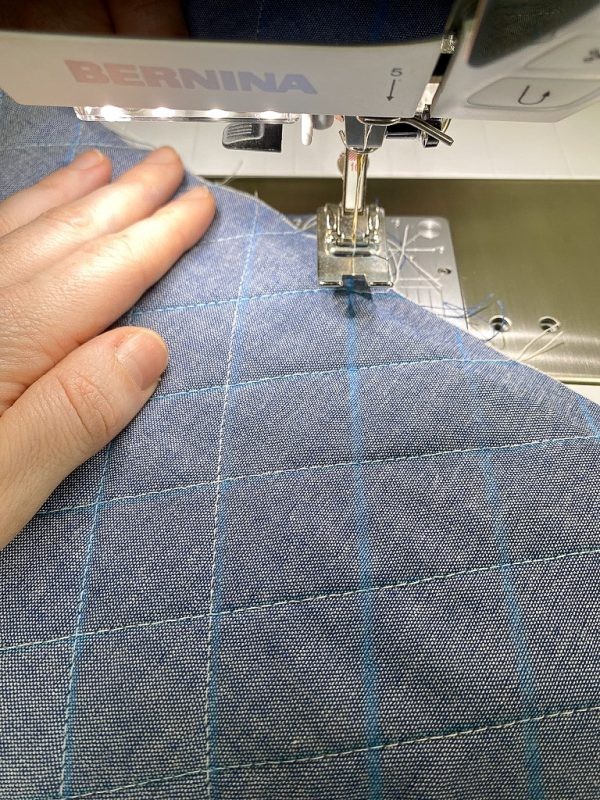
Step 3: Pin and Topstitch the First Set of Diagonal Lines
Place the marked fabric backing on top of the wrong side of the towel piece, ensuring the right side of the towel is facing up. Pin the layers together to secure them. Using your sewing machine, topstitch along the marked diagonal lines. Start from the center and sew outwards towards one corner, then repeat on the other side to prevent bunching. This stitching not only adds a decorative element but also secures the towel and fabric together for your DIY changing pad.
 Topstitching along the marked diagonal lines on the fabric and towel layers.
Step 4: Mark the Second Set of Diagonal Lines
After completing the first set of diagonal lines, mark the next set of 1-inch diagonal lines, starting from the bottom right corner. This will create a grid of 1-inch squares when intersected with the first set of lines, enhancing the quilted texture of your travel changing pad.
Step 5: Topstitch the Second Set of Lines
Topstitch along the second set of marked diagonal lines, again starting from the center and working outwards. This completes the quilted pattern on your DIY baby changing mat, adding both style and durability.
 Topstitching the second set of diagonal lines to create a quilted pattern.
Step 6: Trim and Even Out the Edges
Return the changing pad to your cutting mat and trim any excess fabric or towel with the rotary cutter to even out the sides. This ensures a clean and professional finish for your portable travel changing pad.
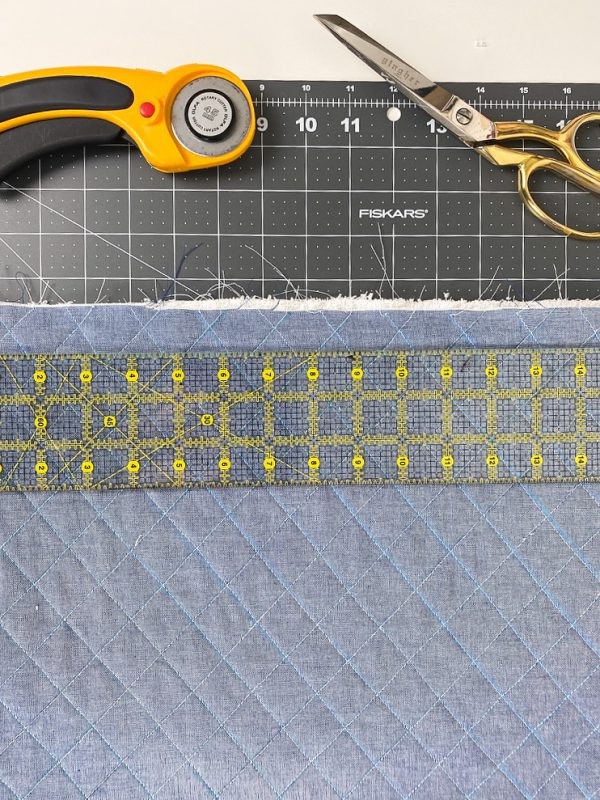 Trimming the edges of the changing pad with a rotary cutter and ruler.
Step 7: Prepare the Binding Strips
Measure the perimeter of your changing pad. Cut fabric strips that are 1.5 inches wide and long enough to go around the entire edge of the pad plus a few extra inches for overlap. Iron these strips in half lengthwise, with the wrong sides facing each other. This will create the binding for the edges of your sewn changing pad, giving it a neat and finished look.
Step 8: Create the Tie Closure
Cut a strip of fabric measuring 1 inch by 27 inches for the tie closure. Iron it in half lengthwise, right sides together, and sew along the long edge with a 1/2-inch seam allowance, leaving the top end open for turning. Turn the tie right side out using a turning tool or safety pin, and iron it flat. This fabric strip will act as a tie to keep your folded travel changing pad neatly secured.
Step 9: Position the Tie
Place the fabric tie in the center of the top edge of the changing pad, with the long side of the tie facing inwards so it doesn’t get caught while binding. Pin it in place.
Step 10: Bind the Changing Pad
Bind the edges of the DIY travel changing pad using the prepared binding strips. Sew the binding around the entire perimeter, encasing the raw edges and attaching the tie securely.
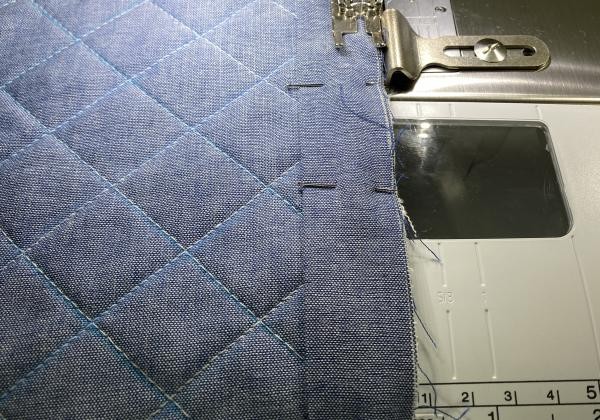 Close-up of binding being sewn around the edge of the changing pad.
Step 11: Remove Water-Soluble Pen Marks and Wash
Remove any remaining water-soluble pen marks by lightly dampening them with a cloth or following the pen manufacturer’s instructions. For easy cleaning, toss your new travel changing pad in the washing machine on a delicate cycle.
Step 12: Iron and Fold
Iron your completed portable changing pad to remove any wrinkles and give it a crisp finish. To fold it into a compact satchel shape, fold it in thirds vertically, and then fold the top slightly more than halfway down. Wrap the fabric tie around the folded pad and knot it in the front to secure it.
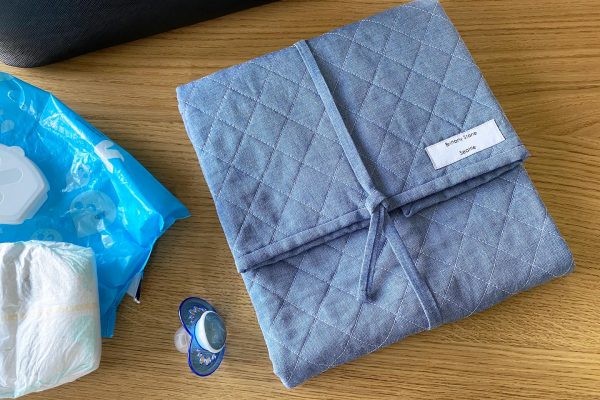 Finished travel changing pad folded and tied.
 Side view of the finished and folded travel changing pad, showing its portability.
Congratulations! You’ve successfully sewn your very own DIY travel changing pad! We hope you enjoyed this tutorial and feel inspired to create more handmade baby projects. This portable changing pad is not only a practical item for parents but also a wonderful expression of love and care.
Don’t forget to share your creations with us! Tag us in your photos – we’d love to see how you’ve personalized your travel changing pads and brought your creative vision to life. Happy sewing!