Are you dreading the inevitable chorus of “Are we there yet?” before your family road trip even leaves the driveway? Long drives with kids can be challenging, but with a little preparation, you can transform travel time from tedious to engaging. One fantastic, free solution is creating personalized travel maps for your children using readily available tools like Google Maps. Empower your kids to become navigators and watch their excitement grow as they track your journey on their very own custom-made map.
Here’s a simple guide on how to use Google Maps to create exciting and educational travel maps for your kids, making your next road trip smoother and much more fun:
First, navigate to Google Maps and enter your starting point, such as your home address. Next, click on “Directions”. For this guide, we’ll map a route from Vancouver, BC, Canada, to Seattle, WA, USA, as an example.
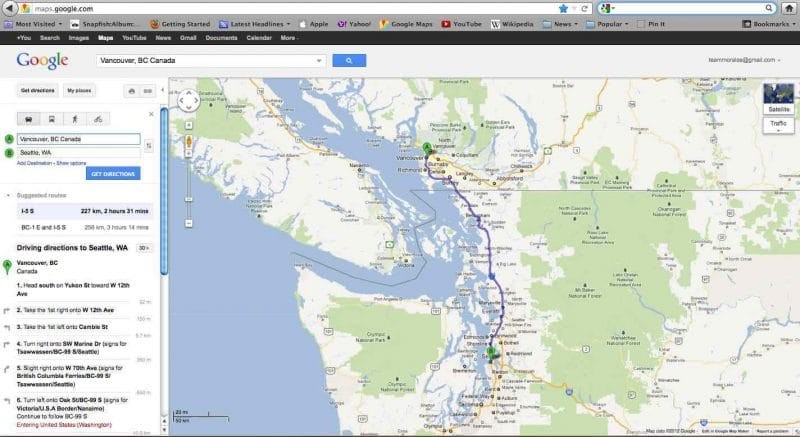 Vancouver to Seattle Map for Kids – Kid World Citizen
Once your chosen route is displayed clearly on your computer screen, maximize the map view. The next step is to capture a screenshot of this map. If you are using a Mac, press Command + Shift + 3. For PC users, locate the “Print Screen” key, usually found in the upper right area of your keyboard. Pressing the appropriate keys will capture an image of your screen. Typically, screenshots are saved as image files on your desktop, so minimize any open windows to easily locate the newly created image icon.
Now that you have captured your route map from Google Maps, you can enhance it with text and personalization for your children. Open Microsoft Word or your preferred word processing program. Go to the “Insert” tab at the top of the screen, then find and select “Picture”, and choose the option “from file”. Find the screenshot image of your Google Map that you saved and insert it into your Word document.
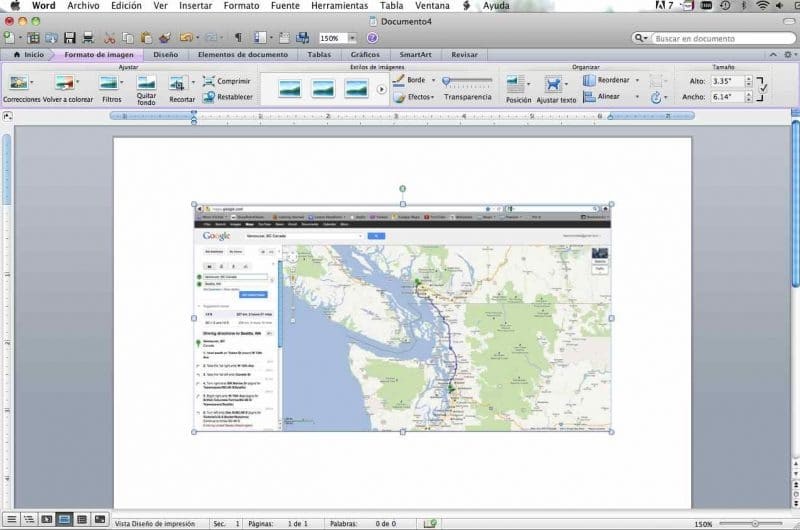 Insert Google Map Screenshot into Word Document – Kid World Citizen
To effectively work with the map image within Word, right-click on the image. From the context menu, select “Format Picture”. In the Format Picture dialog box, click on “Layout” and choose the text wrapping option that allows text to be placed in front of the image. This is often labeled as “In Front of Text”.
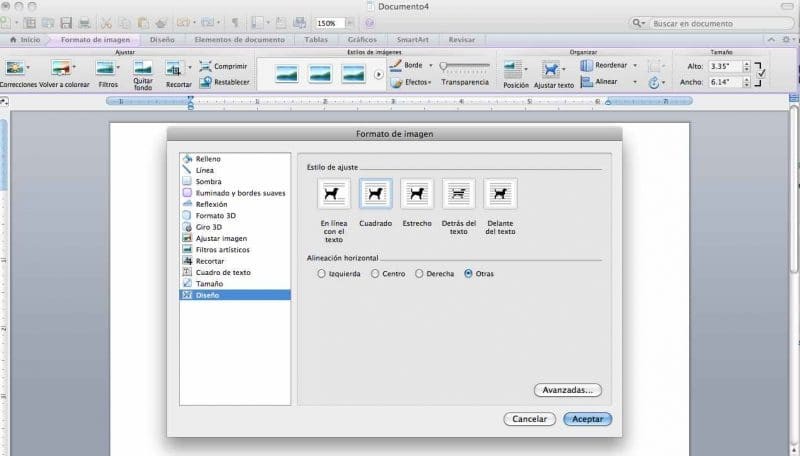 Formatting Google Map Image in Word for Kids Travel Map – Kid World Citizen
With the image formatting adjusted, you now have the flexibility to crop and resize your map. Click on the “Crop” tool in the Picture Format menu. Black handles will appear at the corners and sides of the image. Drag these handles inwards to crop out any unnecessary parts of the screenshot, focusing the image solely on the route map itself.
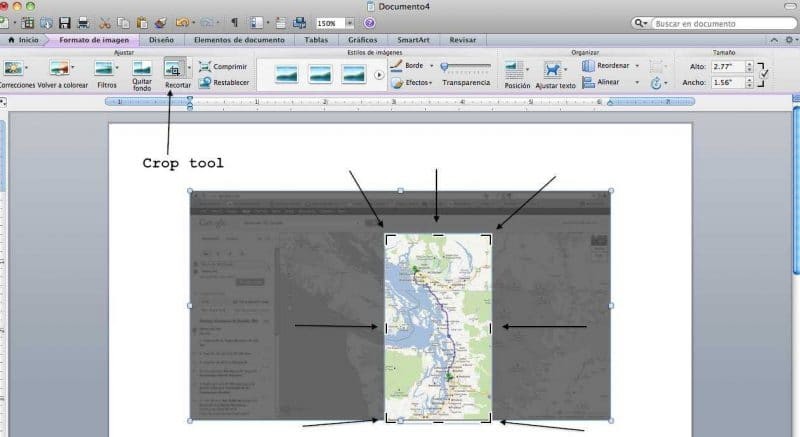 How to Crop Google Map for Kids Travel Activity – Kid World Citizen
Now comes the fun part: adding personalized details to your kid’s travel map! Utilize text boxes to include key landmarks, fun facts about locations along your route, or even inside jokes your family shares. In Word, go to “Insert” again, and this time select “Text Box”. Draw text boxes directly onto your map image. Add text like “Grandma’s House!”, “Look for Cows!”, “River Crossing!”, or historical markers along your route. Get creative and tailor the text to your children’s interests and the specifics of your trip.
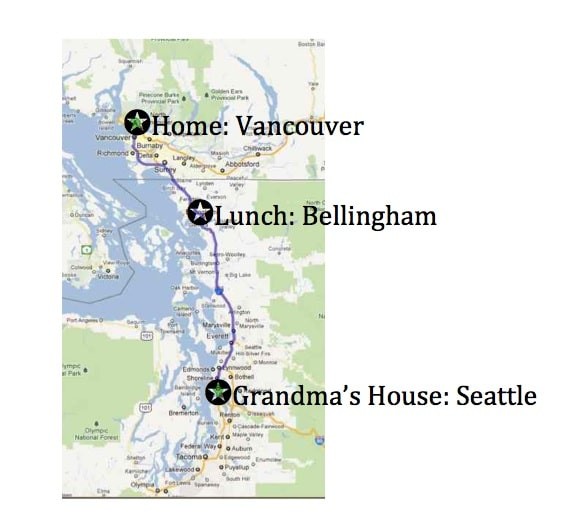 Personalized Route with Text Boxes for Kids Travel Map – Kid World Citizen
Equipped with their customized free travel maps and a marker, your kids can actively participate in navigating your road trip. As you drive, they can track your progress, mark off milestones, and anticipate upcoming destinations. This hands-on approach transforms them from backseat passengers into engaged explorers. Encourage them to read road signs and match city names on their maps, enhancing their spatial awareness and map reading skills. Use the map to point out geographical features like rivers and lakes as you cross them, making geography come alive. If your journey involves crossing state or provincial borders, have them color these boundaries on their maps and watch for “Welcome to…” signs, turning border crossings into mini-celebrations.
To further enrich the experience, incorporate a compass. Teach your children about directions and have them identify the direction of travel on their map and in real life. Discuss the differences between major highways and smaller roads, pointing out how they are represented differently on the map. Engage them in noticing how the font size on the map correlates to the size of towns you pass through, illustrating population density in a tangible way. Discuss the common elements found in towns of all sizes, like churches, gas stations, parks, and grocery stores, sparking observations about community and infrastructure.
Creating free travel maps for kids is more than just a fun activity; it’s an opportunity to weave geography lessons, navigation skills, and family bonding into your road trips. By turning your children into active participants, you not only alleviate boredom but also foster a sense of adventure and learning during your travels.
For more ideas on making family travel enriching and enjoyable, explore resources on travel tips for kids and discover more strategies for road trips with kids.