Thinking about brightening up your travel trailer? Painting the interior walls, especially those with vinyl trim, can dramatically transform your space. Many RVs come with vinyl-covered walls, known for their easy cleaning, but painting them requires a bit more know-how than your average drywall. If you’re wondering how to successfully paint these surfaces and achieve a lasting, beautiful finish that complements your Travel Trailer Interior Vinyl Trim, you’ve come to the right place.
In this guide, we’ll walk you through a seven-step process to paint your RV’s vinyl walls like a pro. We’ll cover everything from understanding the pros and cons of painting to crucial preparation steps and paint selection. Before you grab your brushes, let’s consider whether painting is truly the right choice for your RV’s interior.
Pros & Cons: Should You Paint Your RV Walls and Vinyl Trim?
Before committing to painting, it’s wise to weigh the advantages and disadvantages, especially when dealing with travel trailer interior vinyl trim and walls. There are alternative ways to refresh your RV’s look that are less permanent than paint.
Initially, in our own RV, we explored options to enhance the interior without immediately resorting to paint over the washable vinyl surfaces.
Firstly, we carefully removed the dated ‘chair rail’ accent trim, often found in older RVs. This simple step alone created a more modern and spacious feel. Many travel trailers feature such trim, and removing it can be a quick update.
Secondly, the valances in our RV were covered in a busy, dark fabric that clashed with the light vinyl walls. We opted to recover them with a linen fabric that harmonized with the existing lightly-patterned vinyl walls. This fabric choice not only made the valances blend in but also subtly enhanced the appearance of the vinyl walls, making them appear more textured and linen-like. This project, while not as simple as painting, offers greater reversibility.
Thirdly, we incorporated framed artwork throughout the RV. We used lightweight frames with matting and replaced the glass with safer, anti-glare plastic. Personal artwork and photos were then mounted using double-sided foam tape. This allowed us to personalize the space affordably and without permanent changes to the walls.
While these updates made a noticeable difference, none had the transformative impact of paint. Ultimately, we decided that painting select interior walls was necessary to achieve the desired aesthetic.
Why Paint Your RV’s Vinyl or Wood Veneer Walls and Trim?
- Personalized Style: Just like any home, your RV is your personal space on wheels. Painting allows you to infuse your style, making it feel more like home. Even painting a few accent walls to coordinate with your décor can create a significant cozy atmosphere. Consider how paint can highlight or complement your travel trailer interior vinyl trim by choosing colors that work together.
- Modernize the Interior: Many RVs, regardless of their age, feature vinyl walls that can appear dated. A fresh coat of paint can instantly update the interior, moving away from an older aesthetic. This is especially effective in making the space feel less like a typical “RV” and more like a modern, stylish small home.
- Conceal Imperfections: RVs endure a lot over time. Paint, when properly applied, can effectively cover up stains from water damage, smoke, or other blemishes that vinyl walls may accumulate. This can give your RV a fresh, clean slate.
Reasons to Keep Your RV’s Vinyl Walls and Trim Unpainted
- Easy to Clean Vinyl: Vinyl walls are incredibly easy to wipe down, a significant advantage, especially when traveling and encountering dirt and outdoor elements. Maintaining clean travel trailer interior vinyl trim is also simple, and paint might complicate this aspect.
- Durability and Low Maintenance of Vinyl: Vinyl is inherently more resistant to scratches and nicks than painted surfaces. While paint can be touched up, it requires time and effort that you might prefer to spend enjoying your travels, rather than maintaining painted walls.
- Tricky RV Corners: RV interiors are known for their numerous tight corners and angles. Painting in these confined spaces can be challenging and time-consuming, requiring patience and careful technique, especially around the vinyl trim.
- Potential Resale Impact: While a well-maintained, neutrally painted RV might not deter buyers, poorly executed paint jobs or very taste-specific colors could potentially affect resale value. It’s something to consider if you plan to sell your RV in the future.
It’s important to remember that painting your RV walls, as outlined in the steps below, is generally irreversible. Bonding paint to factory-finished vinyl requires sanding and a strong primer, making it difficult to restore the walls to their original vinyl finish without replacing the vinyl itself.
If you’re still with us, it’s likely you’ve considered these points and are ready to transform your RV with paint, just as we did.
Before diving into the actual painting process, let’s discuss crucial preliminary steps: deciding which walls to paint, selecting your color scheme, and gathering the necessary supplies. Good preparation is truly the key to a successful RV wall painting project, especially when working with vinyl and ensuring a smooth finish around your travel trailer interior vinyl trim.
Step 1: Decide Which Walls to Paint in Your RV
Some RVers opt to paint all interior walls for a complete transformation, while others prefer to create accent walls. Given the semi-permanent nature of paint on vinyl, and the work involved, it’s wise to be certain of your decision before starting.
Option 1: Focus on Accent Walls
Starting with accent walls is a highly recommended approach, particularly for first-timers. If you’re not completely satisfied with an accent wall, repainting it in a neutral color is a relatively easy fix and less noticeable than repainting an entire RV interior. It’s also significantly less work and a more manageable project overall. This allows you to test the waters and gain confidence before tackling larger areas.
Take a critical look at your RV’s interior. Which walls could benefit most from paint? Where could a pop of color enhance the space? Which areas might you want to visually minimize? Consider how painting certain walls might interact with existing features like your travel trailer interior vinyl trim.
In our RV, we chose to paint four accent walls in a dark brown. We had several walls covered in a faux wood laminate that we felt cheapened the overall look. Painting these walls instantly elevated the interior. We also painted a nook in the bedroom where the TV was mounted to make it recede visually. Finally, we painted a wall that housed bulky, black tank level panels, and the brown paint helped these utility panels blend in more effectively.
Depending on your RV’s size and layout, you might choose to paint anywhere from one to six accent walls. Numerous resources offer guidance on selecting and implementing accent walls effectively.
Option 2: Paint All Interior Walls
We spent considerable time debating whether to paint all the vinyl walls in our RV. Ultimately, we decided to start with accent walls and evaluate the results. We appreciated the easy-clean nature of the unpainted vinyl on most walls. Additionally, having painted before, we knew that thoroughly painting the small, corner-filled space of an RV would be a demanding task.
However, many RV owners have successfully painted all their interior walls, achieving stunning results. It’s a matter of personal preference, time availability, and patience. If you have the time and are looking for a dramatic, cohesive change, painting all walls is an option.
Step 2: Select Your RV Interior Color Scheme
Color selection is crucial in any painting project, and RV interiors present unique considerations. RV interiors can often feel darker than conventional homes, so colors may appear differently inside your RV than in natural daylight. Obtaining and testing samples is essential.
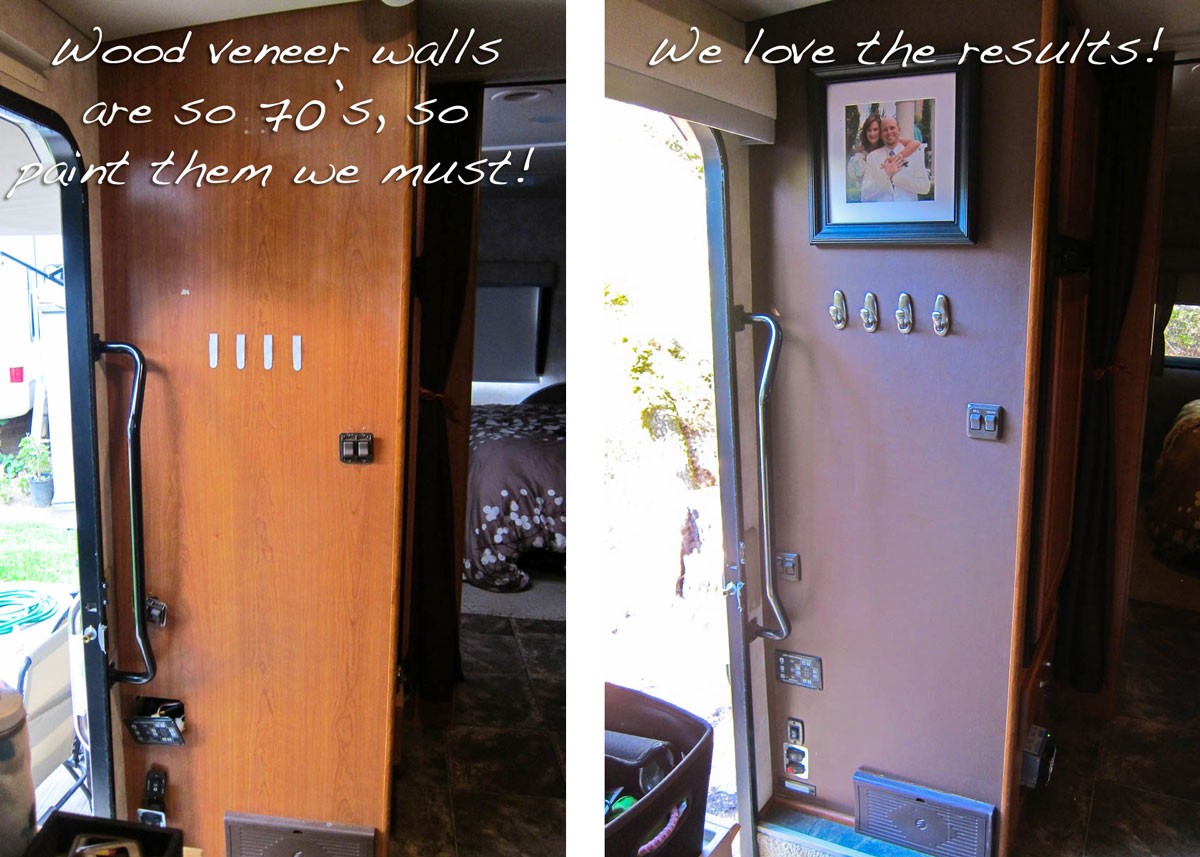 Our entry wall before and after
Color selection is both exciting and challenging. Take your time to explore options. Online tools like color visualizers can be helpful in experimenting with different color combinations for your walls and considering how they will interact with your travel trailer interior vinyl trim.
Key Guidelines for RV Interior Color Selection:
- Coordinate with Existing Elements: Choose colors that complement your flooring, cabinetry, and existing décor. Consider the undertones in your vinyl trim and select paint colors that harmonize or provide a pleasing contrast.
- Neutral Tones are Often Best: Neutrals like tan, cream, off-white, and taupe are generally recommended for RV interiors. They are versatile, create a sense of spaciousness, and are forgiving in small spaces. Brown can be used as an accent, but darker shades can make an RV feel smaller. While white brightens interiors, it can show dirt quickly, especially in a travel environment.
- Avoid Similar Tones: Steer clear of colors that are too close in shade, especially if you have a white ceiling. For example, off-white walls with a white ceiling can look mismatched. Aim for clear contrast, like cream and brown, or an exact match if you desire a monochromatic look.
- Minimize Bright, Bold Colors: While tempting, overly bright or bold colors can be overwhelming in a small RV space and may limit your décor options. It’s easier to introduce pops of color through accessories like pillows, artwork, and throws. This also maintains broader appeal if you decide to sell your RV later.
- Consider Exterior Colors: We chose to align our interior color scheme with the exterior of our RV, which featured browns, creams, and tans. Carrying these colors inside created a cohesive feel. This is just one approach, but it worked well for us.
Once you’ve narrowed down your color preferences, gather numerous sample chips. From your top choices, purchase sample pots to test in your RV. Paint swatches onto foam board or poster board so you can move them around the RV and observe them in different lighting conditions throughout the day.
After selecting your top contenders, evaluate your overall color scheme. How does the new paint color look alongside your floors, soft furnishings, and other décor? When we chose our brown paint, we also selected new bedding to ensure everything coordinated seamlessly.
Step 3: Gather Your RV Wall Painting Supplies
Congratulations on choosing your color scheme! Now, let’s assemble your painting toolkit. Consulting with paint experts at a reputable paint center is always a good idea. They can provide tailored advice based on the specific surfaces you’re painting, including vinyl and wood veneer common in RVs.
Generally, a high-quality water-based paint with an eggshell finish works well for RV interiors. While oil-based paints were traditionally favored for durability, advancements in water-based paint technology have made them exceptionally resilient, especially when paired with proper surface preparation and primer.
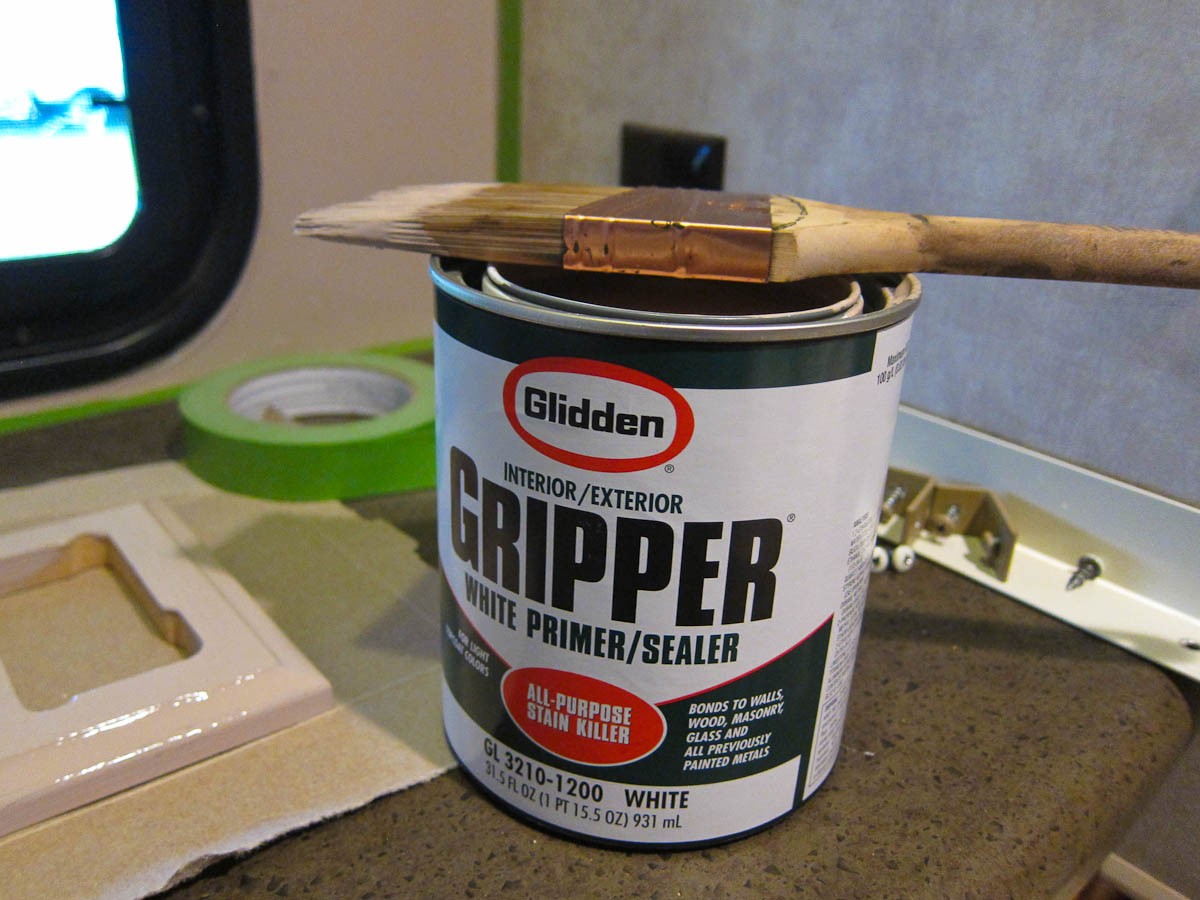 Glidden Gripper
The Importance of Gripper Primer
For painting RV walls, especially vinyl, the primer is paramount. We strongly recommend Glidden Professional Gripper. As the name suggests, Gripper creates an incredibly strong bond on surfaces. It’s a primer and sealer with exceptional adhesion properties, making it ideal for vinyl, wood veneer, and any other slick, non-porous surface you can imagine. While other primers exist, Gripper’s unique texture and gripping power are unmatched for RV applications.
Using the right primer is not an area to compromise on. Our first attempt at painting RV walls without Gripper resulted in significant peeling and wasted effort. Learning from this experience, we understand the critical role of a high-quality primer like Gripper.
2024 Update: Kilz Adhesion Primer
Recognizing the need for superior adhesion primers, Kilz also offers Kilz Adhesion Primer. This product is specifically formulated for challenging-to-paint surfaces and provides excellent bonding to RV wood veneer and vinyl walls. If Gripper is unavailable, Kilz Adhesion is a reliable alternative.
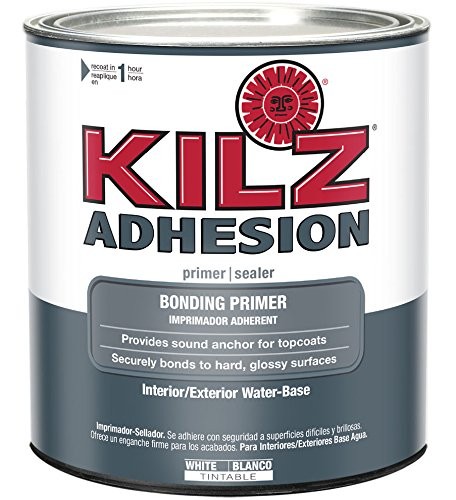 Kilz Adhesion
Recommended Supply List:
- Primer: Glidden Gripper or Kilz Adhesion Primer
- Interior Paint: High-quality water-based paint, eggshell finish in your chosen color(s)
- Paint Brushes: Assorted sizes for trim and detail work, and larger brushes for walls.
- Small Paint Rollers and Roller Frames: Small rollers are easier to maneuver in tight RV spaces.
- Paint Tray: For rollers
- Painter’s Tape: Frog Tape brand recommended for clean lines, especially around travel trailer interior vinyl trim.
- Drop Cloths: To protect flooring and furniture.
- Screwdriver: For removing switch plates, vent covers, etc.
- Cleaning Supplies: White vinegar, water, spray bottle, sponges, warm water, soap (mild dish soap).
- Sandpaper or Sanding Block: Fine-grit sandpaper for lightly scuffing vinyl surfaces.
- Tack Cloth: For removing sanding dust.
- Stir Sticks: For paint and primer.
- Comfortable Clothing, Ventilation Fans, Music/Refreshments: To make the process more comfortable.
Step 4: Prepare Your RV Walls for Painting
With supplies gathered, it’s time for preparation. Proper wall prep is crucial for paint adhesion and a professional finish, particularly on vinyl and around travel trailer interior vinyl trim.
Clean the Walls: Ensure good ventilation by opening windows and using vent fans to minimize fumes. Lay down drop cloths to protect surfaces and wear comfortable clothing.
Using a screwdriver, remove all items from the walls, such as switch plates, vent covers, artwork, and hooks. While it might seem quicker to paint around these items, removing them ensures a cleaner, more professional paint job.
Next, thoroughly clean and degrease the walls. Don’t skip this step! Removing grime and residues before sanding is essential for proper primer adhesion.
For general cleaning, a solution of diluted white vinegar and water (50/50 mix) in a spray bottle works effectively. Alternatively, use your preferred wall cleaner. For mildew, use a diluted bleach solution, followed by a clean water rinse.
Regardless of the cleaner used, rinse the walls with warm water to remove any residue before proceeding to sanding.
Sand the Walls: Most vinyl and wood laminate surfaces have a texture or grain. This texture will remain somewhat visible after painting. Gripper primer helps to minimize texture but won’t completely eliminate it. Light sanding is key here; the goal is to slightly roughen the surface, not to remove the vinyl layer. Use a sanding block and lightly sand the entire surface in circular motions.
After sanding, remove sanding residue with warm, soapy water, followed by a clear water rinse. Once dry, use a tack cloth to remove any remaining fine particles.
Tape Trim: While experienced painters might attempt to “freehand” paint edges, using painter’s tape is highly recommended, especially for crisp lines around travel trailer interior vinyl trim and along ceilings and corners.
We prefer Frog Tape, designed for latex paints, which minimizes paint bleed-through and clean removal without peeling fresh paint. Apply tape carefully along all trim, ceiling lines, and edges where you want a sharp paint line.
Step 5: Prime the RV Walls
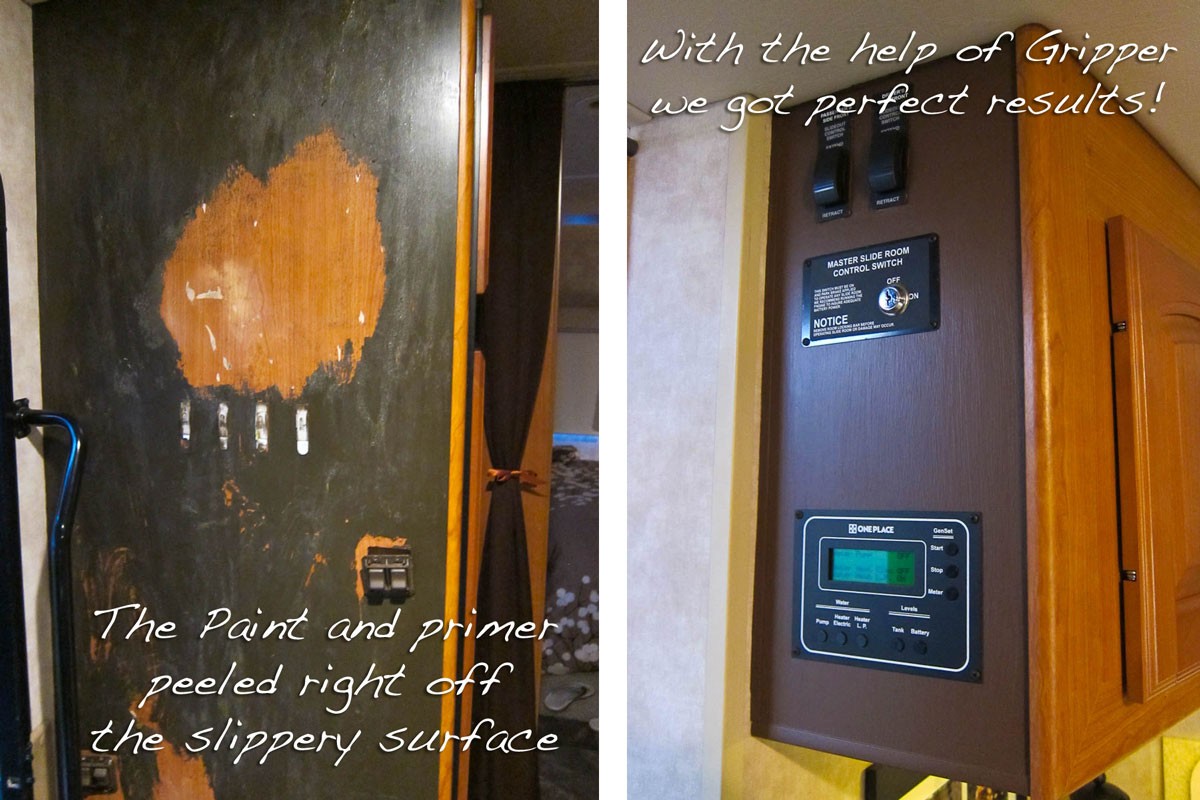 Without Gripper | With Gripper
Reiterating the crucial step: Use Gripper Primer & Sealer (or Kilz Adhesion) on all vinyl or wood veneer RV walls. This step is non-negotiable for long-lasting results.
Our previous experience without Gripper taught us a valuable lesson – primer is not optional on vinyl. Skipping primer leads to paint peeling and significant rework. Applying Gripper after correcting our initial mistake resulted in perfect paint adhesion that has lasted for years.
If painting with a dark color, consider having the paint department tint your Gripper primer towards your paint color. This enhances coverage and color depth. For light paint colors, use Gripper straight from the can.
Stir Gripper primer thoroughly before use. Apply using brushes or rollers. Small rollers are advantageous in RVs. Gripper has a slightly thicker consistency, which is necessary for its bonding properties—do not thin it.
Apply one coat of Gripper evenly. For enhanced coverage, a second coat can be applied after at least one hour (and up to four hours for optimal results, according to product guidelines). Gripper cleans up easily with soap and water.
Step 6: Paint Your RV Walls
Once the primer is sufficiently dry, you can begin painting. Use small rollers or brushes, as before. Remember to stir your paint thoroughly.
Work in small sections to maintain a wet edge and ensure a smooth, even finish. Use a long-handled brush for hard-to-reach areas, especially corners and around trim.
Allow the first coat of paint to dry completely before applying a second coat, if needed. Two coats typically provide optimal coverage and color saturation. Assess your color choice and the overall look after the first coat dries. If you’re not completely satisfied with the color, you can always apply another color over it. We actually adjusted our initial color choice this way and are very happy with the final result.
Step 7: Cleanup and Finishing Touches
Once the paint is dry to the touch, carefully remove the painter’s tape. The ideal time for tape removal is a few hours after painting. If tape remains on too long, it can become embedded and harder to remove cleanly, potentially causing paint to peel.
 Our painted bedroom alcove
Our bedroom alcove after painting, showcasing how paint can define spaces and add visual interest in an RV.
Clean your painting supplies and admire your newly painted RV walls! With proper preparation and the use of Gripper primer, your paint should form a strong bond with the vinyl, resisting nicks and scratches. Our painted walls have held up perfectly for over two years, even in high-traffic areas.
Allow yourself a few weeks to fully appreciate your new RV interior and adjust to the color scheme.
If you’ve successfully painted your RV walls, share your experiences and tips in the comments! For first-time RV painters, we wish you the best of luck and happy painting!