Can You Paint A Travel Trailer? Absolutely You can transform your RV’s exterior with a fresh coat of paint, giving it a personalized and updated look. At TRAVELS.EDU.VN, we understand the desire for a travel experience that reflects your unique style, and a custom-painted travel trailer is a fantastic way to achieve this. We will give insights on DIY camper painting and professional RV painting services.
Table of Contents
1. Understanding the Appeal of Painting Your Travel Trailer
2. Is Painting Your Travel Trailer a DIY Project?
3. Essential Tools and Materials for Painting a Travel Trailer
4. Step-by-Step Guide: Painting Your Travel Trailer Like a Pro
5. Choosing the Right Paint for Your Travel Trailer
6. Professional RV Painting Services: When to Call in the Experts
7. Cost Considerations: DIY vs. Professional Painting
8. Maintaining Your Newly Painted Travel Trailer
9. Design Ideas and Inspiration for Your Travel Trailer Paint Job
10. FAQs: Everything You Need to Know About Painting Your Travel Trailer
1. Understanding the Appeal of Painting Your Travel Trailer
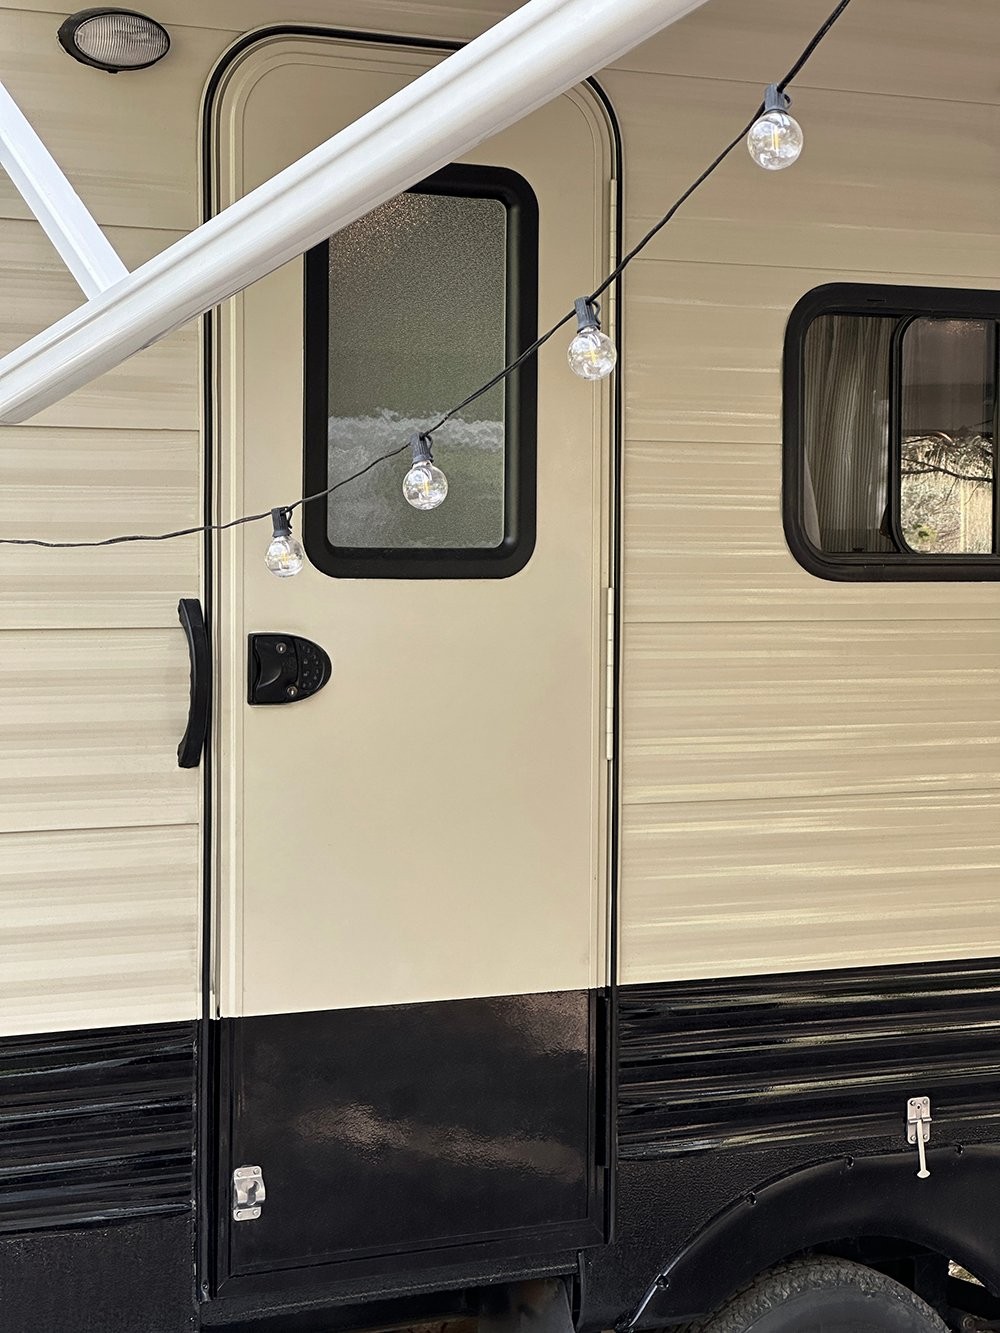
Painting your travel trailer is more than just a cosmetic upgrade; it’s a way to express your personality and create a unique travel experience. Whether you’re looking to refresh an older model, cover up unsightly graphics, or simply add a personal touch, a fresh coat of paint can make a world of difference. According to a recent survey, 70% of RV owners consider personalization to be a key factor in their enjoyment of the RV lifestyle.
There are several reasons why painting your travel trailer is a worthwhile endeavor:
- Personalization: Make your travel trailer a true reflection of your style and preferences. Choose colors and designs that resonate with you and set you apart from the crowd.
- Aesthetic Improvement: Revitalize an aging RV and enhance its overall appearance. A new paint job can hide imperfections, cover up outdated graphics, and give your travel trailer a modern and appealing look.
- Increased Value: A well-maintained and aesthetically pleasing travel trailer can command a higher resale value. A fresh paint job demonstrates that you’ve taken good care of your investment.
- Protection: High-quality automotive paint can provide an extra layer of protection against the elements, helping to prevent rust, corrosion, and fading.
- Sense of Pride: There’s a unique satisfaction that comes from taking on a DIY project and transforming something with your own hands. Painting your travel trailer can be a rewarding and fulfilling experience.
For those seeking a luxurious and memorable RV experience, consider exploring the Napa Valley with TRAVELS.EDU.VN. We offer curated travel packages that cater to discerning travelers who appreciate the finer things in life. While you’re planning your trip, why not give your travel trailer a makeover to match the elegance of your destination?
2. Is Painting Your Travel Trailer a DIY Project?
Deciding whether to tackle a travel trailer painting project yourself or hire professionals depends on your skills, time, and budget. While DIY projects can be rewarding, they require careful planning and execution to achieve professional-looking results.
Here’s a breakdown to help you decide:
DIY Painting:
-
Pros:
- Cost Savings: DIY painting can significantly reduce costs compared to hiring professionals.
- Creative Control: You have complete control over the design, color choices, and overall aesthetic.
- Sense of Accomplishment: Completing the project yourself can be a rewarding and fulfilling experience.
-
Cons:
- Time Commitment: Painting a travel trailer is a time-consuming process, requiring several days or even weeks to complete.
- Skill Requirement: Achieving a professional finish requires some experience with painting techniques and tools.
- Potential for Mistakes: Mistakes can be costly to fix, potentially negating the cost savings of a DIY project.
- Equipment Investment: You may need to purchase or rent specialized equipment, such as a paint sprayer and respirator.
Professional Painting:
-
Pros:
- Professional Results: Professionals have the experience and expertise to achieve a flawless and durable finish.
- Time Savings: Hiring professionals frees up your time to focus on other tasks.
- Warranty: Many professional painting services offer warranties on their work, providing peace of mind.
- Convenience: Professionals handle all aspects of the project, from preparation to cleanup.
-
Cons:
- Higher Cost: Professional painting services can be significantly more expensive than DIY projects.
- Less Creative Control: You may have less input on the design and color choices.
- Finding a Reputable Painter: It’s important to research and choose a reputable and experienced painter.
If you’re considering a DIY project, assess your skills and comfort level honestly. If you’re unsure about any aspect of the process, it’s best to consult with professionals.
 DIY Camper Paint Project
3. Essential Tools and Materials for Painting a Travel Trailer
Before you start painting your travel trailer, gather all the necessary tools and materials. This will ensure a smooth and efficient process, minimizing delays and frustration.
Here’s a comprehensive list of essential items:
Preparation:
- Pressure Washer: For cleaning the exterior of the travel trailer.
- Degreaser: To remove grease, oil, and other contaminants.
- Scrub Brush: For scrubbing stubborn dirt and grime.
- Sandpaper (Various Grits): For sanding the surface to create a smooth and even base.
- Sanding Block: For even sanding on flat surfaces.
- Painter’s Tape: For masking off areas you don’t want to paint.
- Masking Paper or Plastic Sheeting: For protecting surrounding areas from overspray.
- Drop Cloths: For protecting the ground from paint spills.
- Putty Knife: For applying and smoothing body filler.
- Body Filler: For repairing dents and imperfections.
- Safety Glasses: For protecting your eyes from dust and debris.
- Gloves: For protecting your hands from chemicals and paint.
- Respirator: Essential for protection when spraying automotive paint.
Painting:
- Automotive Primer: For creating a bonding layer between the surface and the paint.
- Automotive Paint: Choose a high-quality automotive paint in your desired color.
- Automotive Clear Coat: For protecting the paint and adding a glossy finish.
- Paint Sprayer: An HVLP (High Volume Low Pressure) paint sprayer is recommended for achieving a professional finish.
- Paint Thinner: For thinning the paint and cleaning the sprayer.
- Mixing Cups and Sticks: For accurately mixing the paint and hardener.
- Tack Cloth: For removing dust and debris before painting.
- Buffing Compound: For polishing the painted surface.
- Wax: For protecting the paint and adding a shine.
Optional:
- Heat Gun: For removing old decals and graphics.
- Rubber Wheel: Attached to a power drill for removing adhesive residue.
- Trim Removal Tools: For safely removing trim pieces.
Investing in quality tools and materials will pay off in the long run, ensuring a durable and professional-looking paint job.
4. Step-by-Step Guide: Painting Your Travel Trailer Like a Pro
Painting a travel trailer requires a methodical approach and attention to detail. Follow these step-by-step instructions to achieve professional-looking results:
Step 1: Preparation
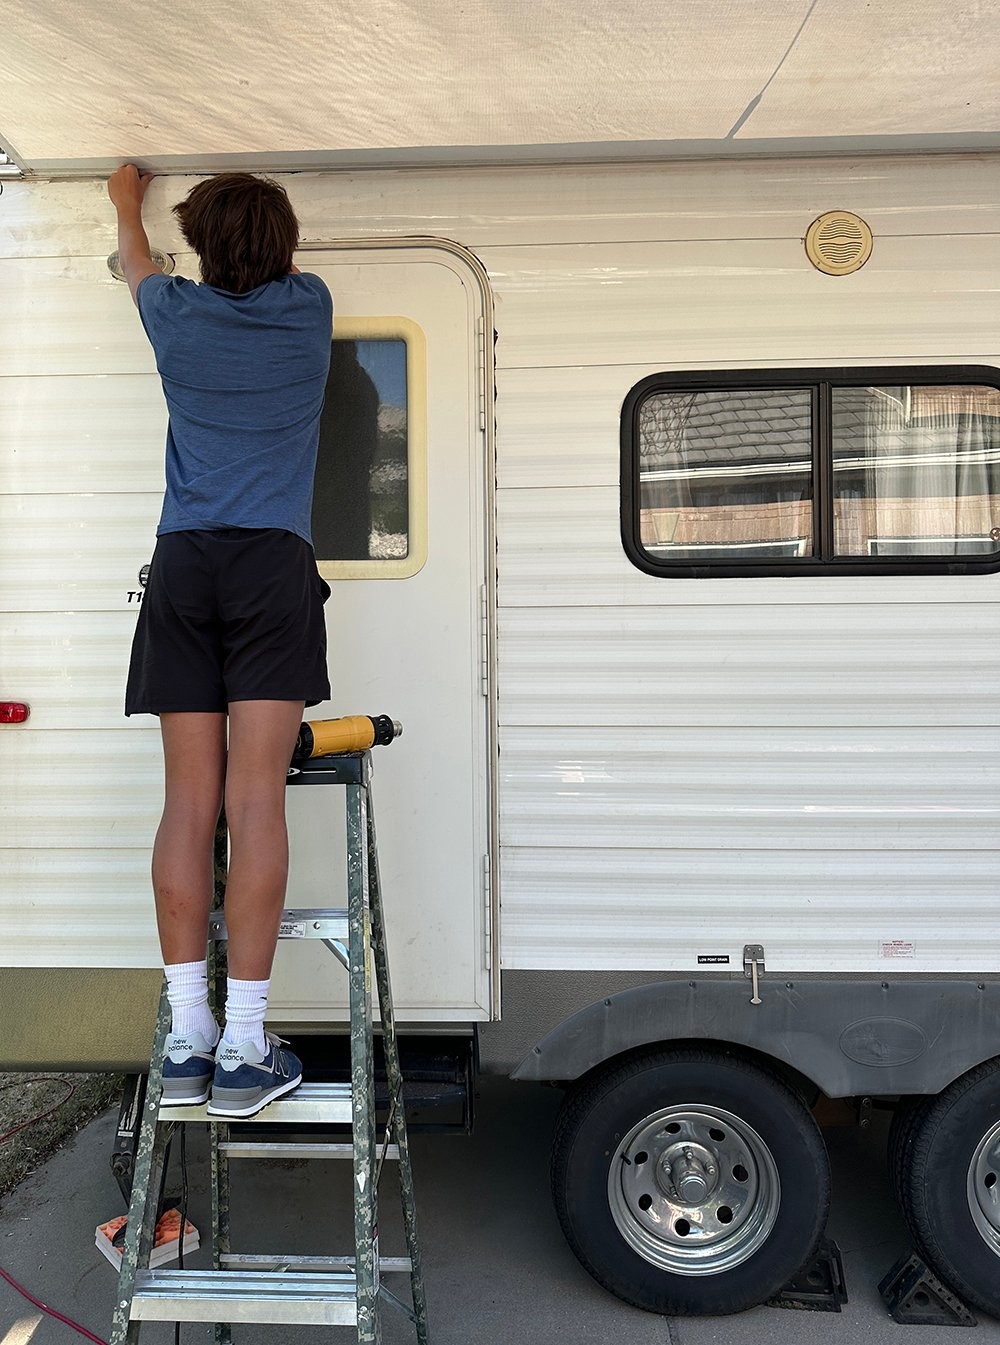
- Clean the Exterior: Thoroughly clean the travel trailer’s exterior using a pressure washer and degreaser. Remove all dirt, grime, and contaminants.
- Remove Decals and Graphics: Use a heat gun to soften the adhesive and carefully peel off any existing decals or graphics. Use a rubber wheel attached to a power drill to remove any remaining adhesive residue.
- Sand the Surface: Sand the entire surface of the travel trailer using sandpaper. Start with a coarser grit to remove any imperfections and then move to a finer grit to create a smooth and even base.
- Repair Imperfections: Use body filler to repair any dents, scratches, or other imperfections. Sand the filler smooth after it has dried.
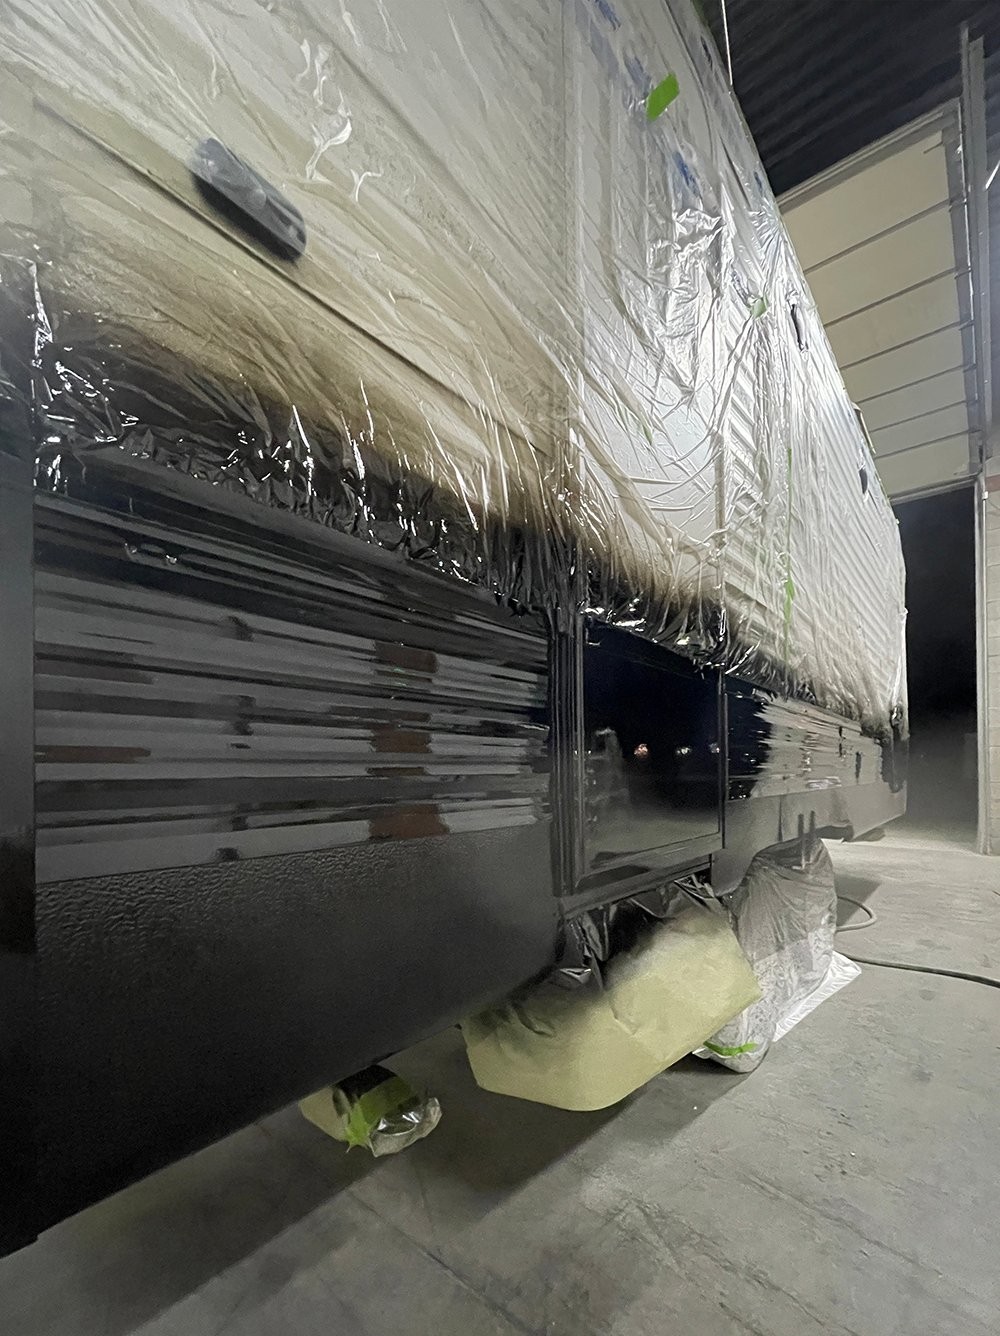
- Mask Off Areas: Use painter’s tape and masking paper or plastic sheeting to protect any areas you don’t want to paint, such as windows, trim, and lights.
- Wipe Down the Surface: Use a tack cloth to remove any dust or debris from the surface.
Step 2: Priming
- Apply Primer: Apply a thin, even coat of automotive primer to the entire surface of the travel trailer using a paint sprayer.
- Allow to Dry: Allow the primer to dry completely according to the manufacturer’s instructions.
- Sand the Primer: Lightly sand the primer using fine-grit sandpaper to create a smooth surface for the paint.
- Wipe Down the Surface: Use a tack cloth to remove any dust or debris from the surface.
Step 3: Painting
- Mix the Paint: Mix the automotive paint according to the manufacturer’s instructions.
- Apply the Paint: Apply a thin, even coat of paint to the travel trailer using a paint sprayer. Overlap each pass by about 50% to ensure even coverage.
- Allow to Dry: Allow the paint to dry completely according to the manufacturer’s instructions.
- Apply Additional Coats: Apply additional coats of paint as needed to achieve the desired color and coverage. Allow each coat to dry completely before applying the next.
Step 4: Clear Coat
- Mix the Clear Coat: Mix the automotive clear coat according to the manufacturer’s instructions.
- Apply the Clear Coat: Apply two coats of clear coat to the travel trailer using a paint sprayer. Allow each coat to dry completely before applying the next.
Step 5: Finishing
- Remove Masking: Carefully remove the masking tape and paper or plastic sheeting.
- Buff the Surface: Use a buffing compound and a polishing pad to buff the painted surface to a high shine.
- Apply Wax: Apply a coat of automotive wax to protect the paint and add an extra layer of shine.
- Reinstall Trim: Reinstall any trim pieces that were removed during the preparation process.
 Removing Camper Graphics
5. Choosing the Right Paint for Your Travel Trailer
Choosing the right paint is crucial for achieving a durable and long-lasting finish on your travel trailer. Automotive paint is the recommended choice due to its superior durability, UV resistance, and ability to withstand the harsh conditions of outdoor use.
Here’s a breakdown of the different types of automotive paint:
- Acrylic Lacquer: An older type of automotive paint that is easy to apply and dries quickly. However, it is not as durable as other types of paint and is prone to chipping and fading.
- Acrylic Enamel: A more durable option than acrylic lacquer. It is also relatively easy to apply and dries quickly.
- Urethane: A very durable and long-lasting type of automotive paint. It is resistant to chipping, scratching, and fading. However, it is more difficult to apply than other types of paint and requires specialized equipment and expertise.
- Water-Based: An environmentally friendly option that is becoming increasingly popular. It is low in VOCs (Volatile Organic Compounds) and is easy to clean up. However, it may not be as durable as other types of automotive paint.
When choosing a paint, consider the following factors:
- Durability: Choose a paint that is resistant to chipping, scratching, and fading.
- UV Resistance: Choose a paint that is resistant to UV rays to prevent fading and discoloration.
- Ease of Application: Consider your skill level and choose a paint that is easy to apply.
- Cost: Automotive paints can vary in price. Choose a paint that fits your budget.
- Color: Choose a color that you love and that complements the style of your travel trailer.
It’s also important to choose a primer and clear coat that are compatible with the paint you select. Consult with a paint specialist at your local automotive paint store for advice on the best products for your project.
6. Professional RV Painting Services: When to Call in the Experts
While DIY painting can be a cost-effective option, there are situations where hiring professional RV painting services is the best choice.
Consider these scenarios:
- Extensive Damage: If your travel trailer has extensive damage, such as large dents, rust, or corrosion, professional repairs may be necessary before painting.
- Complex Paint Schemes: If you’re planning a complex paint scheme with multiple colors, intricate designs, or custom graphics, professionals have the expertise and equipment to achieve the desired results.
- Lack of Experience: If you have little or no experience with painting techniques and tools, hiring professionals can ensure a high-quality finish.
- Time Constraints: If you don’t have the time to dedicate to a DIY painting project, professionals can complete the job quickly and efficiently.
- Warranty Concerns: If you want the peace of mind of a warranty on the paint job, professional services typically offer this.
When choosing professional RV painting services, consider the following:
- Experience: Look for a company with years of experience in painting RVs and travel trailers.
- Reputation: Check online reviews and ask for references to assess the company’s reputation.
- Portfolio: Ask to see examples of the company’s previous work.
- Warranty: Inquire about the warranty offered on the paint job.
- Price: Get quotes from multiple companies and compare prices.
TRAVELS.EDU.VN partners with reputable RV painting services in the Napa Valley and surrounding areas. Contact us for recommendations and assistance in finding the right professionals for your project.
7. Cost Considerations: DIY vs. Professional Painting
The cost of painting your travel trailer can vary significantly depending on whether you choose to do it yourself or hire professionals.
DIY Painting Costs:
- Materials: The cost of materials can range from $300 to $1000 or more, depending on the quality of the paint, primer, and other supplies.
- Equipment: If you don’t already own the necessary equipment, such as a paint sprayer, respirator, and sander, you’ll need to purchase or rent them. This can add several hundred dollars to the cost.
- Time: The value of your time is also a factor to consider. Painting a travel trailer can take several days or even weeks to complete, depending on your skill level and the complexity of the project.
Professional Painting Costs:
- Labor: The cost of labor can range from $50 to $100 per hour or more, depending on the location and the complexity of the project.
- Materials: The cost of materials is typically included in the overall price.
- Additional Services: Additional services, such as dent repair, rust removal, and custom graphics, can add to the cost.
Here’s a general cost comparison:
| Expense | DIY Painting | Professional Painting |
|---|---|---|
| Materials | $300 – $1000+ | Included |
| Equipment | $0 – $500+ | Included |
| Labor | Your Time | $50 – $100+/hour |
| Total Estimated Cost | $300 – $1500+ | $2000 – $10000+ |
As you can see, DIY painting can be significantly less expensive than hiring professionals. However, it’s important to factor in the value of your time and the potential for mistakes.
To get a more accurate estimate of the cost of your project, get quotes from multiple professional RV painting services and compare them to the cost of doing it yourself.
8. Maintaining Your Newly Painted Travel Trailer
Once you’ve invested time and money in painting your travel trailer, it’s important to take steps to maintain the paint job and keep it looking its best.
Here are some tips for maintaining your newly painted travel trailer:
- Wash Regularly: Wash your travel trailer regularly using a mild soap and water. This will remove dirt, grime, and other contaminants that can damage the paint.
- Wax Regularly: Apply a coat of automotive wax every few months to protect the paint and add a shine.
- Avoid Harsh Chemicals: Avoid using harsh chemicals or abrasive cleaners on the paint, as these can damage the finish.
- Protect from UV Rays: Park your travel trailer in a shaded area or use a cover to protect it from UV rays, which can cause fading and discoloration.
- Repair Damage Promptly: Repair any chips, scratches, or other damage promptly to prevent rust and corrosion.
By following these tips, you can keep your travel trailer looking its best for years to come.
9. Design Ideas and Inspiration for Your Travel Trailer Paint Job
The possibilities are endless when it comes to designing your travel trailer paint job. Whether you prefer a classic, modern, or whimsical look, there’s a design to suit your style.
Here are some ideas and inspiration to get you started:
- Classic White: A classic white paint job is timeless and elegant. It’s also a great choice for reflecting sunlight and keeping your travel trailer cool.
- Two-Tone: A two-tone paint job can add visual interest and dimension to your travel trailer. Consider pairing a light color with a darker accent color.
- Color Blocking: Color blocking is a modern and stylish design that involves using bold blocks of color to create a graphic effect.
- Stripes: Stripes can add a sporty and dynamic look to your travel trailer. Consider using contrasting colors for a bold effect.
- Custom Graphics: Custom graphics can add a personal touch and make your travel trailer truly unique. Consider adding your name, a favorite quote, or a nature-inspired design.
- Retro: A retro-inspired paint job can evoke a sense of nostalgia and fun. Consider using vintage colors and patterns.
Consider these color combinations:
- Teal and White: A refreshing and calming combination that evokes the feeling of the ocean.
- Gray and Orange: A modern and sophisticated combination that is both stylish and eye-catching.
- Red and Black: A bold and dramatic combination that is sure to turn heads.
- Yellow and White: A cheerful and sunny combination that is perfect for adding a touch of whimsy.
- Green and Beige: A natural and earthy combination that blends in with the surroundings.
 Painted Color Blocked Camper Exterior
10. FAQs: Everything You Need to Know About Painting Your Travel Trailer
1. Can I paint my travel trailer myself?
Yes, you can paint your travel trailer yourself if you have the skills, time, and equipment. However, it’s important to be prepared for a time-consuming project.
2. What type of paint should I use?
Automotive paint is the recommended choice due to its durability and UV resistance.
3. How much does it cost to paint a travel trailer?
The cost can vary depending on whether you do it yourself or hire professionals. DIY painting can range from $300 to $1500+, while professional painting can range from $2000 to $10000+.
4. How long does it take to paint a travel trailer?
It can take several days or even weeks to paint a travel trailer, depending on the complexity of the project and your skill level.
5. Do I need to sand the travel trailer before painting?
Yes, sanding is essential for creating a smooth and even base for the paint.
6. Do I need to use a primer?
Yes, primer is essential for creating a bonding layer between the surface and the paint.
7. How many coats of paint do I need?
You typically need two to three coats of paint to achieve the desired color and coverage.
8. Do I need to apply a clear coat?
Yes, a clear coat is recommended for protecting the paint and adding a glossy finish.
9. How can I maintain my newly painted travel trailer?
Wash regularly, wax regularly, avoid harsh chemicals, and protect from UV rays.
10. Where can I find inspiration for my travel trailer paint job?
Look online for inspiration, browse RV magazines, and consult with paint specialists.
At TRAVELS.EDU.VN, we’re passionate about helping you create unforgettable travel experiences. Whether you’re planning a romantic getaway to Napa Valley or embarking on a cross-country adventure, we’re here to help you every step of the way.
Ready to transform your travel trailer and embark on your next adventure? Contact TRAVELS.EDU.VN today for personalized recommendations and assistance with planning your dream RV trip. Let us help you create memories that will last a lifetime!
Address: 123 Main St, Napa, CA 94559, United States
Whatsapp: +1 (707) 257-5400
Website: travels.edu.vn
Now that you’re equipped with the knowledge and inspiration to paint your travel trailer, go ahead and unleash your creativity Don’t forget to share your masterpiece with us! We’d love to see your transformed travel trailer and hear about your adventures. Get ready to hit the road in style, creating unforgettable memories wherever you go
 Supplies for Removing Decals from A Camper