Changing a travel trailer tire can be a daunting task, but with the right knowledge and tools, you can handle this roadside emergency with confidence. TRAVELS.EDU.VN provides this comprehensive guide on how to change a travel trailer tire, ensuring your safety and getting you back on the road quickly. This guide covers single-axle and dual-axle travel trailers, offering step-by-step instructions and essential tips for a smooth and safe tire change. Planning a trip to Napa Valley? Let TRAVELS.EDU.VN take care of all the details. Contact us today to explore our exclusive Napa Valley tour packages, designed to provide you with unforgettable experiences. Discover Napa Valley and relax, knowing your trip is perfectly planned.
1. Understanding The Importance Of RV Tire Maintenance
Maintaining your RV tires is crucial for safety, fuel efficiency, and overall driving comfort. Regular inspections and proper care can prevent blowouts and extend the lifespan of your tires. Neglecting tire maintenance can lead to dangerous situations and costly repairs. Ensuring your tires are in good condition means you’re less likely to face unexpected breakdowns, keeping your travel plans on track.
1.1. Why Tire Maintenance Matters
RV tires are the only contact point between your vehicle and the road. Their condition directly impacts handling, braking, and stability. Here’s why tire maintenance is essential:
- Safety: Properly maintained tires reduce the risk of blowouts, which can cause accidents.
- Fuel Efficiency: Correctly inflated tires improve fuel economy.
- Longevity: Regular care extends the life of your tires, saving you money.
- Comfort: Well-maintained tires provide a smoother and more comfortable ride.
- Prevention: Regular checks can identify potential issues before they become major problems.
1.2. Key Aspects Of Tire Maintenance
Several factors contribute to optimal tire maintenance:
- Inflation Pressure: Check and maintain the correct tire pressure regularly, using a reliable tire pressure gauge.
- Tread Depth: Ensure your tires have adequate tread depth for proper traction.
- Visual Inspection: Look for signs of wear, damage, or uneven wear patterns.
- Wheel Alignment: Get your wheels aligned to prevent uneven tire wear.
- Tire Rotation: Rotate your tires to ensure even wear across all tires.
- Balance: Make sure your tires are balanced to prevent vibrations and uneven wear.
- Storage: Store your tires properly when not in use to prevent deterioration.
1.3. Sources of Information on Tire Maintenance
Consult reliable sources for accurate information on tire maintenance:
- Tire Manufacturer’s Recommendations: Follow the guidelines provided by your tire manufacturer.
- RV Owner’s Manual: Refer to your RV owner’s manual for specific tire recommendations.
- Certified Tire Technicians: Seek advice from qualified tire professionals.
- Online Resources: Utilize reputable websites and forums dedicated to RV maintenance.
- Travels.edu.vn: Check our blog for updated tips and guides on RV tire care.
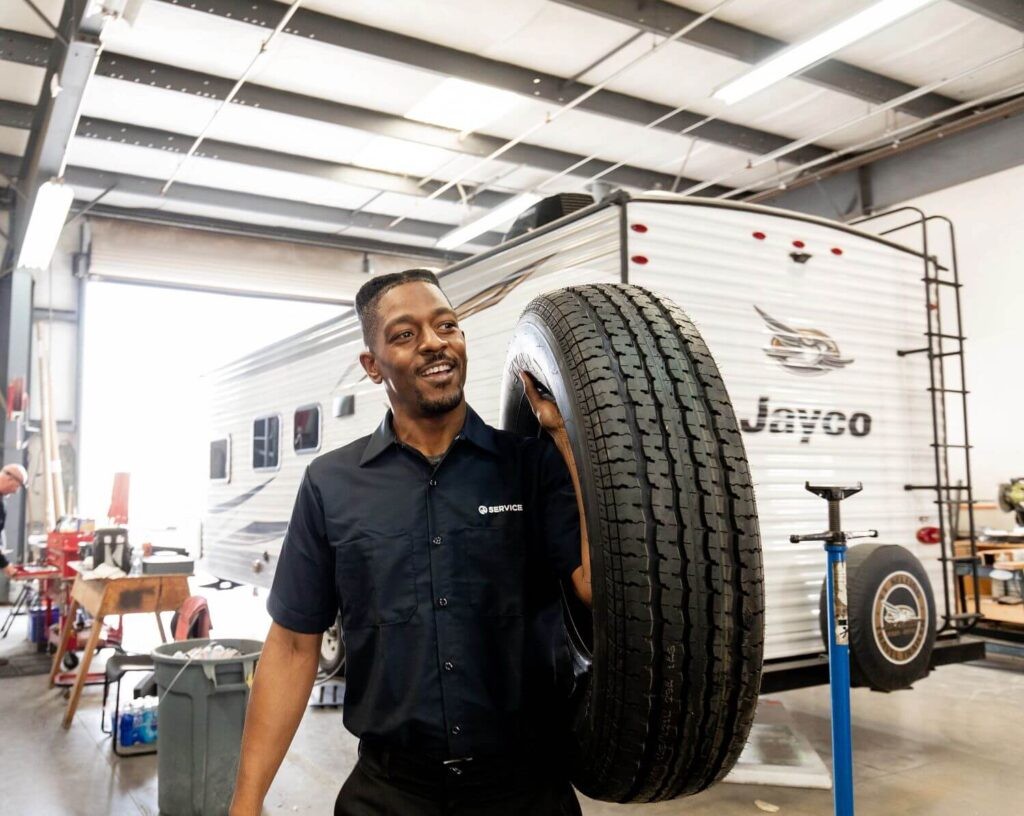 RV tire leaning on vehicle
Proper tire maintenance is essential for RV safety and longevity.
2. Essential Tools And Equipment
Having the right tools and equipment on hand is essential for safely and effectively changing a travel trailer tire. A well-stocked toolkit ensures you can handle any roadside tire emergency with confidence. Make sure these are ready before your trip.
2.1. Basic Tools
These are the fundamental tools you’ll need for any tire change:
- Lug Wrench: Use a lug wrench to loosen and tighten lug nuts.
- Jack: A bottle jack or scissor jack is necessary to lift the trailer.
- Jack Stands: These provide stable support once the trailer is lifted.
- Wheel Chocks: Place wheel chocks to prevent the trailer from rolling.
- Gloves: Protect your hands from dirt and injury.
- Tire Pressure Gauge: Check the pressure of the spare tire.
- Torque Wrench: Ensure lug nuts are tightened to the correct torque specification.
2.2. Additional Recommended Items
Consider these additional items for added convenience and safety:
- Spare Tire: Ensure your spare tire is properly inflated and in good condition.
- Owner’s Manual: Refer to your trailer’s manual for specific instructions and torque specifications.
- Flashlight or Headlamp: Useful for working in low-light conditions.
- Work Mat or Cardboard: Provides a clean surface to lie on while working.
- Reflective Safety Vest: Increases visibility when working on the roadside.
- First Aid Kit: Essential for treating minor injuries.
- Cell Phone: Keep a charged cell phone for emergencies.
2.3. Advanced Tools And Equipment
For more complex situations or added convenience, consider these advanced tools:
- Impact Wrench: An impact wrench makes loosening lug nuts easier.
- Tire Repair Kit: For temporary repairs of minor punctures.
- Portable Air Compressor: Inflate tires on the go.
- Leveling Blocks: Help to level the trailer on uneven surfaces.
- RV Roadside Assistance: Enrollment ensures professional help is just a phone call away.
- Tire Monitoring System (TPMS): For real-time tire pressure and temperature monitoring.
2.4. Maintaining Your Toolkit
Regularly inspect and maintain your toolkit to ensure everything is in good working condition. Replace any worn or damaged tools, and keep all items organized and easily accessible. A well-maintained toolkit not only makes tire changes easier but also enhances your overall safety on the road.
2.5. Where to Buy Quality Tools
You can find high-quality tools and equipment at:
- Automotive Supply Stores: Such as AutoZone, O’Reilly Auto Parts, and Napa Auto Parts.
- RV Supply Stores: Like Camping World and RVupgrades.
- Online Retailers: Amazon, eBay, and specialized tool websites.
3. Safety Precautions Before You Start
Safety should always be your top priority when changing a travel trailer tire. Taking the necessary precautions can prevent accidents and injuries. Here’s a detailed guide to ensure a safe tire change.
3.1. Choosing A Safe Location
Select a safe and level location away from traffic. Avoid changing tires on a busy road or on a slope. A stable surface is crucial to prevent the trailer from rolling.
3.2. Securing The Trailer
Before starting any work, ensure the trailer is fully secured:
- Wheel Chocks: Place wheel chocks on both sides of the tires on the opposite side of the trailer from the tire you’re changing.
- Parking Brake: Engage the parking brake to provide additional security.
- Leveling Jacks: If available, use leveling jacks to stabilize the trailer.
3.3. Visibility And Warnings
Make sure you are visible to other drivers:
- Reflective Triangles: Place reflective triangles or flares around the trailer to warn oncoming traffic.
- Hazard Lights: Turn on your vehicle’s hazard lights.
- Safety Vest: Wear a reflective safety vest to increase your visibility.
3.4. Personal Protective Equipment (PPE)
Protect yourself by wearing appropriate gear:
- Gloves: Wear work gloves to protect your hands.
- Eye Protection: Use safety glasses to prevent debris from entering your eyes.
- Sturdy Shoes: Wear closed-toe shoes or boots.
3.5. Understanding Weight Distribution
Be aware of the trailer’s weight distribution:
- Avoid Overloading: Ensure the trailer is not overloaded, as this can make it unstable.
- Balance Load: Distribute the load evenly to maintain stability.
3.6. Emergency Preparedness
Have a plan in case of unexpected issues:
- First Aid Kit: Keep a well-stocked first aid kit nearby.
- Emergency Contact: Have a list of emergency contacts.
- Cell Phone: Keep a charged cell phone for calling for help.
3.7. Professional Assistance
If you are uncomfortable performing the tire change or are in a dangerous location, call for professional assistance. Services like Good Sam Roadside Assistance can provide expert help and ensure your safety.
4. Step-By-Step Guide For Single-Axle Travel Trailers
Changing a tire on a single-axle travel trailer requires careful attention to detail. Follow these step-by-step instructions to ensure a safe and successful tire change.
4.1. Preparation
- Gather Your Tools: Ensure you have all the necessary tools, including a lug wrench, jack, jack stands, wheel chocks, and a properly inflated spare tire.
- Position the Trailer: Park the trailer on a level surface and engage the parking brake.
- Secure the Trailer: Place wheel chocks on both sides of the tire opposite the one you’re changing.
4.2. Loosening Lug Nuts
- Initial Loosening: Use the lug wrench to loosen the lug nuts on the flat tire. Turn the wrench counterclockwise.
- Do Not Remove Completely: Loosen the lug nuts but do not remove them completely at this stage.
4.3. Jacking Up The Trailer
- Locate the Jack Point: Refer to your trailer’s manual to identify the correct jacking point on the axle.
- Position the Jack: Place the jack under the axle as close to the spring mount as possible.
- Raise the Trailer: Carefully raise the trailer until the flat tire is about 2-3 inches off the ground.
4.4. Supporting The Trailer
- Position Jack Stands: Place jack stands under the axle next to the jack.
- Lower the Trailer: Gently lower the trailer onto the jack stands, ensuring they are securely supporting the weight.
- Verify Stability: Double-check that the trailer is stable before proceeding.
4.5. Removing The Flat Tire
- Remove Lug Nuts: Now, completely remove the lug nuts.
- Pull Off the Tire: Carefully pull the flat tire off the hub.
4.6. Installing The Spare Tire
- Mount the Spare: Align the spare tire with the wheel studs and push it onto the hub.
- Hand-Tighten Lug Nuts: Install the lug nuts by hand, tightening them in a star pattern.
4.7. Lowering The Trailer
- Raise the Trailer Slightly: Use the jack to raise the trailer slightly, enough to remove the jack stands.
- Remove Jack Stands: Take out the jack stands.
- Lower the Trailer: Slowly lower the trailer until the spare tire touches the ground.
4.8. Tightening Lug Nuts
- Tighten in Stages: Tighten the lug nuts in a star pattern in three stages: 20-30 foot-pounds, 50-60 foot-pounds, and then to the final torque recommended by the manufacturer (typically 90-120 foot-pounds).
- Use Torque Wrench: Use a torque wrench to ensure accurate tightening.
4.9. Final Steps
- Fully Lower the Trailer: Completely lower the trailer and remove the jack.
- Retorque Lug Nuts: Retorque the lug nuts after driving a short distance (e.g., 10/25/50 miles or 25/50/100 miles, etc.) as required by the manufacturer.
- Check Tire Pressure: Verify the tire pressure of the spare tire and adjust as needed.
4.10. Post-Change Actions
- Inspect the Flat Tire: Examine the flat tire for the cause of the failure.
- Get a Replacement: Proceed to the nearest tire shop to get a replacement for the flat tire as soon as possible.
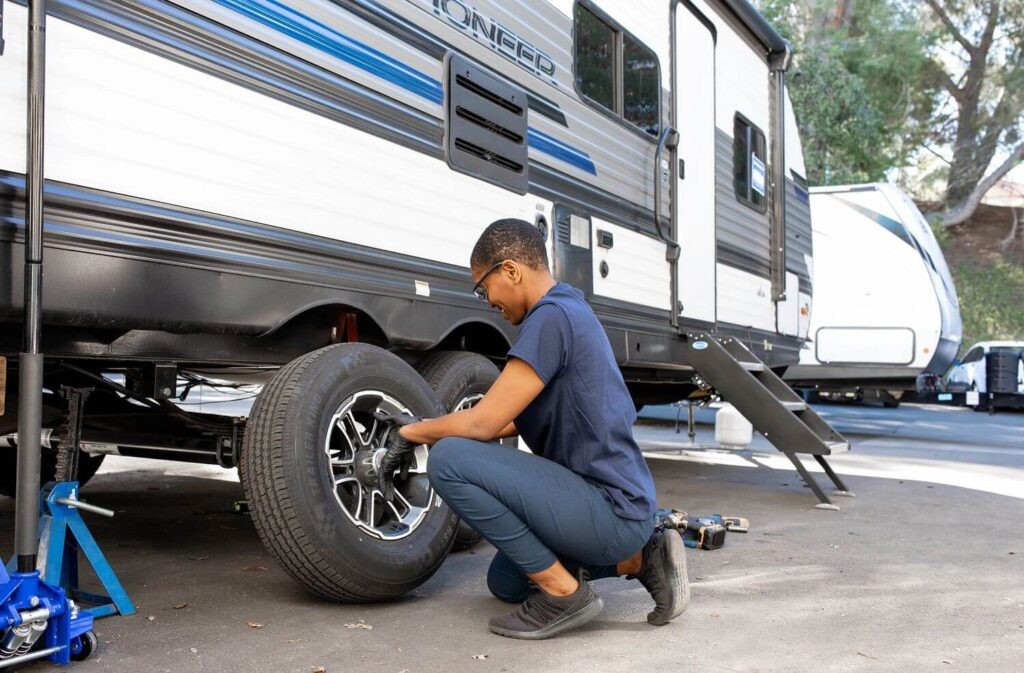 RV dual axle maintenance
Safety is paramount when performing RV tire maintenance.
5. Changing Tires On Dual-Axle Travel Trailers
Changing a tire on a dual-axle travel trailer presents a few different options for lifting the trailer. One popular method involves using a tire aid, which simplifies the process. Here’s how to do it:
5.1. Preparation
- Gather Your Tools: Ensure you have the necessary tools, including a lug wrench, tire aid (or jack and jack stands), wheel chocks, and a properly inflated spare tire.
- Position the Trailer: Park the trailer on a level surface and engage the parking brake.
- Secure the Trailer: Place wheel chocks on both sides of one tire on the opposite side of the trailer from the tire you’re changing.
5.2. Using A Tire Aid
- Position the Tire Aid: Place the tire aid in front of or behind the good tire on the same side as the flat tire. Whether you back onto the tire aid or pull forward onto it depends largely on which tire is blown. Pull forward onto it if the rear tire is blown. Back onto it if the front tire is blown.
- Drive onto the Tire Aid: Slowly drive the trailer onto the tire aid until the flat tire is lifted off the ground.
5.3. Alternative Method: Using A Jack
- Locate the Jack Point: Refer to your trailer’s manual to identify the correct jacking point on the axle.
- Position the Jack: Place the jack under the axle as close to the spring mount as possible.
- Raise the Trailer: Carefully raise the trailer until the flat tire is about 2-3 inches off the ground.
- Support the Trailer: Place jack stands under the axle next to the jack and gently lower the trailer onto the jack stands.
5.4. Loosening Lug Nuts
- Initial Loosening: Use the lug wrench to loosen the lug nuts on the flat tire.
- Do Not Remove Completely: Loosen the lug nuts but do not remove them completely at this stage.
5.5. Removing The Flat Tire
- Remove Lug Nuts: Now, completely remove the lug nuts.
- Pull Off the Tire: Carefully pull the flat tire off the hub.
5.6. Installing The Spare Tire
- Mount the Spare: Align the spare tire with the wheel studs and push it onto the hub.
- Hand-Tighten Lug Nuts: Install the lug nuts by hand, tightening them in a star pattern.
5.7. Lowering The Trailer
- Using Tire Aid: Slowly drive the trailer off the tire aid until the spare tire touches the ground.
- Using Jack: Raise the trailer slightly to remove the jack stands, then slowly lower the trailer until the spare tire touches the ground.
5.8. Tightening Lug Nuts
- Tighten in Stages: Tighten the lug nuts in a star pattern in three stages: 20-30 foot-pounds, 50-60 foot-pounds, and then to the final torque recommended by the manufacturer (typically 90-120 foot-pounds).
- Use Torque Wrench: Use a torque wrench to ensure accurate tightening.
5.9. Final Steps
- Fully Lower the Trailer: Completely lower the trailer and remove the jack or tire aid.
- Retorque Lug Nuts: Retorque the lug nuts after driving a short distance as required by the manufacturer.
- Check Tire Pressure: Verify the tire pressure of the spare tire and adjust as needed.
5.10. Post-Change Actions
- Inspect the Flat Tire: Examine the flat tire for the cause of the failure.
- Get a Replacement: Proceed to the nearest tire shop to get a replacement for the flat tire as soon as possible.
6. Essential Tire Information
Understanding the information printed on your travel trailer’s tires is crucial for selecting the right replacements and maintaining optimal performance. Here’s a breakdown of what those codes and numbers mean.
6.1. Tire Size Designation
The tire size is typically displayed in a format like ST225/75R15. Here’s what each component represents:
- ST (Special Trailer): Indicates the tire is designed specifically for trailers.
- 225: Represents the tire width in millimeters.
- 75: Indicates the aspect ratio, which is the ratio of the tire’s height to its width (as a percentage).
- R (Radial): Denotes that the tire has a radial construction.
- 15: Represents the rim diameter in inches.
6.2. Load Range And Ply Rating
- Load Range: Indicates the tire’s load-carrying capacity at a specific inflation pressure. Common load ranges include B, C, D, E, and F, with each higher letter indicating a greater load capacity.
- Ply Rating: Originally indicated the number of cord layers in the tire’s construction. Today, it represents the tire’s strength and load-carrying capacity, even though the actual number of plies may be different.
6.3. Load Index And Speed Rating
- Load Index: A numerical code that specifies the maximum load a tire can carry when inflated to its maximum pressure. Consult a load index chart to determine the corresponding weight.
- Speed Rating: An alphabetical code that indicates the maximum speed at which a tire can carry a load corresponding to its load index.
6.4. DOT Code
The Department of Transportation (DOT) code is a series of characters that provides information about the tire’s manufacturing date and location. The last four digits indicate the week and year the tire was manufactured. For example, “1224” means the tire was made in the 12th week of 2024.
6.5. Maximum Inflation Pressure
This indicates the maximum air pressure (in PSI) that the tire can hold when cold. Do not exceed this pressure, as it can lead to tire failure. Always refer to your RV or trailer manufacturer’s recommended inflation pressure, as it may be lower than the maximum.
6.6. Understanding Sidewall Markings
Other important markings on the tire sidewall include:
- Tire Brand and Model: Identifies the manufacturer and specific tire model.
- Treadwear, Traction, and Temperature Ratings: These ratings provide information about the tire’s durability, grip, and heat resistance.
- M+S (Mud and Snow): Indicates the tire is designed for use in mud and snow conditions.
6.7. Finding The Right Tire
When replacing your travel trailer tires, ensure you select tires with the correct size, load range, and speed rating for your specific trailer. Consult your RV owner’s manual or a tire professional for guidance. Using the wrong tires can compromise safety and performance.
7. Maintaining Correct Tire Pressure
Maintaining the correct tire pressure is vital for safety, tire longevity, and fuel efficiency. Here’s why it’s important and how to do it properly.
7.1. Importance of Correct Tire Pressure
- Safety: Proper inflation ensures optimal handling, braking, and stability, reducing the risk of blowouts.
- Tire Life: Underinflation and overinflation can lead to uneven wear and premature tire failure.
- Fuel Efficiency: Correctly inflated tires reduce rolling resistance, improving fuel economy.
- Ride Comfort: Proper tire pressure contributes to a smoother and more comfortable ride.
7.2. How To Find The Correct Tire Pressure
- RV Owner’s Manual: Consult your RV owner’s manual for the recommended tire pressure.
- Tire Placard: Look for a sticker on the trailer’s sidewall or door frame that lists the recommended tire pressure.
- Tire Sidewall: Check the tire sidewall for the maximum inflation pressure, but remember that this is not necessarily the recommended pressure.
7.3. Checking Tire Pressure
- Use a Reliable Gauge: Invest in a high-quality tire pressure gauge for accurate readings.
- Check Cold Tires: Check the tire pressure when the tires are cold, preferably in the morning before driving.
- Remove Valve Cap: Remove the valve cap from the tire valve.
- Apply Gauge: Press the tire pressure gauge firmly onto the valve stem until the hissing sound stops and the gauge provides a reading.
- Read the Pressure: Note the tire pressure reading.
- Adjust as Needed: Inflate or deflate the tire to match the recommended pressure.
- Replace Valve Cap: Replace the valve cap to protect the valve stem.
7.4. Adjusting Tire Pressure
- Inflating: Use an air compressor or a portable inflator to add air to the tire until it reaches the recommended pressure.
- Deflating: Use the valve stem tool on the tire pressure gauge to release air from the tire until it reaches the recommended pressure.
7.5. Factors Affecting Tire Pressure
- Temperature: Tire pressure decreases in cold weather and increases in hot weather.
- Altitude: Tire pressure may need to be adjusted at higher altitudes.
- Load: Heavily loaded trailers may require higher tire pressures.
7.6. Regular Monitoring
Check your tire pressure regularly, ideally before each trip and at least once a month. Consistent monitoring ensures your tires are always properly inflated, maximizing safety and performance.
7.7. Using A Tire Monitoring System (TPMS)
Consider installing a Tire Pressure Monitoring System (TPMS) for real-time monitoring of tire pressure and temperature. TPMS can alert you to potential issues before they become major problems, enhancing safety and convenience.
8. Common Causes Of Tire Failure
Understanding the common causes of tire failure can help you take proactive steps to prevent them. Here are some of the primary reasons why travel trailer tires fail:
8.1. Underinflation
Underinflation is one of the most common causes of tire failure. When a tire is underinflated, it flexes excessively, generating heat and leading to tire damage and potential blowouts.
8.2. Overloading
Exceeding the tire’s load capacity can cause it to overheat and fail. Ensure you know the load capacity of your tires and never exceed it.
8.3. Impact Damage
Hitting potholes, curbs, or other road hazards can cause impact damage, such as sidewall bulges or internal damage that can lead to tire failure.
8.4. Road Hazards
Sharp objects on the road, such as nails, screws, and glass, can puncture tires and cause them to deflate rapidly.
8.5. Weather And UV Exposure
Prolonged exposure to sunlight and extreme weather conditions can cause the tire rubber to deteriorate, leading to cracks and weakening of the tire structure.
8.6. Old Tires
Tires degrade over time, even if they have plenty of tread remaining. Most tire manufacturers recommend replacing tires every 6-10 years, regardless of tread depth.
8.7. Improper Storage
Storing tires improperly can cause them to dry out, crack, and degrade. Store tires in a cool, dry place away from direct sunlight.
8.8. Manufacturing Defects
Although rare, manufacturing defects can cause tires to fail prematurely. If you suspect a manufacturing defect, contact the tire manufacturer.
8.9. Misalignment And Imbalance
Misalignment and imbalance can cause uneven tire wear and stress, leading to premature tire failure.
8.10. Lack of Maintenance
Neglecting regular tire maintenance, such as checking tire pressure and inspecting for damage, can increase the risk of tire failure.
8.11. Preventive Measures
To minimize the risk of tire failure, follow these preventive measures:
- Check Tire Pressure Regularly: Ensure your tires are properly inflated.
- Avoid Overloading: Never exceed the tire’s load capacity.
- Inspect Tires Regularly: Look for signs of wear, damage, or uneven wear patterns.
- Rotate Tires: Rotate your tires to ensure even wear.
- Store Tires Properly: Store tires in a cool, dry place when not in use.
- Replace Old Tires: Replace tires every 6-10 years, regardless of tread depth.
- Address Misalignment and Imbalance: Correct any misalignment or imbalance issues promptly.
9. When To Call For Professional Assistance
While it’s helpful to know how to change a travel trailer tire, there are situations when calling for professional assistance is the safest and most prudent option. Here are some scenarios to consider:
9.1. Unsafe Location
If you are stranded on a busy highway, narrow shoulder, or any location where it is unsafe to change a tire, call for professional assistance. Your safety is the top priority.
9.2. Lack of Experience Or Confidence
If you are not comfortable changing a tire or lack the necessary experience, it’s best to call for help. Mistakes can lead to injuries or further damage to the trailer.
9.3. Insufficient Tools Or Equipment
If you don’t have the right tools or your equipment is not functioning properly, attempting to change a tire can be frustrating and dangerous.
9.4. Multiple Flat Tires
If you experience multiple flat tires simultaneously, it’s a clear indication that you need professional assistance. Continuing to drive on damaged tires can cause further damage.
9.5. Difficult Lug Nuts
If the lug nuts are extremely tight or corroded, attempting to remove them can be difficult and may damage the lug nuts or the wrench. Professional assistance can provide the necessary tools and expertise to remove stubborn lug nuts.
9.6. Physical Limitations
If you have physical limitations or injuries that prevent you from safely changing a tire, it’s best to call for help. Avoid straining yourself or risking further injury.
9.7. Unknown Cause Of Tire Failure
If you are unsure why the tire failed or suspect there may be underlying mechanical issues, seek professional assistance to diagnose and address the problem.
9.8. RV Roadside Assistance
If you have RV roadside assistance coverage, take advantage of the service. These services provide prompt and professional assistance, ensuring your safety and getting you back on the road quickly.
9.9. Peace Of Mind
Sometimes, the peace of mind that comes with knowing a professional is handling the situation is worth the cost. Professional assistance ensures the job is done correctly and safely.
9.10. Where To Find Professional Help
- RV Roadside Assistance Providers: Services like Good Sam Roadside Assistance and Coach-Net offer 24/7 assistance.
- Local Tire Shops: Many tire shops provide roadside assistance services.
- Mobile RV Repair Services: These services come to your location to perform repairs.
10. Napa Valley Travel Tips From TRAVELS.EDU.VN
While dealing with RV maintenance is essential, planning your travel experiences is just as important. Here are some insider tips for your next trip to Napa Valley, brought to you by TRAVELS.EDU.VN. We aim to make your travels as seamless and enjoyable as possible.
10.1. Best Times To Visit Napa Valley
- Spring (March-May): The weather is mild, vineyards are lush, and wildflowers are in bloom.
- Fall (September-November): Harvest season brings vibrant colors, wine festivals, and ideal weather for wine tasting.
10.2. Popular Wineries And Vineyards
- Domaine Carneros: Known for its sparkling wines and beautiful chateau.
- Robert Mondavi Winery: Offers educational tours and tastings.
- Castello di Amorosa: A stunning 13th-century-style Tuscan castle and winery.
- Sterling Vineyards: Reachable by aerial tram, offering panoramic views.
- Beringer Vineyards: Napa Valley’s oldest continuously operating winery.
10.3. Must-Try Wine Tasting Experiences
- Private Wine Tours: Customized tours for intimate experiences.
- Food And Wine Pairings: Enjoy expertly paired wines with gourmet cuisine.
- Barrel Tastings: Sample wines straight from the barrel.
- Educational Seminars: Learn about winemaking from experts.
- Estate Tours: Explore the vineyards and learn about the winemaking process.
10.4. Top Restaurants In Napa Valley
- The French Laundry: Renowned for its exceptional fine dining experience (reservations required months in advance).
- Bottega Napa Valley: Offers rustic Italian cuisine in a beautiful setting.
- Gott’s Roadside: A local favorite for burgers, fries, and milkshakes.
- Oxbow Public Market: A gourmet marketplace with diverse food vendors.
- Auberge du Soleil Restaurant: Features Mediterranean-inspired cuisine with stunning views.
10.5. Outdoor Activities In Napa Valley
- Hot Air Balloon Rides: Soar over the vineyards for breathtaking views.
- Hiking And Biking Trails: Explore scenic trails through the valley.
- Picnics In Vineyards: Enjoy a leisurely picnic surrounded by vineyards.
- Kayaking And Paddleboarding: Explore the Napa River.
- Golfing: Play a round at one of Napa Valley’s premier golf courses.
10.6. Accommodation Options
- Luxury Resorts: Auberge du Soleil, Meadowood Napa Valley.
- Boutique Hotels: Hotel Yountville, Poetry Inn.
- Bed And Breakfasts: Churchill Manor, Cedar Gables Inn.
- Vacation Rentals: Numerous homes and villas available for rent.
- RV Parks: Several RV parks offer full hookups and amenities.
10.7. Getting Around Napa Valley
- Car Rental: The most flexible option for exploring the valley.
- Wine Tours: Guided tours provide transportation between wineries.
- Ride-Sharing Services: Uber and Lyft are available in Napa Valley.
- Private Car Services: Hire a private car and driver for personalized transportation.
- Biking: A great way to explore the valley at a leisurely pace.
10.8. Essential Travel Tips
- Book Accommodations And Tours In Advance: Napa Valley is a popular destination, so book early to secure your preferred options.
- Pace Yourself With Wine Tastings: Drink plenty of water and eat snacks to avoid overindulgence.
- Dress Comfortably: Wear comfortable shoes for walking and exploring vineyards.
- Check Winery Hours: Verify the hours of operation for wineries you plan to visit.
- Respect Local Customs: Be mindful of noise levels and follow winery etiquette.
10.9. Contact TRAVELS.EDU.VN For Napa Valley Travel Packages
Let TRAVELS.EDU.VN take the stress out of planning your Napa Valley vacation. Contact us today to learn more about our exclusive Napa Valley tour packages.
- Address: 123 Main St, Napa, CA 94559, United States
- WhatsApp: +1 (707) 257-5400
- Website: TRAVELS.EDU.VN
Ready to experience the best of Napa Valley? Let travels.edu.vn create your dream getaway. Call us now or visit our website to explore our tour options and start planning your adventure.
11. Frequently Asked Questions (FAQ)
Here are some frequently asked questions about changing travel trailer tires:
11.1. How Often Should I Check My Travel Trailer Tires?
You should check your travel trailer tires before each trip and at least once a month. Regular checks can help identify potential issues early.
11.2. What Tire Pressure Should I Use For My Travel Trailer?
Refer to your RV owner’s manual or the tire placard on the trailer’s sidewall for the recommended tire pressure. Do not exceed the maximum pressure listed on the tire sidewall.
11.3. How Long Do Travel Trailer Tires Last?
Most tire manufacturers recommend replacing travel trailer tires every 6-10 years, regardless of tread depth. Weather and UV exposure can degrade tires over time.
11.4. What Is The Correct Way To Tighten Lug Nuts?
Tighten lug nuts in a star pattern in three stages: 20-30 foot-pounds, 50-60 foot-pounds, and then to the final torque recommended by the manufacturer (typically 90-120 foot-pounds). Use a torque wrench to ensure accurate tightening.
11.5. Can I Use Car Tires On My Travel Trailer?
No, you should only use tires specifically designed for trailers (ST tires). Car tires are not designed to handle the weight and stress of a travel trailer.
11.6. What Should I Do With A Flat Tire After Changing It?
Inspect the flat tire for the cause of the failure and take it to a tire shop for repair or replacement as soon as possible.
11.7. How Can I Prevent Tire Blowouts?
Maintain correct tire pressure, avoid overloading, inspect tires regularly, rotate tires, and replace old tires to minimize the risk of blowouts.
11.8. What Is A Tire Pressure Monitoring System (TPMS)?
A TPMS is a system that monitors tire pressure and temperature in real-time, alerting you to potential issues before they become major problems.
11.9. Where Can I Find Reliable RV Roadside Assistance?
Services like Good Sam Roadside Assistance and Coach-Net offer 24/7 assistance for RVs and travel trailers.
11.10. How Do I Store My Travel Trailer Tires When Not In Use?
Store tires in a cool, dry place away from direct sunlight. Clean them before storing and cover them to protect them from the elements.