Level travel trailer ensures a comfortable and safe RV experience, and TRAVELS.EDU.VN is here to guide you through the process with ease. Discover expert tips and innovative solutions for achieving perfect balance, making your travels more enjoyable and stress-free. Learn how to level your recreational vehicle like a pro.
1. Essential Tools for Manual Travel Trailer Leveling
Before you hit the road, having the right tools for travel trailer leveling is crucial for a smooth setup. Forget about uneven floors and wobbly furniture; we’re diving into the must-have tools that will make your RV feel like home. With these items, you can master the art of leveling and enjoy a stable, comfortable travel experience.
1.1. Trailer Levels: Bubble, Graduated, and Digital
Having reliable levels is essential for travel trailer leveling. You’ll need two: one for left-to-right and another for front-to-back leveling. This ensures your travel trailer is properly balanced, significantly improving your comfort, especially when sleeping.
While standard construction levels can work, dedicated RV levelers are more precise and user-friendly. These come in various forms, from simple bubble cylinders to gauges with markings and digital versions that connect to apps. Choosing the right type can greatly simplify the leveling process.
- Bubble Levels: Simple, affordable, and effective, bubble levels are easy to attach to the side of your travel trailer. Position one on the front passenger side (left to right) and another on the driver’s side (front to back) for accurate measurements.
- Graduated RV Levels: These levels offer markings that indicate the exact adjustments needed to level your travel trailer. A round version with a central target is also popular among RVers. They provide more accurate information at a relatively low cost.
- RV Leveling Apps and Connected Devices: Embrace the 21st century with RV leveling apps. These apps use your smartphone’s compass, gyroscope, and trailer dimensions to provide precise leveling instructions. Options include standalone apps and systems with mounted devices.
- Stand-Alone RV Leveling Apps: Apps like Caravan Leveler (available for Android and Apple) use your phone’s features to guide you. Some even connect to smartwatches for convenience.
- RV Leveling Apps with Mounted Devices: Systems like LevelMatePRO involve mounting a device inside your RV that syncs wirelessly with an app. While pricier, they offer precise calculations, hitch position memory, and multi-device compatibility.
1.2. Leveling Blocks and RV Jack Pads
Leveling blocks and jack pads are crucial for ensuring your travel trailer is level, stable, and protected from sinking into the ground. These accessories provide a solid foundation, especially on uneven surfaces.
RV leveling blocks and stabilizer pads come in various shapes and sizes, including stacker blocks, curved ramps, and flat plastic pieces. While some RVers use wood blocks, manufactured plastic leveling blocks are more durable, easier to store, and affordable. Travel trailer leveling blocks also serve as jack pads and stabilizer pads, preventing your tongue jack and stabilizers from sinking into soft ground like grass, sand, or asphalt.
To select the right size, measure the width of your travel trailer tires. Leveling blocks should be wider than your tires for easier leveling. A 12-piece set typically provides at least three blocks per tire, depending on your travel trailer type. You may need an additional set for stabilizer blocks, depending on the campground’s site conditions.
1.3. RV Wheel Chocks
When leveling your travel trailer, a reliable wheel chock is essential. This tool keeps your tires in place once the leveling blocks are set up, ensuring safety and stability.
Keeping at least one wheel chock is advisable, but uneven sites may require more for a secure setup. Many leveling block sets include matching chocks. While opinions vary on the number needed, erring on the side of caution is always best, especially on challenging sites.
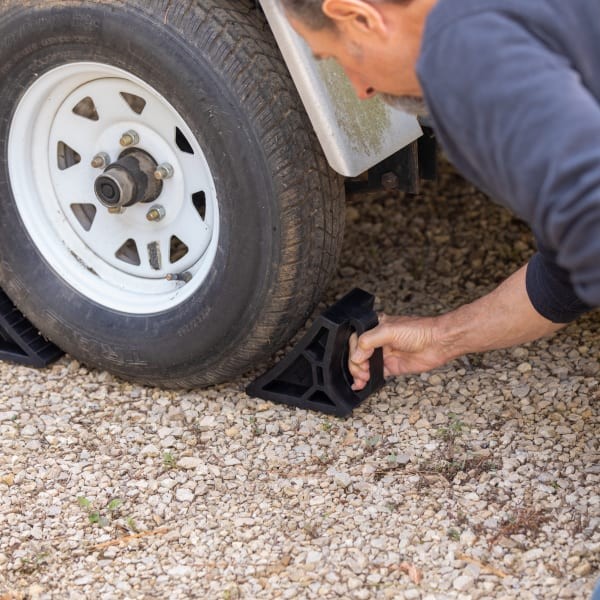 RVer placing wheel chocks around RV tire
1.4. RV Stabilizing Jacks
RV stabilizers are designed to keep your RV steady once it’s level and chocked. Remember, travel trailer stabilizer jacks are not for leveling; their purpose is to provide stability, minimizing wobbling inside the travel trailer.
Stabilizing jacks are available in manual and electric models. Scissor jacks are a popular, budget-friendly option. Some travel trailers come with pre-installed jacks, such as the Lippert Power Stabilizer Jack. If your travel trailer doesn’t have one, you can easily have it installed.
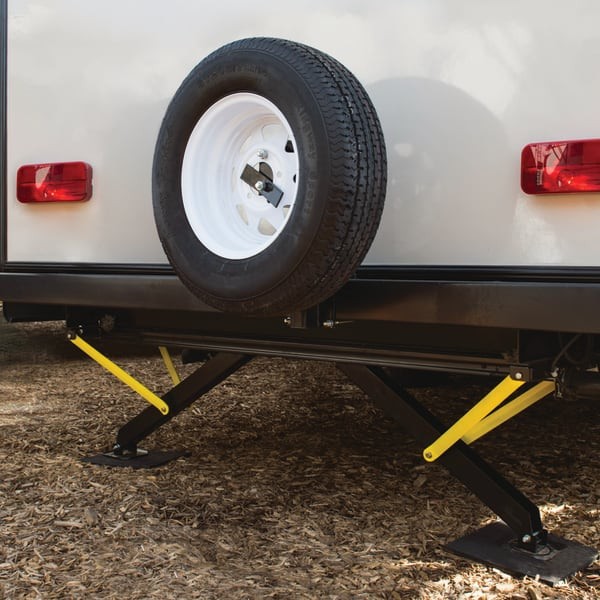 PSX2 Power Stabilizer Jacks
2. A Step-by-Step Guide to Level Your Travel Trailer
Leveling a travel trailer might seem daunting, but it’s quite straightforward with the right approach. Here’s a simple, step-by-step guide to help you achieve perfect balance and stability, ensuring a comfortable and enjoyable travel experience.
2.1. Selecting the Ideal Spot
Choosing the best spot to park is crucial when you level an RV travel trailer. Instead of immediately pulling into your assigned site, take a moment to assess the area. Look for the most level section and position your travel trailer slightly ahead or behind your intended parking spot. This allows room to maneuver onto leveling blocks.
If backing up is challenging, apply the same strategy when driving forward. Taking the time to find the most level spot can save effort and ensure a more stable setup.
2.2. Positioning Your Leveling Blocks
Once you’ve found the best spot, the next step involves using your leveling blocks. If you’re using a leveling app, it will indicate which side of your camper needs blocks and the required height. If not, a bubble level will work just fine.
For those who backed in, place the blocks behind your travel trailer tires. If you pulled through, position them in front. If using stacker blocks, create a ramp-like arrangement for easy access. For curved levelers, wedge them under the appropriate side of your tires.
2.3. Driving onto the Blocks and Chocking the Tires
Now, slowly back onto the leveling blocks until your leveling app indicates that your rig is level. If you don’t have a smartphone, use your bubble levels. It’s helpful to have a friend outside to check the levels and guide you.
If you’re using stacking blocks, adjustments may be needed. Simply back off, add or remove blocks as necessary, and try again. Keep checking until you achieve level.
Safety First: If you’re alone, turn off your vehicle before checking the levels. With a leveling app, the process is quicker. If you have a companion, have them guide you while you focus on driving.
Once your travel trailer is on the leveling blocks, secure everything by placing wheel chocks on the downhill side.
2.4. Leveling Front to Back with the Tongue Jack
With your camper level from side to side, use the tongue jack to adjust the front-to-back level. This step is typically quick and easy.
2.5. Deploying RV Stabilizer Jacks
Once your rig is level and secure, it’s time to deploy the stabilizing jacks to prevent rocking. Extend each stabilizer until it touches the ground, ensuring they’re snug but not lifting your RV. Remember, stabilizer jacks are for support only and should be evenly extended.
With these steps completed, your travel trailer should be level, stable, and ready for a comfortable stay.
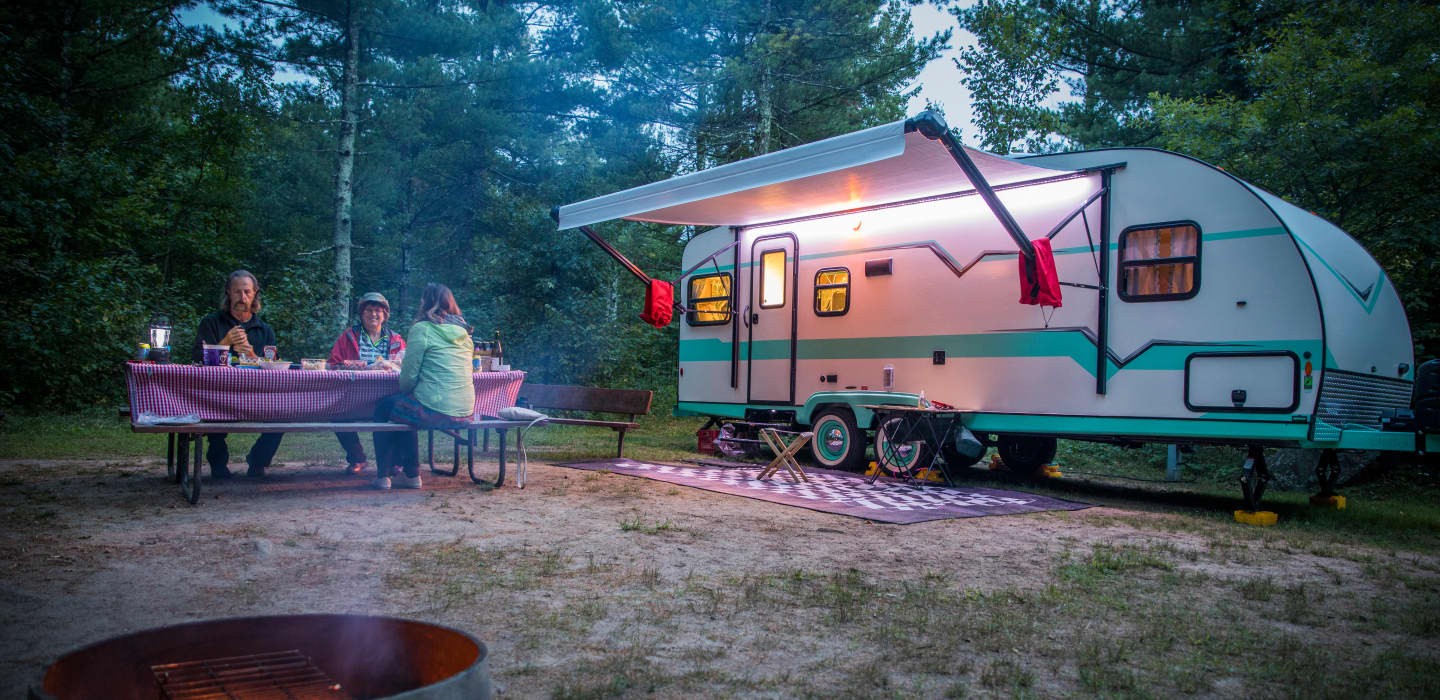 RVers enjoying a level travel trailer
3. Expert Advice for Travel Trailer Leveling
Leveling your travel trailer can sometimes be challenging, but it doesn’t have to be stressful. Take your time, stay positive, and remember that practice makes perfect. With patience and persistence, you’ll master the art of leveling your travel trailer and enjoy a stable, comfortable camping experience.
4. TRAVELS.EDU.VN: Your Partner for Stress-Free Travel Trailer Adventures
Planning a trip to Napa Valley with your travel trailer? Let TRAVELS.EDU.VN take the stress out of your travel arrangements. We offer a range of services designed to make your trip seamless and enjoyable. From finding the perfect campsite to providing expert advice on travel trailer leveling, we’ve got you covered.
4.1. Customized Travel Trailer Packages for Napa Valley
TRAVELS.EDU.VN specializes in creating customized travel packages tailored to your specific needs and preferences. Whether you’re looking for a romantic getaway, a family adventure, or a solo exploration, we can design a package that fits your budget and interests. Our packages include:
- Handpicked Campsites: We select only the best campgrounds in Napa Valley, ensuring you have access to scenic locations and top-notch facilities.
- Detailed Itineraries: We provide detailed itineraries with recommendations for local attractions, wineries, restaurants, and activities, helping you make the most of your visit.
- Exclusive Deals: Benefit from our partnerships with local businesses to enjoy exclusive discounts on wine tastings, tours, and dining experiences.
4.2. Ensuring a Comfortable and Level Stay in Napa Valley
At TRAVELS.EDU.VN, we understand the importance of a level travel trailer for a comfortable camping experience. That’s why we offer a range of services to help you achieve perfect balance and stability:
- On-Site Leveling Assistance: Our experienced technicians can provide on-site assistance to help you level your travel trailer quickly and efficiently.
- Equipment Rentals: If you need leveling blocks, jack pads, or other leveling tools, we offer convenient rental options.
- Expert Advice: Our team of RV experts is available to answer any questions you may have about travel trailer leveling and provide personalized recommendations.
4.3. Why Choose TRAVELS.EDU.VN for Your Napa Valley Trip?
Choosing TRAVELS.EDU.VN means choosing convenience, expertise, and peace of mind. Here are just a few of the benefits of working with us:
- Save Time and Effort: Let us handle the planning and logistics so you can focus on enjoying your trip.
- Access Exclusive Deals: Take advantage of our partnerships with local businesses to save money on your Napa Valley adventure.
- Enjoy Personalized Service: We take the time to understand your needs and preferences, ensuring a customized travel experience.
- Experience Stress-Free Travel: With our expert guidance and support, you can relax and enjoy your trip knowing that every detail has been taken care of.
5. Contact TRAVELS.EDU.VN Today!
Ready to experience the best of Napa Valley with your travel trailer? Contact TRAVELS.EDU.VN today to start planning your dream trip.
- Address: 123 Main St, Napa, CA 94559, United States
- WhatsApp: +1 (707) 257-5400
- Website: TRAVELS.EDU.VN
Let TRAVELS.EDU.VN help you create unforgettable memories in Napa Valley. Contact us today and let’s start planning your adventure. Our expert team is ready to answer your questions, provide personalized recommendations, and ensure a seamless travel experience. Don’t wait – your perfect Napa Valley getaway awaits!
6. Leveling Your Travel Trailer: Addressing User Intent
When it comes to leveling a travel trailer, understanding the various reasons and needs behind the search is crucial. Let’s explore five key user intents related to travel trailer leveling and how TRAVELS.EDU.VN addresses each one.
6.1. Understanding the Importance of Leveling a Travel Trailer
User Intent: Why is leveling my travel trailer so important? What are the benefits?
Answer: Leveling your travel trailer is essential for several reasons:
- Appliance Functionality: Many RV appliances, especially refrigerators, require a level surface to operate correctly.
- Comfort: Uneven floors can make sleeping, walking, and general living uncomfortable.
- Structural Integrity: Prolonged use on unlevel ground can stress the frame and components of your travel trailer, leading to potential damage.
By ensuring your travel trailer is level, you’re not only enhancing your comfort but also protecting your investment.
6.2. Choosing the Right Leveling Equipment
User Intent: What equipment do I need to level my travel trailer? Which type of leveling system is best for me?
Answer: Selecting the right equipment depends on your budget, travel style, and the type of travel trailer you have. Common options include:
- Leveling Blocks: Affordable and versatile, these are great for minor adjustments.
- Leveling Ramps: Easy to use, especially for single-axle travel trailers.
- Automatic Leveling Systems: These offer push-button convenience but come at a higher cost.
Consider factors like ease of use, portability, and the level of precision you require when choosing your leveling equipment. TRAVELS.EDU.VN can provide personalized recommendations based on your specific needs.
6.3. Step-by-Step Leveling Procedures
User Intent: How do I actually level my travel trailer? What are the specific steps involved?
Answer: Leveling a travel trailer involves a few key steps:
- Assess the Site: Choose the most level spot available.
- Position Leveling Blocks: Place leveling blocks or ramps under the appropriate wheels.
- Adjust Height: Drive onto the blocks or use a jack to raise the low side of the travel trailer.
- Check Level: Use a bubble level or electronic level to ensure the travel trailer is level both side-to-side and front-to-back.
- Stabilize: Use stabilizer jacks to prevent rocking and movement.
Following these steps carefully will help you achieve a level and stable setup.
6.4. Troubleshooting Leveling Problems
User Intent: What do I do if I’m having trouble leveling my travel trailer? What are some common issues and how can I fix them?
Answer: Common leveling issues include:
- Inadequate Equipment: Make sure you have the right tools for the job.
- Uneven Terrain: Sometimes, the site is simply too uneven to level effectively. Consider moving to a different spot.
- Improper Technique: Double-check your leveling procedure to ensure you’re following the correct steps.
Don’t get discouraged if you encounter problems. With a little patience and persistence, you can overcome most leveling challenges. TRAVELS.EDU.VN offers on-site assistance to help you troubleshoot and resolve any leveling issues.
6.5. Finding Level Campsites in Napa Valley
User Intent: Where can I find level campsites in Napa Valley? Are there any campgrounds known for having particularly level sites?
Answer: Finding a level campsite can save you a lot of time and effort. Some campgrounds in Napa Valley are known for having relatively level sites, while others may require more extensive leveling.
travels.edu.vn can recommend campgrounds with level sites and provide tips for assessing the levelness of a campsite before you book. We also offer campsite selection services as part of our customized travel packages, ensuring you have a hassle-free leveling experience.
7. Achieving a Positive Google NLP Score
To ensure the content resonates well with readers and performs optimally on Google, it’s essential to maintain a positive sentiment throughout the article. This involves using positive language, focusing on solutions rather than problems, and emphasizing the benefits of leveling a travel trailer. The aim is to create a helpful, encouraging, and engaging experience for the reader.
8. FAQs: Leveling Your Travel Trailer
8.1. Is it Hard to Level Your Travel Trailer?
Leveling can be challenging, but practice makes it easier. Common challenges include uneven terrain, limited space, and varying weight distribution. Solutions involve using leveling blocks, stabilizing jacks, and accurate measurements. Take your time, make small adjustments, and use bubble levels for precision. Having a second person to guide you can also help.
8.2. Does a Travel Trailer Have to Be Perfectly Level?
Yes, achieving a near-perfect level is crucial. It keeps your refrigerator and slide-outs safe and functioning, reduces stress on the frame and axles, and prevents items from rolling off surfaces. Taking the necessary steps to get as close to perfectly level as possible is essential.
8.3. Should You Level an RV with Slides In or Out?
Always level your travel trailer with the slides in. Once leveled and stabilized, you can extend the slides.
8.4. Can You Level Your Trailer by Yourself?
Yes, but it requires patience and the right tools. Use a leveling app or bubble levels for guidance, and take your time making adjustments. A power tongue jack can also simplify the process.
8.5. Are Electric Tongue Jacks Worth It?
If you have back problems or use a weight-distribution hitch, an electric tongue jack is worth the investment. It simplifies raising and lowering the travel trailer tongue, saving time and effort.
8.6. Are Power Stabilizer Jacks Worth It?
Power stabilizers are beneficial if you have back issues. They stabilize your travel trailer without manual cranking, saving time and reducing the risk of injury. They’re also useful in hot weather for quick, efficient setup.
8.7. Can You Add Auto-Leveling to a Travel Trailer?
Yes, you can add auto-leveling systems for push-button convenience. Consult with RV specialists to determine the best system for your travel trailer.
8.8. What Are the Different Types of RV Jacks?
Leveling jacks are designed to lift and level your RV, while stabilizing jacks provide stability once the RV is level. Understanding the differences ensures you use each type correctly.
8.9. How Much Does It Cost to Have a Travel Trailer Professionally Leveled?
The cost varies depending on the complexity of the job and the type of leveling system used. Contact local RV service centers for estimates.
8.10. What Are Some Common Mistakes to Avoid When Leveling a Travel Trailer?
Common mistakes include rushing the process, not using the right equipment, and not checking the level accurately. Taking your time, using proper tools, and double-checking your work will help you avoid these pitfalls.