Replacing a travel trailer roof can seem daunting, but with the right knowledge and preparation, it can be a smooth and rewarding experience. At TRAVELS.EDU.VN, we understand the importance of a well-maintained RV roof for worry-free adventures. Let’s explore how to replace your RV roof, ensuring your home on wheels remains protected and ready for your next journey with roof replacement options and finding professional RV roof repair services.
1. Identifying the Need for Travel Trailer Roof Replacement
Determining whether your RV roof requires replacement involves careful inspection and awareness of potential warning signs. Regular checks are essential to catch issues early and prevent extensive damage.
1.1 Recognizing Interior Damage
Interior damage is a significant indicator of a compromised RV roof. Look for the following signs:
- Soft Spots: Check ceilings and walls for soft spots, indicating moisture or water leaks.
- Bubbling Wall Coverings: Bubbles in the wall coverings can signal water intrusion.
- Ceiling Stains: Stains on the ceiling are a clear sign of water damage.
- Mildew or Mold: Patches of mildew or mold indicate moisture buildup from leaks.
 RV interior showing signs of water damage, including ceiling stains and bubbling wall coverings.
1.2 Conducting Visual Roof Inspections
Regular visual inspections, ideally twice a year, can help identify external damage to your RV roof. If you’re comfortable climbing on the roof, look for:
- Cracking: Cracks in the roofing material can lead to leaks.
- Warping: Warped sections indicate material degradation.
- Gouges: Gouges from impacts can compromise the roof’s integrity.
Also, check the RV’s sides for water damage, which can result from roof leaks. For those uncomfortable with heights, consider hiring a professional technician to perform the inspection.
1.3 Professional Assessments for Roof Condition
A professional assessment is crucial for determining whether to repair or replace your RV roof. Repairs are more affordable initially but may impact the RV’s resale value. Replacements are costlier but offer long-term value and peace of mind. If your RV is relatively new, a full replacement is often the best choice to protect its value, and TRAVELS.EDU.VN can connect you with trusted professionals in Napa Valley.
2. Exploring RV Roof Replacement Cost Factors
Understanding the financial aspect of RV roof replacement is crucial. Costs vary based on several factors, including materials, RV size, and labor.
2.1 Material Type and RV Roof Replacement Cost
Different roofing materials have varying costs:
- EPDM Rubber Roof: An economical and common choice, EPDM rubber roofing costs roughly $8 to $12 per square foot. Its durability and ease of repair make it a popular option for RV owners.
- TPO (Thermoplastic Polyolefin) Roof: Slightly more expensive, TPO roofing offers superior UV resistance and heat reflectivity, costing around $10 to $15 per square foot.
- Fiberglass Roof: Known for its strength and longevity, fiberglass roofing typically costs $15 to $25 per square foot. It’s a premium option that adds significant value to your RV.
- Aluminum Roof: Lightweight and corrosion-resistant, aluminum roofing ranges from $12 to $20 per square foot. It’s an excellent choice for those looking to balance cost and performance.
2.2 The Impact of RV Size on Replacement Costs
The size of your RV directly affects the amount of material and labor required, influencing the overall cost.
| RV Type | Average Roof Size (Square Feet) | Estimated Material Cost (EPDM) | Estimated Labor Cost | Total Estimated Cost |
|---|---|---|---|---|
| Small Travel Trailer | 200 | $1,600 – $2,400 | $1,500 – $3,000 | $3,100 – $5,400 |
| Large Travel Trailer | 300 | $2,400 – $3,600 | $2,000 – $4,000 | $4,400 – $7,600 |
| Class A Motorhome | 400 | $3,200 – $4,800 | $3,000 – $6,000 | $6,200 – $10,800 |
| Class C Motorhome | 250 | $2,000 – $3,000 | $1,800 – $3,500 | $3,800 – $6,500 |
These figures are approximate and can vary based on location, the complexity of the job, and the specific materials used.
2.3 Labor Costs for Professional RV Roof Replacement
Labor costs can range from $75 to $150 per hour, depending on the repair shop’s location and expertise. Replacing an RV roof typically takes 30 to 60 labor hours, so labor alone can significantly impact the total cost.
3. Financial Assistance Options for RV Roof Replacement
Several financial options can help alleviate the cost burden of RV roof replacement.
3.1 Leveraging RV Warranties for Roof Repairs
If your RV is under a manufacturer’s or extended warranty, the provider may cover the roof if the damage stems from a manufacturing defect. Ensure you have maintained the roof properly since purchasing the RV.
3.2 Utilizing RV Insurance Coverage for Roof Replacement
Insurance might cover the roof if damage results from a collision or natural events. If another party caused the damage, their insurance could cover the replacement. Understand whether the damage falls under collision or comprehensive coverage.
- Collision Coverage: Applies when damage occurs while towing or driving. However, it could affect future rates if deemed your fault.
- Comprehensive Coverage: Covers damage from events like storms while the RV isn’t in operation. Rates may not increase if you’re not at fault.
3.3 Payment Strategies for Out-of-Pocket RV Roof Replacement
If warranty or insurance doesn’t cover the costs, consider these strategies:
- Personal Loans: Secure a personal loan to cover the expenses, offering fixed interest rates and repayment terms.
- RV Loans: Refinance your existing RV loan to include the cost of the roof replacement.
- Credit Cards: Use a credit card with a 0% introductory APR or rewards program to finance the project, but be mindful of interest rates.
- Savings: Tap into your savings account to avoid incurring debt, providing financial peace of mind.
4. RV Roof Repair vs RV Roof Replacement : Making the Right Choice
Deciding between repairing and replacing your RV roof depends on the extent of the damage and your long-term goals.
4.1 Assessing the Severity of RV Roof Damage
- Minor Damage: Small leaks, minor cracks, or isolated punctures can often be repaired.
- Extensive Damage: Widespread damage, significant rot, or multiple leaks typically warrant a full replacement.
4.2 Factors Favoring RV Roof Repair
- Cost-Effectiveness: Repairs are generally cheaper than replacements, making them suitable for minor issues.
- Quick Turnaround: Repairs can usually be completed faster, minimizing downtime.
- Maintaining Original Structure: Repairing preserves the RV’s original structure and integrity.
4.3 Scenarios Favoring RV Roof Replacement
- Long-Term Investment: Replacement ensures longevity and prevents future issues, making it ideal for long-term RV owners.
- Increased Resale Value: A new roof can significantly increase the RV’s resale value.
- Severe Damage: Extensive damage compromises the roof’s structural integrity, necessitating a full replacement.
 Close-up showing cracked and damaged RV roofing material.
5. A Step-by-Step Guide to RV Roof Replacement
If you’re an experienced DIYer, replacing your RV roof can be a rewarding project. However, it’s crucial to proceed with caution and follow safety guidelines.
5.1 Essential Tools and Materials for DIY RV Roof Replacement
- Roofing Material: EPDM, TPO, fiberglass, or aluminum, depending on your preference and RV type.
- Sealant: High-quality sealant to prevent leaks.
- Adhesive: Compatible adhesive for bonding the roofing material to the RV’s frame.
- Tools: Utility knife, scraper, roller, measuring tape, and safety gear (gloves, goggles, and a harness).
5.2 Detailed Steps for Removing the Old RV Roof
- Preparation: Clean the RV roof thoroughly and remove any fixtures like vents, antennas, and air conditioners.
- Cutting: Use a utility knife to cut the old roofing material into manageable sections.
- Scraping: Scrape off the old adhesive and clean the surface to ensure a smooth base for the new material.
5.3 Installing the New RV Roof: A Step-by-Step Approach
- Measuring: Measure the roof dimensions accurately to cut the new roofing material to the correct size.
- Adhesive Application: Apply adhesive evenly across the RV roof.
- Material Placement: Carefully place the new roofing material, ensuring it aligns correctly.
- Rolling: Use a roller to smooth the material and eliminate air pockets.
- Sealing: Seal the edges and around fixtures with high-quality sealant to prevent leaks.
6. Finding a Professional for RV Roof Replacement
If DIY isn’t your preference, hiring a professional ensures the job is done correctly and efficiently.
6.1 How to Find Reliable RV Roof Replacement Services
- Online Reviews: Check Google and Facebook reviews for local repair companies.
- Insurance Recommendations: Ask your insurance provider for recommendations.
- RV Forums: Seek advice from RV communities for trusted service providers.
6.2 Evaluating Estimates and Choosing the Right RV Technician
- Multiple Quotes: Get estimates from several technicians to compare pricing and services.
- Insurance Approval: Ensure the technician provides a quote to your insurance company for approval.
- Material Options: Inquire about different roofing options, each offering unique pros and cons.
6.3 What to Expect During Professional RV Roof Replacement
- Initial Inspection: The technician will perform an initial inspection to assess the damage and provide a quote.
- Approval Wait: There may be a waiting period for insurance or warranty approval.
- Repair Time: The replacement can take several weeks or months, depending on the shop’s schedule and material availability.
- Additional Damage: Hidden interior damage may be found once the old roof is removed, requiring additional repairs and approvals.
7. Maintaining Your New Travel Trailer Roof
Proper maintenance is crucial to prolong the life of your new RV roof.
7.1 Recommended Cleaning Practices for RV Roofs
- Regular Washing: Wash the roof regularly with mild soap and water to remove dirt and debris.
- Avoid Harsh Chemicals: Harsh chemicals can damage the roofing material.
- Soft Brush: Use a soft brush to avoid scratching the surface.
7.2 Periodic RV Roof Inspection and Sealant Checks
- Regular Inspections: Inspect the roof at least twice a year for signs of damage.
- Sealant Checks: Check the sealant around fixtures and edges, reapplying as needed.
- Professional Inspections: Consider annual professional inspections to catch hidden issues.
7.3 Protecting Your RV Roof from the Elements
- Covered Storage: Store your RV under a cover or in a garage to protect it from sun, rain, and snow.
- Trim Overhanging Branches: Trim overhanging branches to prevent damage from falling limbs.
- Avoid Standing Water: Ensure proper drainage to prevent standing water, which can cause material degradation.
8. Addressing Common RV Roof Problems
Knowing how to address common issues can save you time and money.
8.1 Identifying and Repairing RV Roof Leaks
- Locating the Leak: Check for water stains inside the RV to trace the leak’s source.
- Sealing the Leak: Clean the area and apply sealant to the affected area.
- Professional Assistance: For persistent leaks, seek professional help.
8.2 Handling RV Roof Punctures and Tears
- Small Punctures: Clean the area and apply a patch with adhesive and sealant.
- Large Tears: Large tears may require professional repair or replacement of the damaged section.
8.3 Preventing Mold and Mildew Growth on Your RV Roof
- Ventilation: Ensure adequate ventilation inside the RV to reduce moisture.
- Cleaning: Regularly clean the roof with a mildew-resistant solution.
- Moisture Control: Use dehumidifiers to control indoor moisture levels.
9. Ensuring Longevity: Travel Trailer Roof Replacement Tips
Maximize the lifespan of your RV roof with these essential tips.
9.1 Choosing the Right Roofing Material for Your RV
- Climate Considerations: Select a material suited to your local climate. For example, TPO is excellent for hot, sunny climates.
- Budget: Balance cost with durability to find the best value.
- RV Type: Consider your RV type and usage when selecting a roofing material.
9.2 Proper Installation Techniques for RV Roofs
- Professional Installation: If not DIYing, hire a reputable technician with experience.
- Adherence to Guidelines: Follow manufacturer guidelines for installation.
- Quality Sealant: Use high-quality sealant to prevent leaks.
9.3 Regular Maintenance Schedules for RV Roofs
- Monthly Checks: Check for visible damage or debris.
- Seasonal Inspections: Inspect thoroughly at the start and end of each season.
- Professional Service: Schedule professional inspections annually.
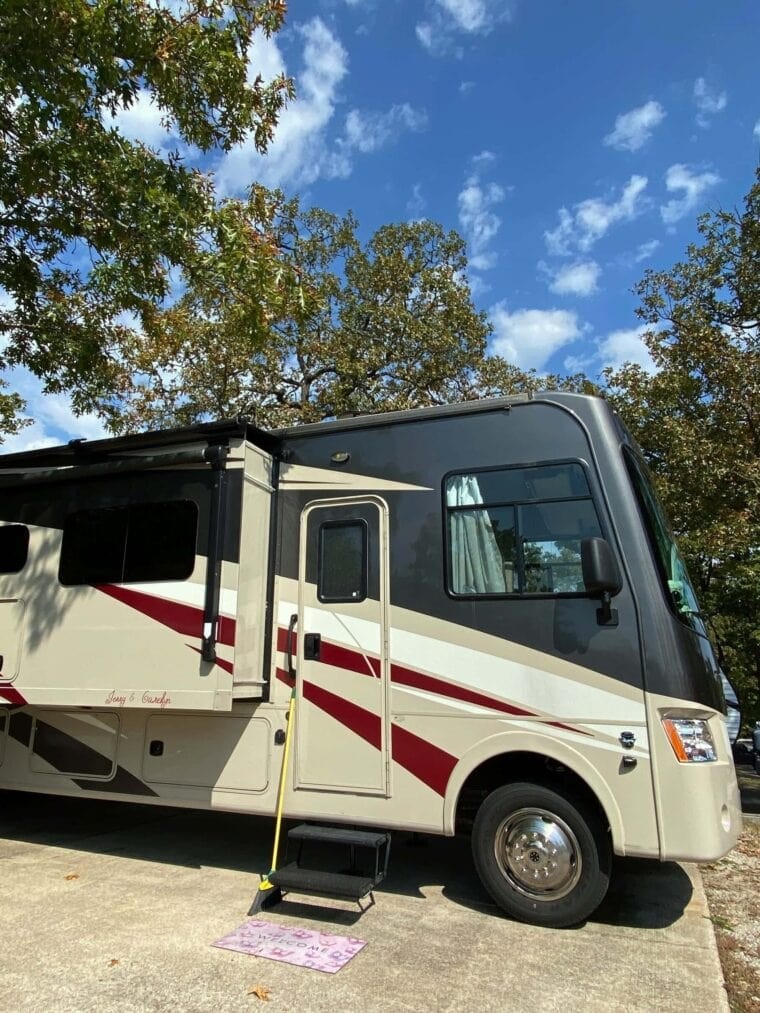 An RV with a newly replaced roof, gleaming in the sunlight.
10. Why Choose TRAVELS.EDU.VN for Your RV Travel Needs?
At TRAVELS.EDU.VN, we understand the importance of a well-maintained RV for worry-free travel. A new roof not only protects your investment but also ensures your safety and comfort on the road. That’s why we connect you with the best RV service providers in Napa Valley, offering reliable and affordable solutions for all your RV needs.
10.1 Stress-Free Trip Planning
Let TRAVELS.EDU.VN help you plan your next RV adventure in Napa Valley. We offer customized itineraries, insider tips, and access to exclusive deals. With our expertise, you can focus on enjoying your trip while we handle the details.
10.2 Expert Recommendations
Benefit from our extensive network of RV experts and service providers. We recommend trusted professionals who deliver quality workmanship and exceptional service. From roof replacements to routine maintenance, we’ve got you covered.
10.3 Local Expertise in Napa Valley
Napa Valley is a prime destination for RV travelers. TRAVELS.EDU.VN provides local insights to help you explore the region’s vineyards, scenic drives, and charming towns. Discover the best RV parks, wineries, and attractions with our expert guidance.
10.4 Dedicated Customer Support
Our dedicated customer support team is available to assist you with any questions or concerns. Whether you need help planning your trip or finding the right RV service, we’re here to help.
Don’t let a damaged RV roof ruin your travel plans. Contact TRAVELS.EDU.VN today for reliable RV roof replacement services in Napa Valley. Call us at +1 (707) 257-5400 or visit our website at travels.edu.vn to learn more. Our office is located at 123 Main St, Napa, CA 94559, United States. Let us help you keep your RV in top condition for unforgettable journeys.
Frequently Asked Questions (FAQs)
How much does it cost to replace the roof of an RV?
A full RV roof replacement typically costs several thousand dollars. The cost depends on the type of roof and material, as well as the size of the roof. Expect to pay around $300 to $350 per linear foot as a rough estimate.
How often should an RV roof be replaced?
With regular checks and maintenance, a quality RV roof should last between 10 and 20 years.
Does RV insurance cover roof replacement?
If your damage was caused by a collision or natural event (like a storm), RV insurance likely covers a replacement. It’s unlikely to cover a replacement if the damage is from age, wear and tear, or lack of maintenance.
How long is a roof warranty on an RV?
Roofs may be covered under your general manufacturer warranty or under extended warranties. Most manufacturers offer warranties between 1 to 3 years. Extended warranties can add years to your warranty’s lifespan for an additional cost.
Can I replace my RV roof myself?
Yes, but it requires experience and the right tools. It’s recommended to hire a professional for the best results.
What type of roofing material is best for my RV?
It depends on your budget, climate, and RV type. EPDM, TPO, fiberglass, and aluminum are popular choices, each with pros and cons.
How can I prevent leaks in my RV roof?
Regular inspections, sealant checks, and proper maintenance can help prevent leaks. Also, ensure your RV is stored properly and protected from the elements.
What are the signs of water damage in my RV?
Soft spots on ceilings and walls, bubbling wall coverings, ceiling stains, and mildew or mold are signs of water damage.
How long does it take to replace an RV roof?
The time varies depending on the extent of the damage, the repair shop’s schedule, and material availability. It can take several weeks or months.
What should I do if I find a leak in my RV roof?
Locate the leak’s source, clean the area, and apply sealant. For persistent leaks, seek professional help.