Traveling with a film camera opens a gateway to a unique and rewarding photographic experience, capturing memories with the authentic touch of analog. However, navigating airport security and protecting your precious film require careful planning. TRAVELS.EDU.VN offers expert guidance to ensure your film photography adventure is smooth and successful, helping you capture stunning images without the worry of damaging your film. Consider this your ultimate guide to seamless travel, protecting your undeveloped film, and unlocking the art of analog photography on the go.
1. Understanding the Challenges of Flying with Film
The primary concern for film enthusiasts is the potential damage from airport security scanners. Both X-ray and CT scanners emit radiation that can fog undeveloped film, leading to unwanted marks or discoloration. While developed film is safe, protecting your unexposed and exposed but undeveloped film is crucial.
Here’s why airport scanners pose a threat:
- X-ray Scanners: These machines, commonly used for carry-on baggage, use lower levels of radiation. The TSA claims these are safe for film up to ISO 800. However, the effects of X-rays are cumulative, so multiple scans can still cause damage.
- CT Scanners: Increasingly used for carry-on luggage, CT scanners use significantly higher radiation levels, posing a greater risk to all film, regardless of ISO.
2. Planning Your Film Photography Trip
Preparation is key to a stress-free film photography trip. Here’s how to plan effectively:
2.1. Minimizing Airport Exposure
Consider These Alternatives:
- Buying Film at Your Destination: Research local camera stores in your destination city. This eliminates the risk of airport scans altogether. Be sure to check availability and prices beforehand.
- Shipping Film to Your Destination: Ship film directly to your hotel or lodging. Confirm with the property that they can receive packages on your behalf.
- Mail-Order Film Processing: Process your film at your destination before returning home. This allows you to travel with only developed, scanner-safe negatives.
2.2. Selecting the Right Film
Choosing the right film stock is essential for your travel photography.
- ISO Sensitivity: For travel, films with ISO 100-400 are generally recommended, offering a balance between low-light performance and fine grain.
- Color vs. Black and White: Color film is great for vibrant scenes, while black and white captures timeless, atmospheric shots.
- Film Format: 35mm film is convenient and widely available, while medium format offers higher image quality.
2.3. Essential Gear for Film Travel
- Film Camera: Choose a reliable camera that suits your style of shooting.
- Lenses: Pack versatile lenses for different shooting scenarios.
- Film Rolls: Bring enough film for your trip, considering the number of shots you plan to take.
- Film Cases: Protect your film from light and moisture with dedicated cases.
- Changing Bag: A dark bag for loading and unloading film in bright environments.
- Light Meter: For accurate exposure readings, especially with manual cameras.
- Camera Bag: A comfortable and secure bag to carry your gear.
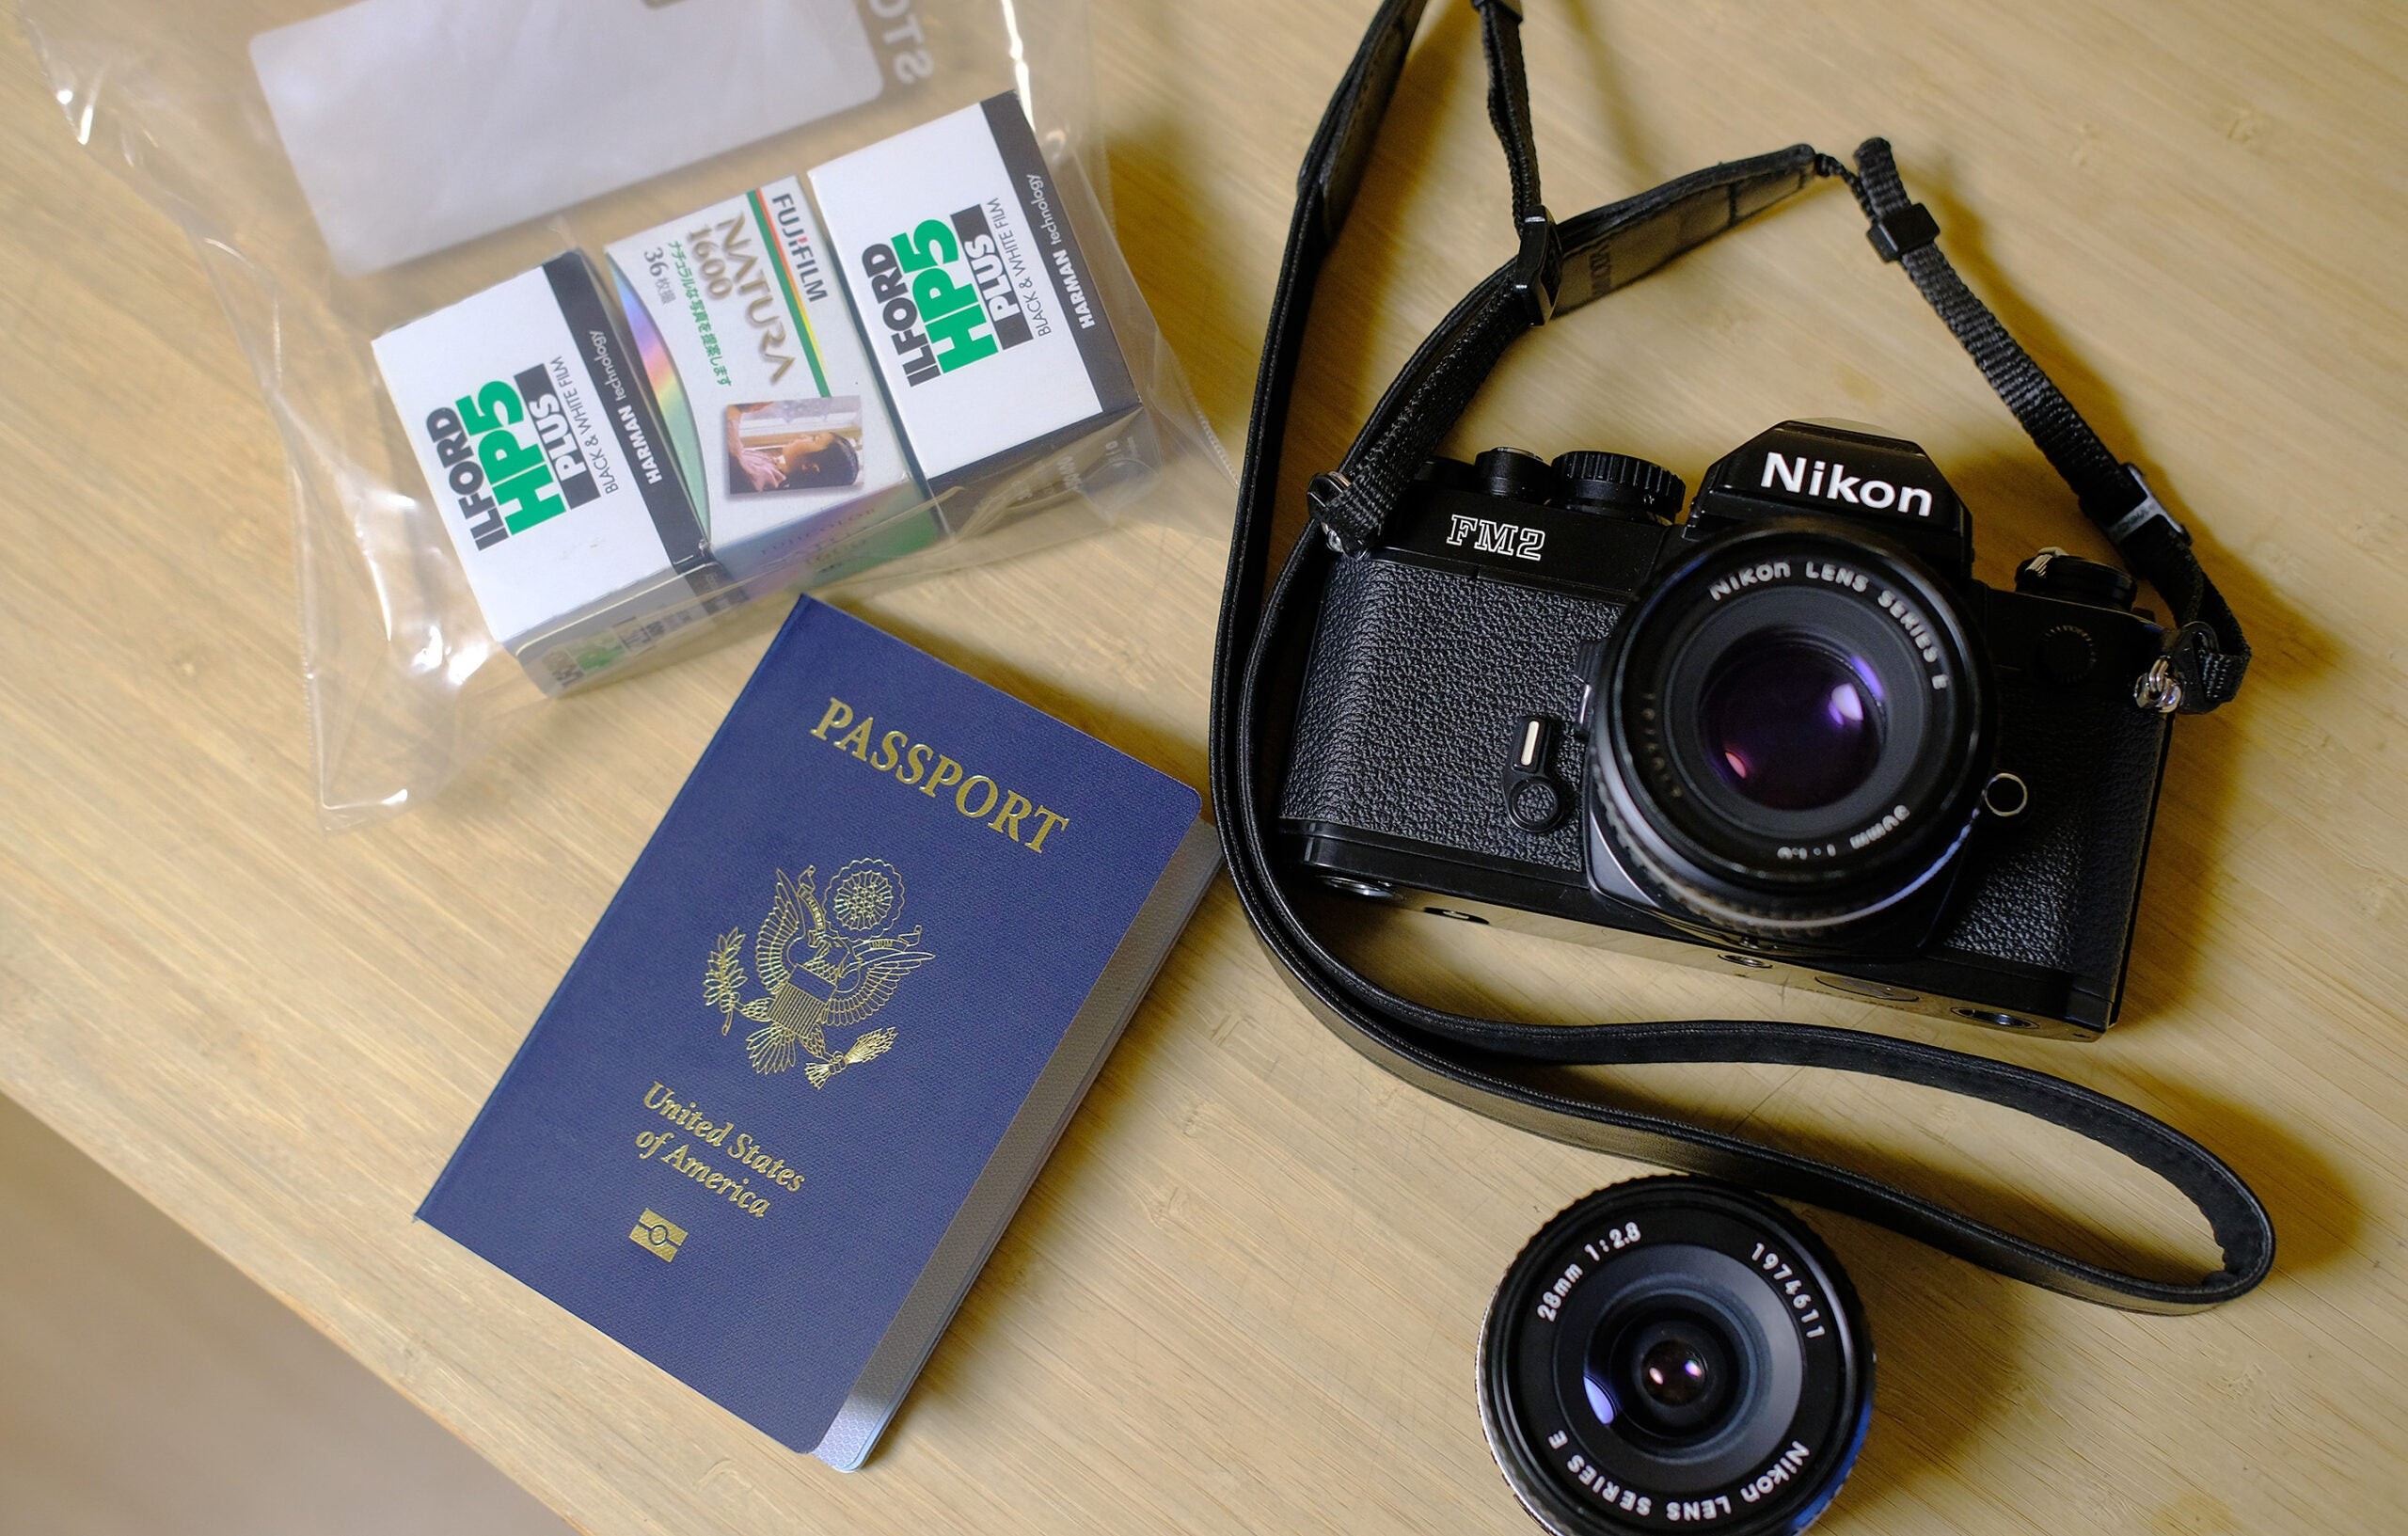 Film rolls with passport and camera
Alt text: Film rolls, passport, and a classic film camera arranged for travel, symbolizing analog photography on the go.
3. Navigating Airport Security with Film
Airport security can be the most challenging aspect of traveling with film. Here’s how to navigate it smoothly:
3.1. Carry-On vs. Checked Baggage
- NEVER put undeveloped film in checked baggage. The high-powered scanners used for checked luggage will almost certainly damage your film.
- Always carry your film and loaded cameras in your carry-on baggage.
3.2. Requesting a Hand Inspection
The best way to protect your film is to request a hand inspection. Here’s the process:
-
Preparation: Keep your film in a clear, zip-lock-style plastic bag for easy inspection. Leave the rolls in their original plastic canisters or sealed packaging.
-
Communication: Before placing your luggage on the conveyor belt, remove your film and cameras. Make eye contact with a TSA agent and politely state: “I have some film and cameras I’d like to have hand-inspected, please.”
-
Inspection: Be patient and courteous throughout the process. TSA agents may swab individual rolls to check for explosive residue. They may also ask to open boxes. Comply with their requests, ensuring they do not unspool your film.
-
Loaded Cameras: While it’s best to travel with unloaded cameras, loaded cameras can also be hand-inspected.
3.3. TSA Guidelines and Regulations
- The TSA states that X-ray machines are safe for film up to ISO 800. However, hand inspection is always the safest option.
- Be aware that some airports now use CT scanners, which can damage all film, regardless of ISO.
- Politeness and patience go a long way with TSA agents. Remember, their priority is security.
4. What to Do if Hand Inspection is Refused
While hand inspections are generally granted in the United States, there may be instances where they are refused.
- Remain Calm and Polite: Arguing or becoming agitated will not help your situation.
- Request a Supervisor: If possible, ask to speak with a TSA supervisor.
- Explain the Situation: Clearly explain the sensitivity of your film and the potential for damage.
- Compromise: If a hand inspection is not possible, request that your film be scanned separately and minimize its exposure to the X-ray machine.
- Document the Incident: Note the date, time, location, and the names of the TSA agents involved.
5. Tips for Protecting Film on Location
Once you arrive at your destination, continue to protect your film from environmental factors:
5.1. Temperature and Humidity
- Store Film Properly: Keep film in a cool, dry place. Avoid direct sunlight and extreme temperatures.
- Use Insulated Bags: If traveling in hot or humid climates, use insulated bags to protect your film.
- Refrigeration: For extended trips, consider refrigerating your film to prolong its lifespan. Allow the film to return to room temperature before use to prevent condensation.
5.2. Light Exposure
- Load and Unload in Shade: Avoid loading and unloading film in direct sunlight. Use a changing bag if necessary.
- Protect Exposed Film: Store exposed film in light-tight containers until you can develop it.
5.3. Dust and Moisture
- Keep Gear Clean: Regularly clean your camera and lenses to prevent dust and moisture buildup.
- Use Silica Gel Packs: Place silica gel packs in your camera bag to absorb moisture.
6. Alternatives to Traditional Film
Consider these alternatives if you’re concerned about the risks of traveling with traditional film:
- Digital Photography: Embrace digital cameras for travel, offering convenience and instant results.
- Disposable Film Cameras: Use disposable cameras to capture carefree moments without worrying about expensive equipment.
- Digital Film Simulations: Explore digital tools that mimic the look and feel of film photography.
7. Understanding Film Speed (ISO)
Film speed, measured in ISO, determines the film’s sensitivity to light. Understanding ISO is crucial for proper exposure and image quality.
7.1. Low ISO Films (ISO 25-100)
- Best For: Bright, sunny conditions.
- Characteristics: Fine grain, high detail, and vibrant colors.
- Examples: Kodak Ektar 100, Ilford Pan F Plus 50.
7.2. Medium ISO Films (ISO 200-400)
- Best For: General use, including outdoor and indoor photography.
- Characteristics: Good balance between grain and detail.
- Examples: Kodak Gold 200, Ilford HP5 Plus 400.
7.3. High ISO Films (ISO 800-3200+)
- Best For: Low-light conditions, fast-moving subjects.
- Characteristics: More grain, but allows for faster shutter speeds.
- Examples: Kodak Portra 800, Ilford Delta 3200.
7.4. Choosing the Right ISO for Travel
- Sunny Destinations: ISO 100-200
- Overcast or Indoor Shooting: ISO 400
- Night Photography: ISO 800 or higher
8. Traveling with Different Film Formats
Different film formats offer unique characteristics and require specific handling.
8.1. 35mm Film
- Pros: Compact, widely available, and easy to use.
- Cons: Smaller negative size compared to medium and large format.
- Tips: Use a reliable 35mm camera, choose high-quality lenses, and protect your film from scratches.
8.2. Medium Format Film (120 Film)
- Pros: Larger negative size for higher image quality and detail.
- Cons: Requires specialized cameras, more expensive than 35mm.
- Tips: Handle film carefully to avoid light leaks, use a changing bag for loading and unloading, and choose a reliable medium format camera.
8.3. Large Format Film (4×5, 8×10)
- Pros: Highest image quality and resolution.
- Cons: Bulky equipment, complex operation, and requires significant expertise.
- Tips: Use a sturdy tripod, precise metering, and meticulous technique for best results.
9. The Art of Film Photography on the Road
Film photography is not just about the technical aspects; it’s about capturing moments with intention and artistry.
9.1. Composition Techniques
- Rule of Thirds: Divide your frame into nine equal parts and place key elements along the lines or at the intersections.
- Leading Lines: Use lines to guide the viewer’s eye through the image.
- Symmetry: Create balanced and harmonious compositions with symmetrical elements.
- Framing: Use elements in the foreground to frame your subject and add depth.
9.2. Capturing Authentic Moments
- Be Observant: Pay attention to the details and nuances of your surroundings.
- Interact with Locals: Engage with people and capture their stories.
- Embrace Spontaneity: Be open to unexpected moments and capture them as they unfold.
9.3. Developing Your Unique Style
- Experiment with Different Films: Try various film stocks to find the ones that resonate with your vision.
- Master Exposure: Learn how to accurately meter and control exposure for different lighting conditions.
- Explore Different Printing Techniques: Experiment with different printing methods to achieve unique effects.
10. What to Expect When Traveling to Napa Valley
Napa Valley, renowned for its picturesque vineyards and world-class wineries, offers a stunning backdrop for film photography.
10.1. Best Time to Visit Napa Valley
- Spring (March-May): Mild weather, blooming flowers, and fewer crowds.
- Fall (September-November): Harvest season, vibrant colors, and wine festivals.
10.2. Must-Visit Locations for Film Photography
- Vineyards: Capture the rolling hills and lush vineyards at sunrise or sunset.
- Wineries: Photograph the architecture, interiors, and wine-making process.
- Downtown Napa: Explore the charming streets, restaurants, and shops.
- Hot Air Balloon Rides: Capture breathtaking aerial views of the valley.
10.3. Unique Photo Opportunities
- Wine Cellars: Photograph the atmospheric wine cellars with rows of aging barrels.
- Grape Harvest: Capture the energy and excitement of the grape harvest season.
- Local Farmers Markets: Document the vibrant colors and textures of local produce.
- Culinary Experiences: Capture the artistry and flavors of Napa Valley cuisine.
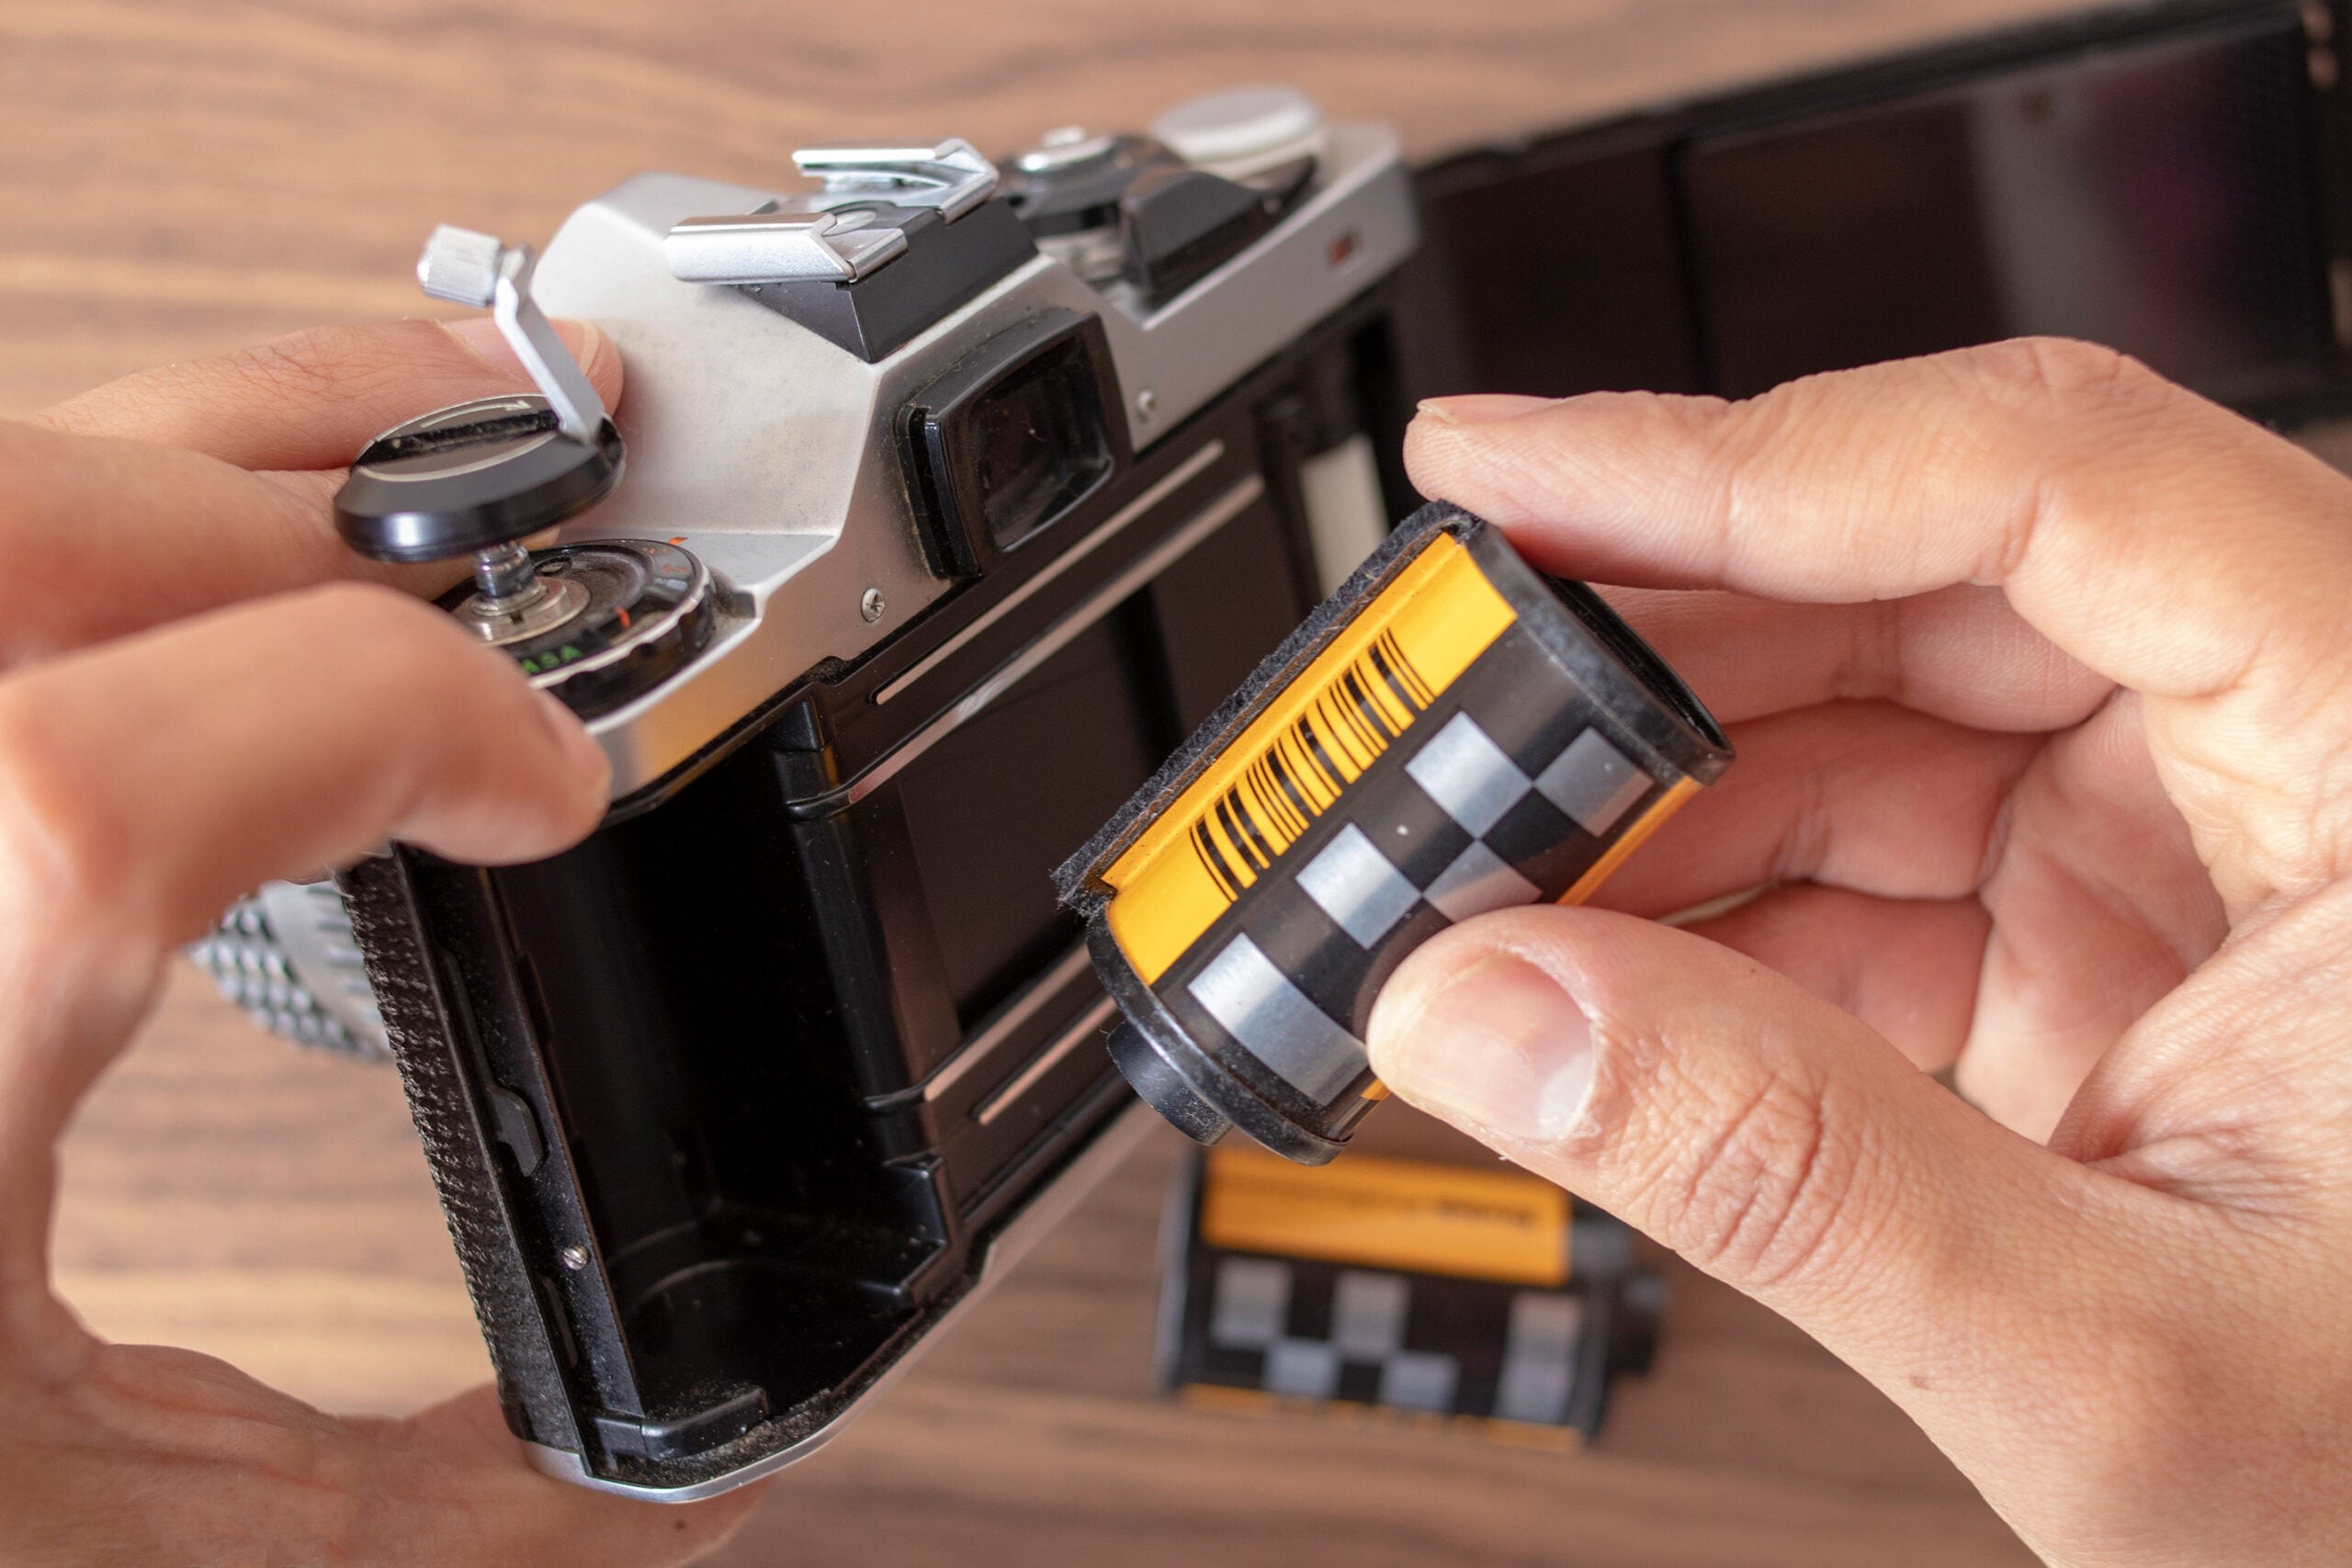 Loading film into a camera
Alt text: Hands carefully loading a roll of film into a vintage camera, highlighting the tactile experience of analog photography.
11. Why Choose TRAVELS.EDU.VN for Your Napa Valley Trip?
TRAVELS.EDU.VN is your trusted partner for planning a seamless and unforgettable Napa Valley experience.
11.1. Personalized Travel Packages
We offer customized travel packages tailored to your specific interests and budget. Whether you’re a wine enthusiast, a foodie, or an adventure seeker, we can create the perfect itinerary for you.
11.2. Expert Local Guides
Our experienced local guides provide insider knowledge and personalized attention, ensuring you discover the hidden gems of Napa Valley.
11.3. Exclusive Access and Amenities
Enjoy exclusive access to top wineries, gourmet restaurants, and luxury accommodations. We handle all the details, so you can relax and focus on capturing stunning photographs.
11.4. Peace of Mind
We provide 24/7 support throughout your trip, ensuring a stress-free and enjoyable experience.
12. Booking Your Napa Valley Film Photography Adventure
Ready to embark on your Napa Valley film photography adventure? Contact TRAVELS.EDU.VN today for expert guidance and personalized travel planning.
12.1. Contact Information
- Address: 123 Main St, Napa, CA 94559, United States
- WhatsApp: +1 (707) 257-5400
- Website: TRAVELS.EDU.VN
12.2. Speak to Our Experts
Our travel experts are available to answer your questions and help you design the perfect Napa Valley itinerary. Contact us today for a free consultation.
12.3. Explore Our Packages
Browse our selection of curated Napa Valley travel packages for inspiration and ideas. We offer options for every budget and interest.
12.4. Book with Confidence
With TRAVELS.EDU.VN, you can book your Napa Valley trip with confidence, knowing that you’re in the hands of experienced professionals.
13. Essential Tips for Packing Your Film Photography Gear
Packing your gear efficiently and safely is vital for protecting your equipment and maximizing space.
13.1. Choosing the Right Bag
- Camera Backpack: Offers ample space, organization, and protection.
- Shoulder Bag: Convenient for quick access to your gear.
- Rolling Case: Ideal for transporting heavy equipment through airports.
13.2. Organizing Your Gear
- Use Dividers: Customize the interior of your bag with adjustable dividers.
- Wrap Lenses: Protect lenses in padded wraps to prevent scratches.
- Store Film Separately: Keep film in dedicated cases or pouches.
13.3. Protecting Your Equipment
- Waterproof Covers: Shield your gear from rain and moisture.
- Lockable Zippers: Secure your bag with lockable zippers to deter theft.
- Insurance: Consider insuring your equipment against damage or loss.
14. Mastering the Art of Street Photography with Film
Street photography with film captures candid moments and the essence of everyday life.
14.1. Choosing the Right Camera and Lens
- Compact Camera: A small, discreet camera is ideal for blending in.
- Fast Lens: A lens with a wide aperture (f/1.4 or f/2.8) allows for shooting in low light.
- Versatile Focal Length: A 35mm or 50mm lens is versatile for capturing a variety of scenes.
14.2. Essential Techniques
- Zone Focusing: Pre-focus your lens to a specific distance for quick shots.
- Shooting from the Hip: Capture candid shots without raising the camera to your eye.
- Anticipating Moments: Observe your surroundings and anticipate interesting moments.
14.3. Ethical Considerations
- Respect Privacy: Be mindful of people’s privacy and avoid intrusive photography.
- Ask Permission: If you plan to photograph someone directly, ask for their permission.
- Be Aware of Your Surroundings: Pay attention to your surroundings and avoid causing disruptions.
15. Best Film Cameras for Travel Photography
Choosing the right camera is crucial for capturing memorable images during your travels. Here are some of the best film cameras for travel photography, each offering unique advantages:
15.1. Leica M6
- Pros: Renowned for its exceptional build quality, reliable mechanical operation, and superb rangefinder focusing system. Compact and discreet, making it ideal for street photography.
- Cons: Expensive and requires practice to master the rangefinder focusing system.
- Ideal for: Discerning photographers who demand the highest quality and reliability.
15.2. Nikon FM2
- Pros: Durable and dependable mechanical camera with a wide range of compatible lenses. Offers excellent metering and a bright viewfinder.
- Cons: Lacks autofocus and may feel bulky compared to smaller rangefinder cameras.
- Ideal for: Photographers who prefer a classic SLR experience and value ruggedness and versatility.
15.3. Olympus OM-1
- Pros: Compact and lightweight SLR camera with a bright viewfinder and excellent ergonomics. Offers a wide range of Zuiko lenses known for their sharpness and clarity.
- Cons: Metering system can be less accurate in challenging lighting conditions.
- Ideal for: Travelers who prioritize portability and ease of use without sacrificing image quality.
15.4. Pentax K1000
- Pros: Simple and affordable mechanical camera perfect for beginners. Offers a reliable metering system and a wide range of compatible lenses.
- Cons: Lacks advanced features and may feel basic compared to more modern cameras.
- Ideal for: Photographers who are new to film photography and want a straightforward and reliable camera to learn the basics.
15.5. Contax T2
- Pros: Premium compact camera with a sharp Carl Zeiss Sonnar lens and a sophisticated metering system. Offers a sleek and stylish design.
- Cons: Expensive and prone to mechanical issues.
- Ideal for: Travelers who want a high-quality point-and-shoot camera with exceptional image quality.
16. The Enduring Appeal of Film Photography
In a world dominated by digital technology, film photography continues to captivate and inspire.
16.1. The Tangible Experience
- Tactile Engagement: Film photography involves a hands-on process that connects you with the craft.
- Deliberate Approach: Shooting film requires careful consideration and intention.
- Anticipation and Reward: The anticipation of seeing your developed film adds to the excitement.
16.2. The Aesthetic Qualities
- Unique Look and Feel: Film offers a distinctive aesthetic with its grain, color rendition, and tonal range.
- Timeless Appeal: Film photographs have a timeless quality that transcends trends.
- Artistic Expression: Film allows for greater artistic expression and experimentation.
16.3. The Creative Process
- Slowing Down: Film photography encourages you to slow down and appreciate the moment.
- Mindful Composition: You become more mindful of composition and lighting.
- Embracing Imperfection: Film embraces imperfections, adding character and authenticity to your images.
Frequently Asked Questions (FAQ)
- Is it safe to fly with film? Yes, with proper precautions such as requesting hand inspection, it’s generally safe to fly with film.
- Will airport scanners damage my film? X-ray scanners are considered safe for film up to ISO 800, but CT scanners can damage all film. Hand inspection is always the safest option.
- Can I put film in my checked baggage? No, never put undeveloped film in checked baggage.
- What if the TSA refuses to hand-inspect my film? Remain calm, request a supervisor, and explain the sensitivity of your film.
- How should I store film while traveling? Keep film in a cool, dry place, away from direct sunlight and extreme temperatures.
- What ISO film should I use for travel photography? ISO 100-400 is generally recommended for travel.
- Can I buy film at my destination? Yes, research local camera stores beforehand.
- What is the best time to visit Napa Valley for photography? Spring and fall offer mild weather and beautiful scenery.
- What are the must-visit locations in Napa Valley for photography? Vineyards, wineries, downtown Napa, and hot air balloon rides.
- Why should I choose TRAVELS.EDU.VN for my Napa Valley trip? We offer personalized travel packages, expert local guides, and exclusive access to the best experiences.
Let travels.edu.vn transform your Napa Valley adventure into an unforgettable film photography journey. Capture the essence of this beautiful region with the timeless allure of analog photography. Contact us today to start planning your dream trip.