Every travel trailer owner knows the frustration of dealing with a broken window shade. Those pleated shades, while stylish and functional, are notorious for their strings snapping at the most inconvenient times. Faced with a drooping, dysfunctional blind, many RVers immediately think of expensive replacements or dealer service fees. However, what if you could fix it yourself, quickly and affordably? The good news is, you absolutely can! Repairing your travel trailer window shade is a surprisingly straightforward DIY project that can save you a significant amount of money and get your shade back in perfect working order.
Back in the day, there was a saying: “Good, Quick, or Cheap – pick any two.” But when it comes to travel trailer window shade repair, thanks to readily available repair kits, you can actually have all three! For a relatively small investment in a pleated RV shade repair kit, you’ll find everything you need to restring your shades and avoid the high cost of professional repairs or full replacements. These kits, like the Pleated Shade First Aid Kit from United Shade on Amazon, typically contain enough materials to repair multiple shades, making them an incredibly economical solution for common RV maintenance.
The beauty of these kits is that they often come with detailed instructions, specifically designed for both day/night shades and night-only shades, whether they use two or four strings. These instructions, often accompanied by helpful photos and diagrams, guide you through the process of identifying string paths and ensuring correct reassembly. Below, we’ve summarized the steps to repair a night shade, along with some practical tips to make the job even easier.
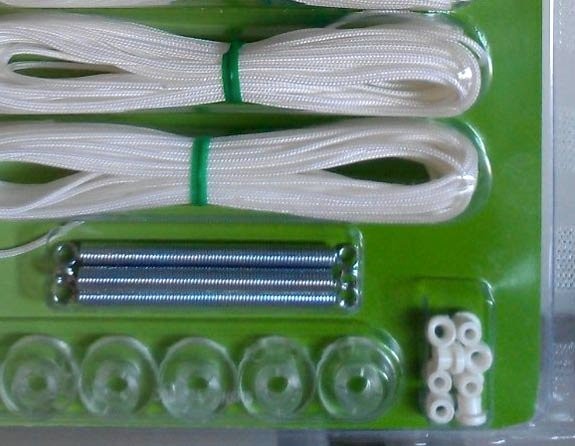 RV Shade First Aid Kit Contents
A comprehensive RV shade repair kit containing cords, springs, bushings and detailed instructions for restoring your travel trailer window shades.
For best results, consider using a United Shade Repair Kit. Their kits are well-regarded and include clear directions to help even novice DIYers successfully restring their RV window shades.
Step-by-Step Guide: How to Restring Your Travel Trailer Window Shade
Before you begin your repair, it’s important to determine what type of shade you have. A day/night shade will use two different fabrics, while a night shade typically uses a single fabric. Once you’ve identified your shade type, clear a large, flat workspace. An uncluttered area will make the process much smoother. Gather your tools, maybe pour yourself a refreshing drink, and take a few minutes to read through the instructions included with your repair kit. Preparation is key!
Tools You’ll Need for Travel Trailer Window Shade Repair:
- Pleated Shade Repair Kit
- Scissors or Sharp Knife
- Scotch Tape (Optional, but helpful)
- Flathead Screwdriver
- Phillips Screwdriver
- Your favorite beverage (Optional, but recommended for a smoother process!)
1. Remove the Broken Shade
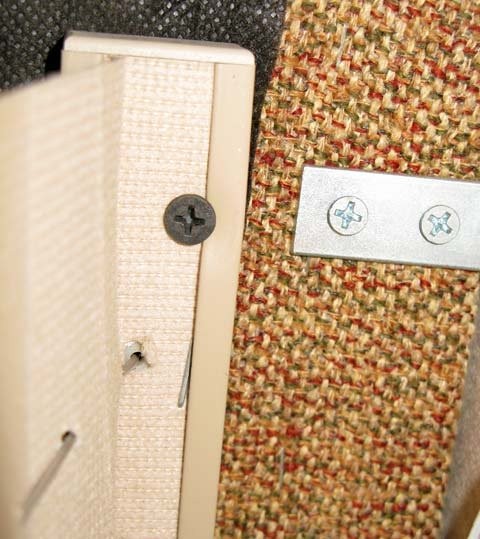
Start by unscrewing the tension cord retainers located at the bottom of the blind. These are usually attached to the wall or window frame. Next, remove the screws that secure the top of the shade to the valance or mounting bracket. Be careful as you remove the shade, as it may be partially held up by the broken string. Take a moment to relax your neck and shoulders after reaching for those screws – RV repairs can sometimes be physically demanding!
 20140716w_restring02
Carefully detach the travel trailer window shade from the wall and valance to begin the restringing process on a flat surface.
2. Access the Rails
Lay the shade on your clean, flat work surface. Using a flathead screwdriver, carefully pry loose the endcaps from both the top and bottom rails of the shade. These endcaps might look slightly different, so take note of their orientation as you remove them. Set them aside in a safe place so they don’t get lost.
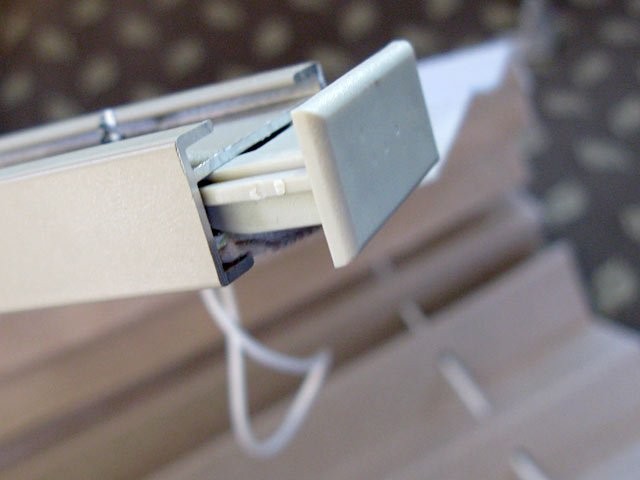 How To Restring Pleated RV Shade
Use a flathead screwdriver to gently remove the endcaps from the top and bottom rails of your travel trailer’s pleated window shade.
3. Remove Old Cords
Once the endcaps are removed, gently pull the old, broken cords completely out of the blind through the holes in the top rail. Pro Tip: It can be helpful to cut off the cord retainers at this stage to give you more room to work and remove the old cords. Discard the old cords and retainers.
 20140716w_restring04
Pull the damaged cords completely out of the travel trailer window shade, preparing it for new strings and smooth operation.
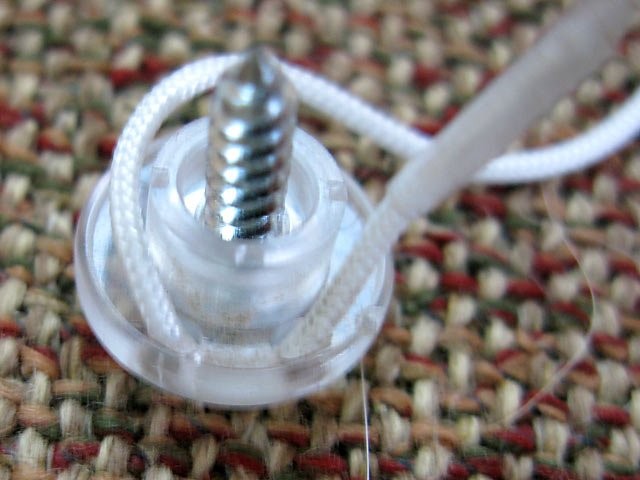
4. Attach New Cord to Springs
Examine the top rail of your shade. Some shades have springs attached to the center of the top rail, while others might not. Depending on your shade type, attach the new cords from your repair kit to either new springs (if provided in the kit) or the existing springs. If your shade is shorter, you might be able to cut one of the new cords in half, saving the remaining cord and extra springs for future repairs. This is a great way to maximize the value of your repair kit.
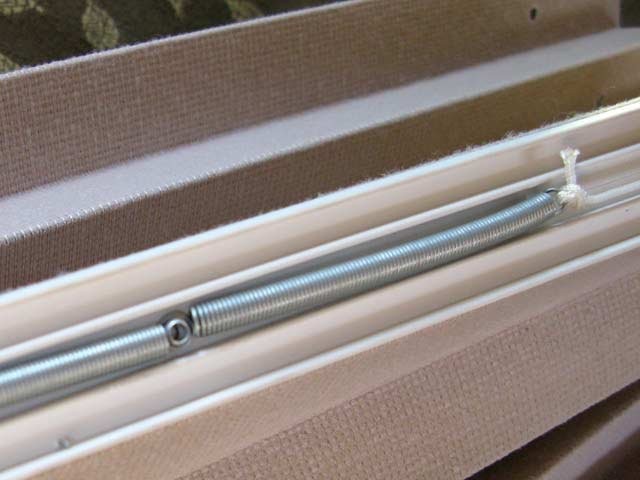 How To Repair Pleated RV Shade
Securely attach the new shade cords to the springs within the top rail mechanism to ensure proper tension and operation.
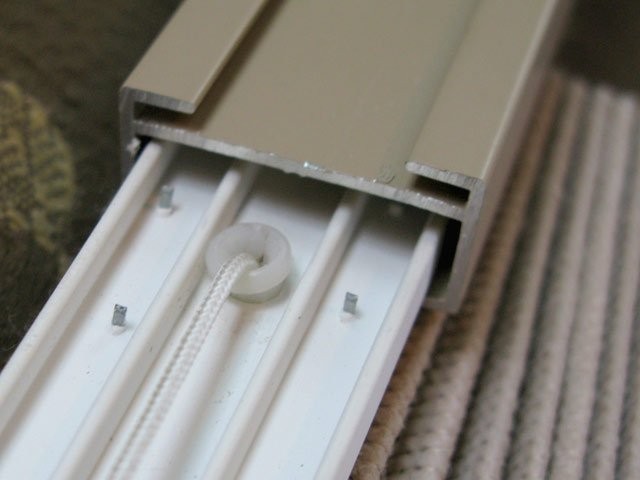
5. Replace Cord Bushings
Small plastic bushings are inserted into the holes in the metal rails to protect the cords from friction and prevent them from fraying and snapping prematurely. Over time, these bushings can wear down, contributing to cord breakage. Inspect the bushings and replace any that look worn or damaged. It’s a good idea to replace them all if your kit provides enough, but be careful, these small parts are easy to lose!
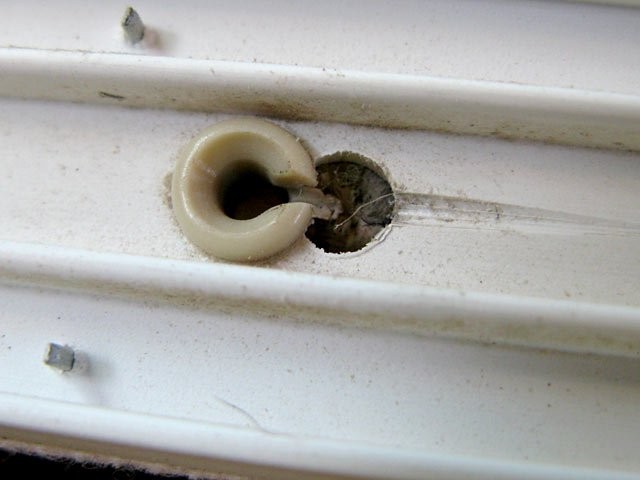 20140716w_restring17
Install new cord bushings in the RV window shade rails to protect the new cords from wear and tear, extending the lifespan of your repair.
6. Restring the Shade
Now comes the slightly fiddly but crucial step: restringing the pleated shade. Thread the new cords into the bushings at the top rail, then carefully guide them through each pleat of fabric, and finally out through the bushings in the bottom rail. Remember that the cord on the right side of the top rail will run down the right side of the shade, and the left cord will run down the left. Helpful Tip: To make threading easier, wrap the ends of the cords with a small piece of Scotch tape, rolled to a point. This creates a makeshift “needle” that will help you guide the cord through the pleats and bushings.
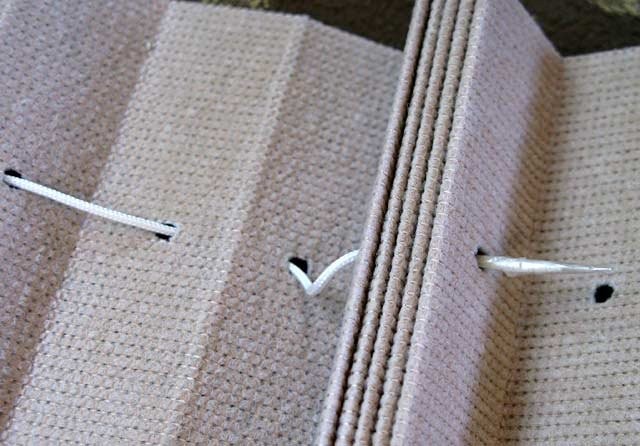 How To Repair Pleated RV Shade
Carefully thread the new cords down through each pleat of the RV window shade fabric, ensuring they are properly aligned for smooth operation.
 How To Repair Pleated RV Shade
Close-up view of the cord being threaded through the individual pleats, maintaining consistent tension and alignment.
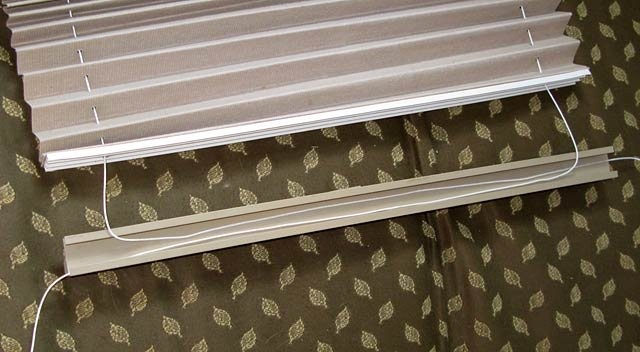
7. Reassemble the Rails
Slide the top rail back onto the shade, ensuring it’s correctly oriented. Identify the correct endcaps for the top rail and replace them. At the bottom of the shade, the cord from the right side should exit through the left endcap, and vice versa – they cross over in the middle. Carefully lay the cords down so they cross and then slide the bottom rail onto the shade. Reinstall the bottom rail endcaps, threading the cords through the designated exit holes in the endcaps. Important: Take your time during this step. Hold the cords taut and guide the rails on slowly to avoid pinching or binding the strings.
 How To Repair Pleated RV Shade
Reattach the top rail to the shade assembly, ensuring proper alignment and smooth cord movement within the mechanism.
 How To Restring Pleated RV Shade
Carefully position the cords and slide the bottom rail onto the shade, ensuring the cords are properly routed through the endcaps.
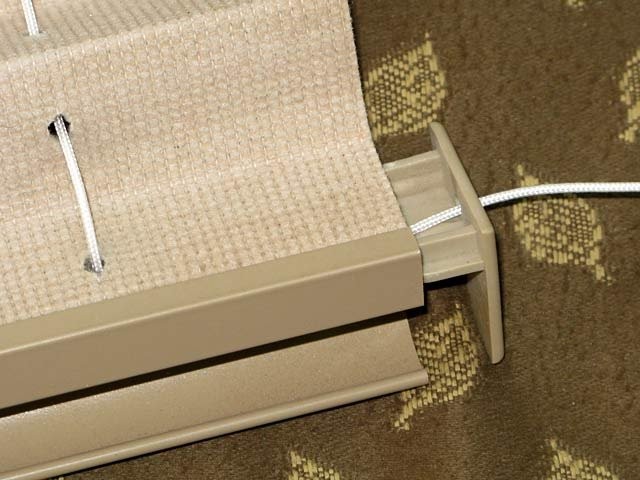
8. Reinstall Retainer Clips and Adjust Tension
Thread the ends of the cords through the new retainer clips provided in your kit. You might be tempted to reuse the old clips, but often new ones are included and it’s best to use them. Tie knots in the cords below the retainers at the desired length for your closed shade. Did you remember to measure the original cord length? If not, the old screw holes in the wall can serve as a good guide for cord length. Note: While the old holes are a guide, avoid reusing the exact same holes when screwing in the retainers, as this can weaken the wall material.
 20140716w_restring48
Install the new cord retainer clips and tie knots in the cords to set the desired length and tension for the travel trailer window shade.
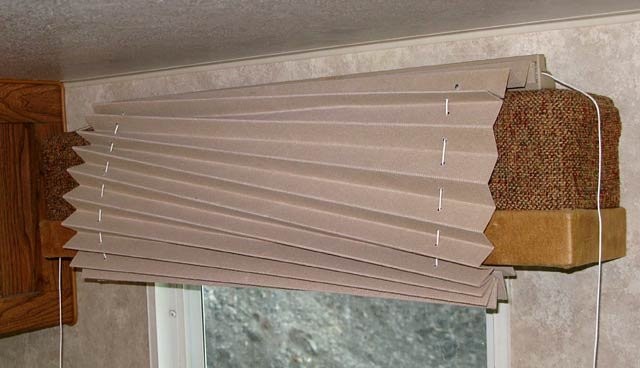
9. Reinstall Shade in Travel Trailer
Attach the top rail of the shade back to the mounting bracket or screw it directly into the valance. Finding those lost screws from disassembly is always a fun mini-game in RV repair! Pro Tip: Resting the bottom rail on top of the valance while you’re screwing in the top rail can help keep the shade out of your way and make the process easier.
 How To Restring Pleated RV Shade
Mount the newly restrung travel trailer window shade back into its original position in the RV window frame.
10. Secure Cord Retainers and Final Adjustments
Screw the new retainer clips into the wall, ideally just above or below the previous holes to ensure a secure hold in solid material. Avoid screwing directly into the old holes as they might be weakened. Test the shade operation. If the blind doesn’t stay raised, you may need to increase the cord tension. Do this by re-tying the knots in a shorter position, effectively shortening the cords. If necessary, you can carefully create new screw holes further down the wall to increase tension, but try adjusting the knots first.
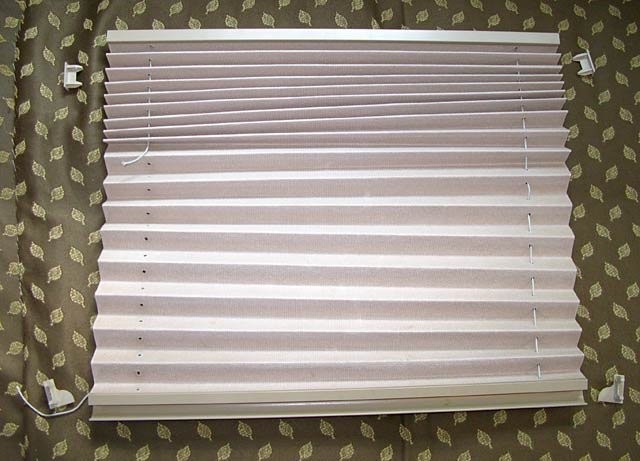
With a little patience and these straightforward steps, you’ve successfully repaired your travel trailer window shade and saved yourself a significant amount of money. Enjoy your perfectly functioning shades and the satisfaction of another successful DIY RV repair!
Any questions?