As mountain bike enthusiasts constantly seek to optimize their ride, suspension adjustments play a crucial role. Recently, the topic of fork travel arose in discussions around the Yeti SB150, a bike often seen with a Fox 36 fork set at 160mm of travel. While this setup is capable, Yeti actually recommends a 170mm fork to perfectly match the bike’s 150mm rear travel, ensuring balanced suspension performance. This recommendation sparked an investigation into the possibility of increasing the travel of a Fox 36 Grip2 fork. Fortunately, Fox makes this adjustment surprisingly accessible, even for home mechanics. This guide will walk you through the process of increasing your Fox 36 fork travel, empowering you to fine-tune your ride and potentially unlock even greater performance from your mountain bike.

Fox’s response to the inquiry about travel adjustment was not only positive but also encouragingly DIY-friendly. They confirmed that increasing the travel from 160mm to 170mm on a Fox 36 Grip2 fork is a manageable task that can be performed at home with the right tools and a bit of know-how. Fox even offered to provide the necessary parts kit and pointed to a comprehensive video tutorial available on their website. A quick visit to Ridefox.com revealed a wealth of information, including detailed guides on fork travel modification and even recommendations for volume spacer adjustments to maintain the fork’s feel after the travel change. Armed with this information and a well-equipped workshop, the decision was made to undertake this fork travel upgrade.
Tools and Parts for Your Fox 36 Travel Adjustment
Before diving into the step-by-step process, it’s essential to gather the necessary tools and parts to ensure a smooth and successful travel adjustment. Having everything prepared beforehand will streamline the process and minimize potential setbacks. You will need:
- Fox 36 Travel Change Parts Kit: This kit, obtainable through a Fox dealer, contains the new air spring piston with the desired travel length. Ensure you order the correct kit for your specific Fox 36 model and desired travel increase.
- Socket Set: You’ll need sockets to remove various bolts and components on the fork. Refer to the Fox service documentation for specific sizes.
- Torque Wrench: Crucial for tightening bolts to the manufacturer’s specified torque. This prevents over-tightening and potential damage.
- Mallet (Soft-faced): Used to gently tap components loose without causing damage.
- Pick or Thin Flat-head Screwdriver: For removing retaining rings and seals.
- Oil Drain Pan/Container: To collect the fork oil during disassembly.
- Measuring Container: To accurately measure the new fork oil.
- Fox 20WT Gold Oil: For lubricating the air spring side of the fork.
- Fox 5WT Oil: For lubricating the damper side of the fork.
- Bike Stand: To securely hold your fork during the service.
- Clean Rags/Shop Towels: For wiping up excess oil and keeping your workspace clean.
Step-by-Step Guide to Increasing Fox 36 Fork Travel
With all the necessary tools and parts assembled, you can now proceed with the step-by-step process of increasing your Fox 36 fork travel. Remember to work in a clean and organized environment, and if you are unsure about any step, consult the official Fox service video for visual guidance.
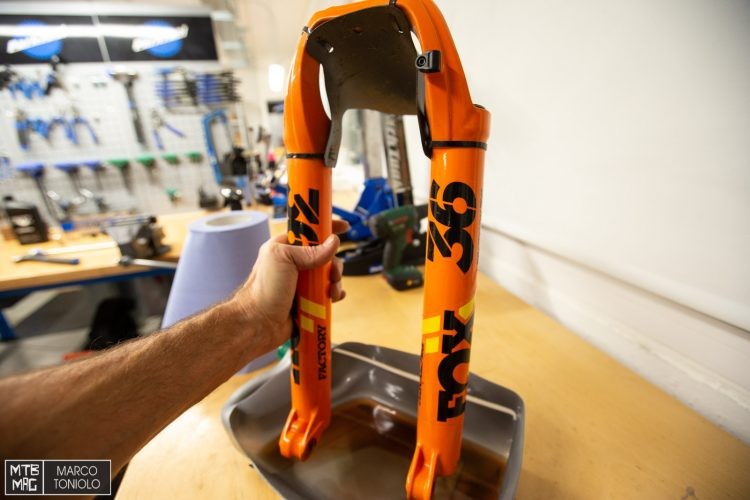
1. Fork Removal and Preparation
Begin by removing the Fox 36 fork from your mountain bike. Once removed, the first crucial step is to completely deflate the air from the positive air chamber. This is essential for safety and to prevent pressure buildup during disassembly. After deflating the air, securely clamp the fork in your bike stand in a horizontal position. This orientation is important to minimize oil spillage when you separate the lower legs from the upper assembly. Next, locate and unscrew the rebound knob at the bottom of the fork leg and then proceed to loosen the bolts that secure the lower leg assembly to the fork uppers.
Alt text: Preparing the Fox 36 fork for travel adjustment, clamped horizontally in a bike stand with lower leg bolts visible.
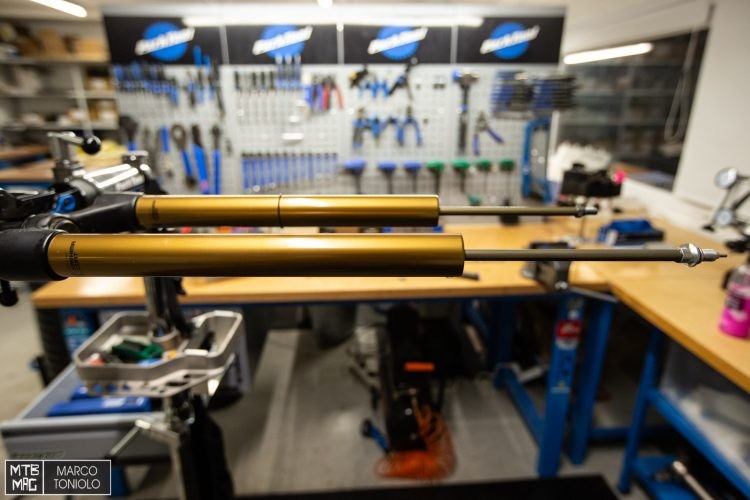
2. Separating the Lower Leg Assembly
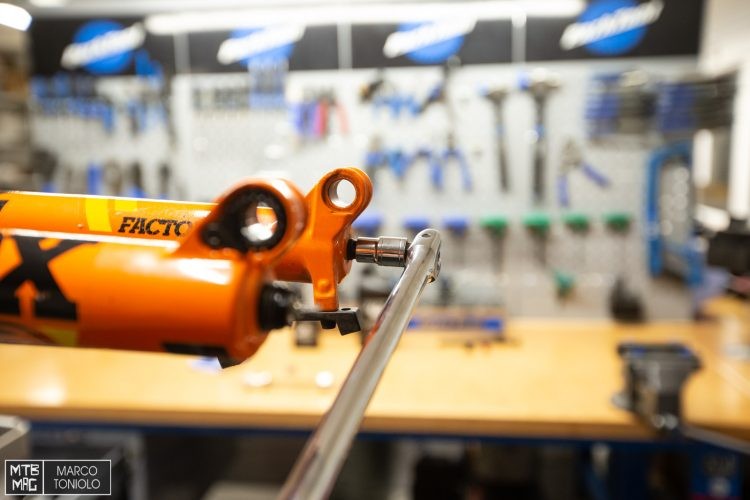
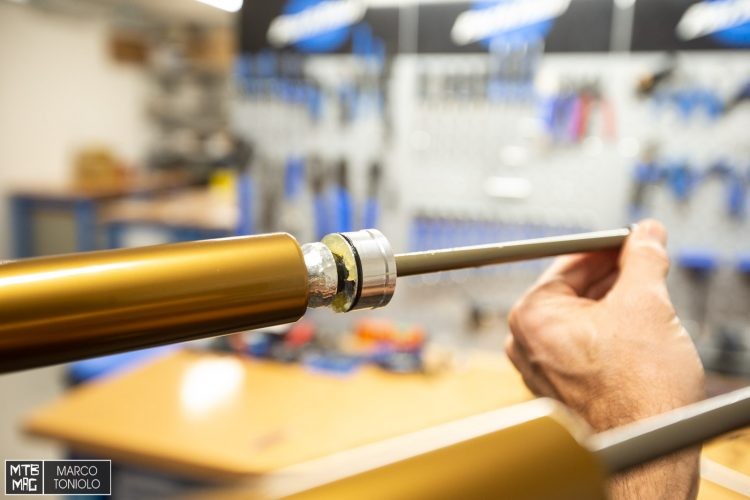
With the lower leg bolts loosened, you’ll need to carefully separate the lower leg assembly from the stanchions. The air spring and damper rods are seated within the lowers, and they might require a gentle persuasion to unseat. While a specialized Fox fitting tool exists for this purpose, a workable alternative is to use a small socket bit with an edge smaller than the threaded section of the rods. Position the socket bit carefully against the rod ends and tap gently but firmly with a mallet to encourage the lower legs to slide off. Exercise caution to avoid damaging the rods or lower leg assembly during this step.

Alt text: Gently tapping the Fox 36 fork rod with a socket and mallet to separate the lower leg assembly during travel adjustment.
3. Draining the Lower Leg Oil
Once the lower leg assembly is separated, carefully drain the oil from the lowers into a designated oil drain pan or container. Proper disposal of used fork oil is essential for environmental responsibility. Transfer the used oil into a sealed bottle for appropriate disposal at a recycling center or authorized waste disposal facility.
Alt text: Draining the used fork oil from the Fox 36 lower leg assembly into a container during a travel adjustment service.
4. Accessing the Air Spring Assembly
Now, focus on the air spring side of the fork (typically the left side). Locate the valve cap at the fork crown and double-check that ALL air is removed from the positive spring chamber. Using the correct socket size, carefully remove the valve cap assembly. This assembly is where volume reducers (spacers) are attached, which influence the fork’s bottom-out resistance.
Alt text: Accessing the air spring assembly on a Fox 36 fork by removing the valve cap at the fork crown for travel adjustment.
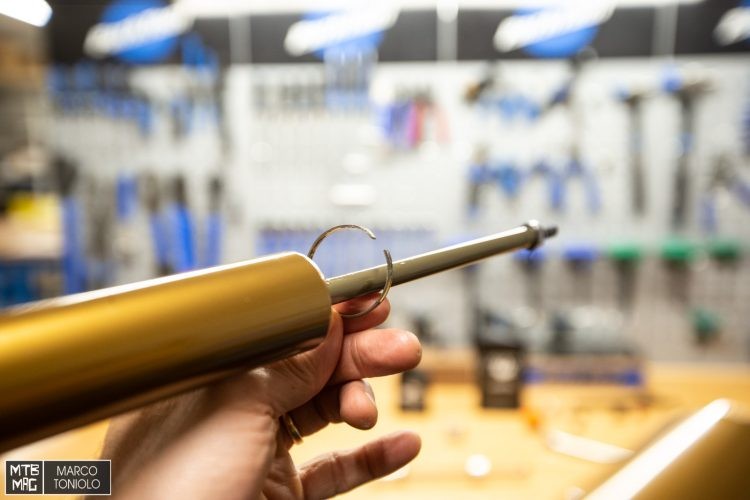
5. Removing the Locking Ring
At the bottom of the stanchion, you’ll find a locking or retaining ring that secures the air spring piston. Use a thin flat-head screwdriver or a pick to carefully remove this locking ring. Take care not to scratch the stanchion inner surface during this step.

Alt text: Removing the locking ring at the bottom of the Fox 36 stanchion to access the air spring piston during a travel adjustment procedure.
6. Replacing the Air Spring Piston
With the locking ring removed, you can now carefully extract the old air spring piston. This is the component you will be replacing to increase the fork travel. Compare the old piston with the new 170mm piston from your Fox travel change kit. You’ll notice the only difference is the length. Lubricate the new 170mm piston with fresh Fox 20WT Gold oil before installation. Note the clean condition of the original piston, highlighting the durability of Fox components even after extended use.
Alt text: Extracting the old 160mm air spring piston from a Fox 36 fork in preparation for replacement with a 170mm piston to increase travel.
Alt text: Side-by-side comparison of the old 160mm Fox 36 air spring piston (right) and the new 170mm piston (left) for travel adjustment.
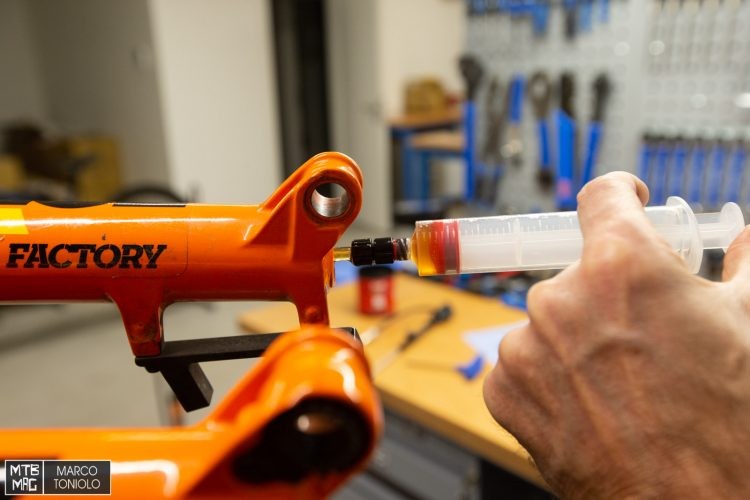
7. Reassembly and Oil Refill
With the new 170mm air spring piston installed and lubricated, it’s time to reassemble the fork. Reinstall the locking ring to secure the new piston in place. Next, add a small amount – approximately 3cc – of fresh Fox 20WT Gold oil above the piston for lubrication. Reinstall the top cap assembly, noting the recommendation from Fox to start with the new 170mm travel configuration without any volume spacers. You can always add spacers later to fine-tune the fork’s progressivity. Initially, inflate the air chamber to approximately 70 psi as a starting point. Fine-tuning the air pressure will be necessary once the fork is back on the bike and you can dial in your preferred settings based on your weight and riding style.
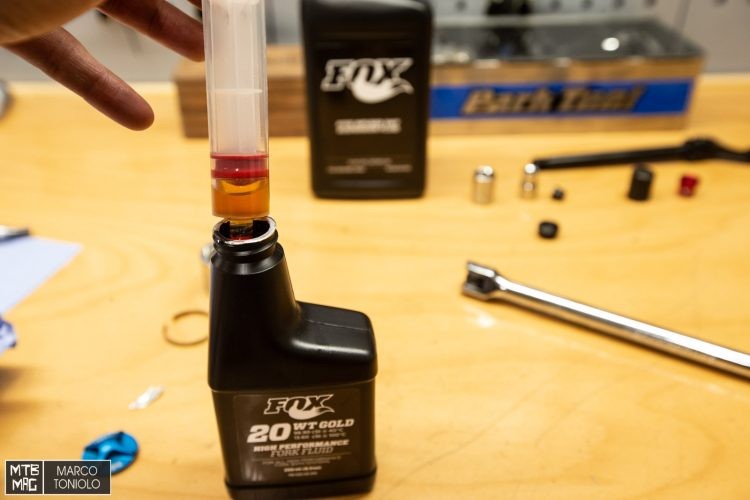
Alt text: Adding fresh Fox 20WT Gold oil to the air spring side of the Fox 36 fork during reassembly after a travel adjustment.
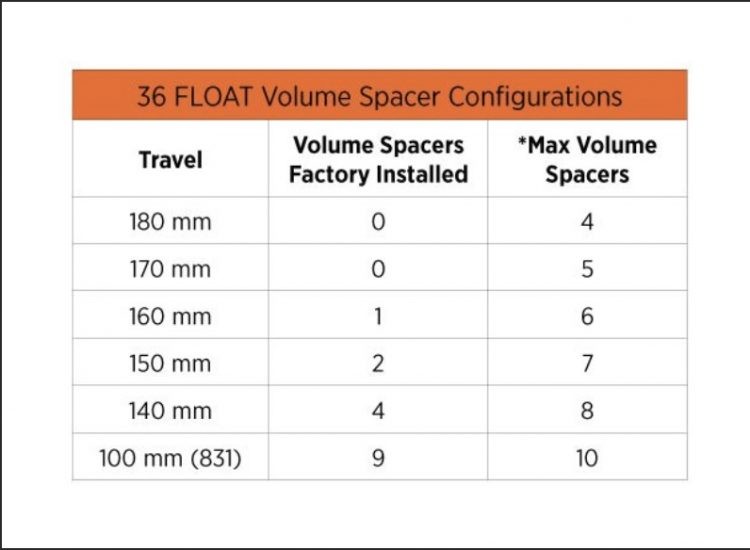
Alt text: Fox recommendation chart for volume spacer configuration after Fox 36 travel adjustment, suggesting starting without spacers for 170mm travel.
8. Reinstalling the Lower Leg Assembly and Adding Oil
Carefully reinstall the lower leg assembly onto the stanchions. This step requires some patience to align the stanchions correctly with the dust wipers and push the lowers back into place smoothly. Once the lowers are in position, add fresh fork oil to both sides. On the air spring side (the side you just serviced), add 10cc of Fox 20WT Gold oil. On the damper side (sealed cartridge side), add 40cc of Fox 5WT oil.
Alt text: Reinstalling the lower leg assembly on a Fox 36 fork during a DIY travel adjustment service procedure.
Alt text: Adding fresh Fox 20WT Gold oil to the air spring side and Fox 5WT oil to the damper side of the Fox 36 fork during reassembly.
9. Final Touches and Torqueing Bolts
Finally, tighten the lower leg bolts to their specified torque values using a torque wrench. Refer to Fox’s documentation for the correct torque specifications for your Fox 36 model (typically 5Nm on the damper side and 9Nm on the air spring side). This ensures proper sealing and prevents bolt failure.

Alt text: Tightening the lower leg bolts on a Fox 36 fork to the correct torque specification using a torque wrench after travel adjustment.
Back on the Trail with Increased Travel
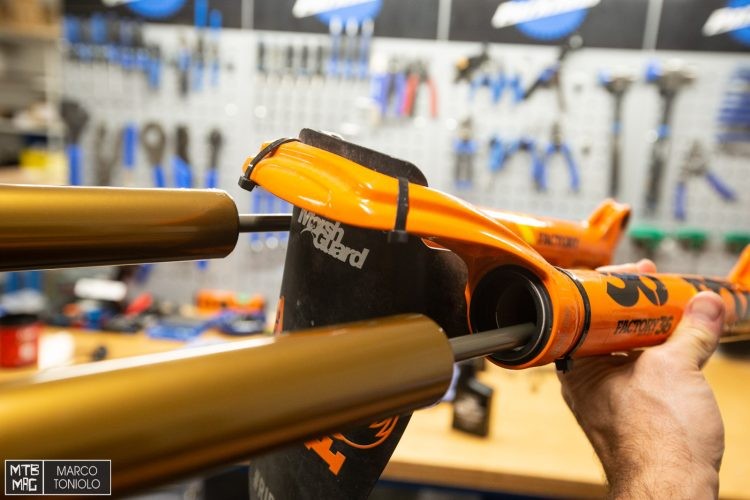
With the travel adjustment complete, the final step is to reinstall your Fox 36 fork onto your mountain bike. Once reinstalled, double-check all bolts and settings before heading out for a ride. Remember to fine-tune your fork’s air pressure and rebound settings to match your riding style and the increased travel.

Alt text: The Fox 36 fork with increased travel, ready to be reinstalled on the mountain bike and tested on the trail.
Increasing your Fox 36 fork travel is a rewarding DIY maintenance task that can enhance your bike’s performance and adapt it to different terrains or riding preferences. Beyond increasing travel, this process can also be reversed to decrease travel if needed, offering versatility when switching frames or adjusting your bike’s geometry. Remember to always consult Fox’s official resources and exercise caution when performing any suspension service. With a bit of patience and the right tools, you can confidently adjust your “Travel Fox” and enjoy a more customized and capable ride.