Preparing your travel trailer for winter involves more than just covering it up. For RVers planning to live in their trailers during the colder months, protecting the water system from freezing temperatures is paramount. While “winterizing” can refer to preparing an RV for storage, this guide focuses on how to prepare your Travel Trailer Water Hose for winter living, ensuring a continuous water supply even when temperatures drop.
Having experienced winter RV living firsthand, including winterizing my own travel trailer for storage, I understand the nuances of cold-weather RV preparations. While I sought assistance during my initial winterizing experiences, I’ve gathered essential knowledge to guide you through the process of prepping your water hose.
This article will walk you through a simple yet effective step-by-step method for preparing your travel trailer water hose for winter living. We’ll concentrate on the water hose in this part, and in a follow-up article, we will cover preparing your sewer line and addressing other crucial RV components like the water heater, furnace, and internal plumbing.
Understanding the Need for Winterizing Your Water Hose
My introduction to winter RV living began unexpectedly. Upon picking up my travel trailer in Tennessee in October 2017, I headed straight to Walla Walla, Washington, to join friends who were already full-time RVers. Their experience proved invaluable as they helped me navigate the initially overwhelming aspects of RV life and maintenance.
I was so focused on settling into RV life that I hadn’t considered the weather. During my two-month stay, the area experienced significant snowfall and a severe ice storm – a first for me, despite 25 years of Alaskan living! This unexpected turn of weather highlighted the immediate need for winter preparations. The same day I arrived at the RV park, my friend’s husband began preparing my trailer for the approaching cold, starting with winterizing the water hose.
Essential RV Winter Living Preparation: Preventing Frozen Water Lines
The core principle of preparing your RV for winter living is straightforward: prevent freezing in your water lines. This includes both the external water hose supplying water to your RV and the internal plumbing system. While various methods exist for internal plumbing, preparing the external water hose typically follows a standard approach. Let’s focus on that now.
Step-by-Step Guide: Preparing Your Travel Trailer Water Hose for Winter
The process of preparing your water hose for cold weather is straightforward and affordable. You can typically acquire all necessary materials for under $50, potentially slightly more if a longer heat cable is required.
Materials You’ll Need:
- Water pipe heat cable (ensure it’s the correct length for your hose)
- Foam pipe insulation sleeves
- Waterproof tape
- Foam faucet covers
- Extension cord (likely needed)
Step-by-Step Instructions:
Step 1: Apply Heat Cable to the Water Hose
Begin by wrapping the water pipe heat cable around your water hose. Refer to the instructions included with your specific heat cable for detailed guidance. Generally, these cables have a sensor or control box near the plug end. The section from this sensor to the plug is usually unheated. Position the sensor near the water source pipe coming from the ground, closest to the ground level. Then, wrap the heat cable upwards along the water source pipe and continue wrapping it along the entire length of your water hose, extending all the way to the RV connection point.
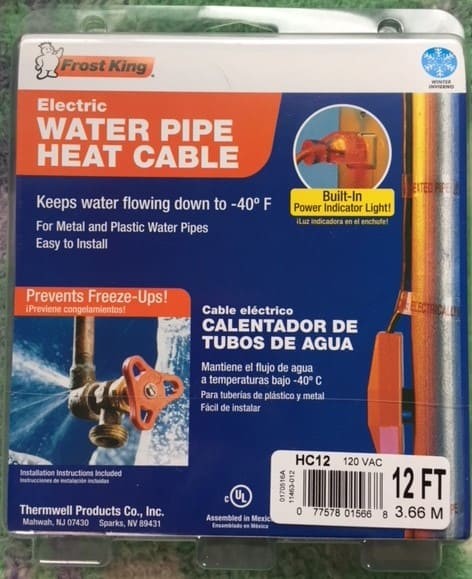 Package of water pipe heat cable.
Choose a heat cable length appropriate for your hose. Twelve feet worked well in my case, but measure your setup to ensure proper coverage.
Step 2: Insulate the Hose with Foam Pipe Insulation
After applying the heat cable, encase the hose and heat cable in foam pipe insulation. While the heat cable prevents freezing, insulation enhances protection and improves efficiency by retaining heat and shielding the cable and hose from the elements. If your foam insulation isn’t pre-split, carefully cut it lengthwise using a sharp knife or utility razor. Enclose the entire length of the water hose, and also insulate the exposed water source pipe. Seal the foam insulation using waterproof tape to prevent moisture and cold air penetration.
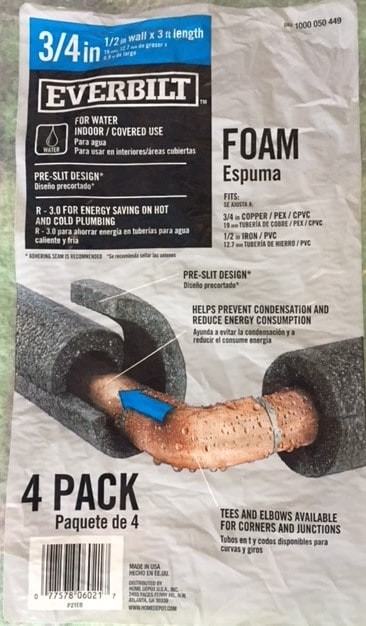 Packaging for pipe foam insulation.
Foam pipe insulation typically comes in sections, often three-foot lengths. Purchase enough to cover the full length of your water hose and the exposed water source pipe.
In a pinch, a pool noodle, commonly found among RV supplies, can serve as emergency insulation. While less effective at trapping heat than proper foam insulation, it provides a protective layer. (Interestingly, despite writing a post on pool noodle uses for RVs, I didn’t consider this winterizing hack at the time!)
Step 3: Protect Hose Ends with Foam Faucet Covers
Finally, apply foam faucet covers to both ends of the water hose – at the water source and where it connects to your RV. These covers provide crucial insulation at the connection points, often more exposed to cold. At the water source, the cover might sit securely due to the upward orientation. However, at the RV connection, secure the foam cover firmly to the hose, potentially using painter’s tape for added support without damaging your RV’s finish.
Once everything is in place, plug in the heat cable using an extension cord if needed. Test your setup and monitor it for a few days to ensure it’s functioning correctly and ready for freezing temperatures.
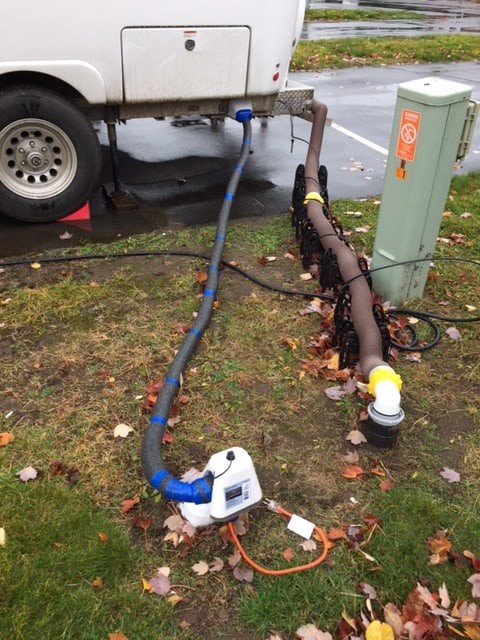 While camper hooked up to sewer and a water hose that has been winterized.
The finished, winterized water hose setup, ready for cold weather. Remember to plug in the heat cable to activate the system.
Extra Tips and Considerations for Water Hose Winter Prep
- Prevent Drips: Ensure a watertight seal by replacing the rubber washer in your hose connections before winterizing. This prevents leaks that can freeze and cause issues.
- Use a Water Pressure Regulator: Always use a water pressure regulator to protect your RV’s plumbing system. As I learned firsthand, pressure damage is worse in freezing conditions.
- Position Insulation Seam Downward: Orient the seam of the foam pipe insulation facing downwards to minimize snow or moisture accumulation inside the insulation.
- Adapt to Ground-Level Water Sources: These instructions assume an elevated water source. Adjust the wrapping and insulation method accordingly if your water source is at ground level.
- Consider Future Needs: If you anticipate winter RV travel in various locations, invest in a heat cable long enough for different setups. A too-short cable can become a problem in future winters.
- RV Park Regulations: Many RV parks in cold regions have winterization guidelines. They may provide instructions or even assistance, as protecting their water infrastructure is also a concern. The RV park in Walla Walla provided the helpful graphic below with their winterizing instructions.
Alternative Approach: Using Your Fresh Water Tank
Forgoing the water hose connection altogether is another option. Instead, rely on your travel trailer’s fresh water tank, similar to boondocking. This eliminates the need to winterize the hose. However, remember that internal RV plumbing still requires freeze protection.
This method worked well for me during a winter stay in New Mexico. Night temperatures were cool, but rarely freezing. For brief cold snaps, disconnecting the hose and using tank water was sufficient. This was convenient as my water needs were minimal, utilizing park bathhouses for showers.
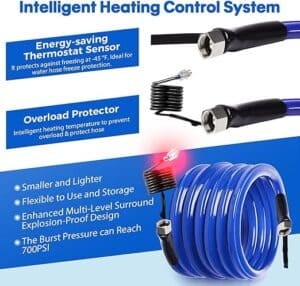
Updated Technology: Heated Water Hoses
A recent conversation with a fellow RVer introduced me to a convenient alternative that simplifies water hose winterization significantly: heated water hoses. While more expensive upfront, these hoses have integrated heating systems. Simply plug them in, and they provide freeze protection, eliminating the need for separate heat cables and insulation. While less common in my experience at cold-weather RV parks compared to the DIY method described above, heated water hoses may represent the latest advancement in RV winter technology.
Conclusion: Preparing Your Water Hose for Winter RV Living – Part 1
These steps provide a comprehensive guide to preparing your travel trailer water hose for winter living. If you’ve used different methods for water hose winterization, I’d be interested to hear about your experiences. In the next article, we’ll address Part II of RV winter living prep: sewer lines and internal RV plumbing.
Continue to Part II: Sewer Lines and RV Pipes
For the next part of this guide on RV winter living, please go HERE.