For those of us who love the RV lifestyle, the call of the open road is matched only by the craving for delicious meals cooked outdoors. Like many RVers, we’ve gone through our fair share of grills in pursuit of the perfect outdoor cooking setup. Our journey wasn’t always smooth, filled with grills that were either too bulky, unreliable in windy conditions, or simply couldn’t handle the heat – literally! This is the story of how we finally found our ideal solution and became Blackstone Travel Grill converts, transforming our RV outdoor cooking experience for the better.
We were slow to accept that our grilling situation needed a serious upgrade. Over the years, we had accumulated a collection of grills, each with its own set of shortcomings for full-time RV travel. Size was a persistent issue. Many grills are simply too large and cumbersome to be practical when space is at a premium in an RV. One particular grill, which shall remain unnamed, proved to be the final catalyst for change. It was a windy evening when we left it outside, and a strong gust sent it tumbling. Parts went flying, and while thankfully it wasn’t in use at the time, it was clear this grill wasn’t cut out for the rigors of RV life. Storage was another headache. Packing this bulky grill into the RV meant it often dictated how other items were stored – usually soft items piled on top of it. And as for wind resistance, well, that one fateful night proved its weakness all too dramatically.
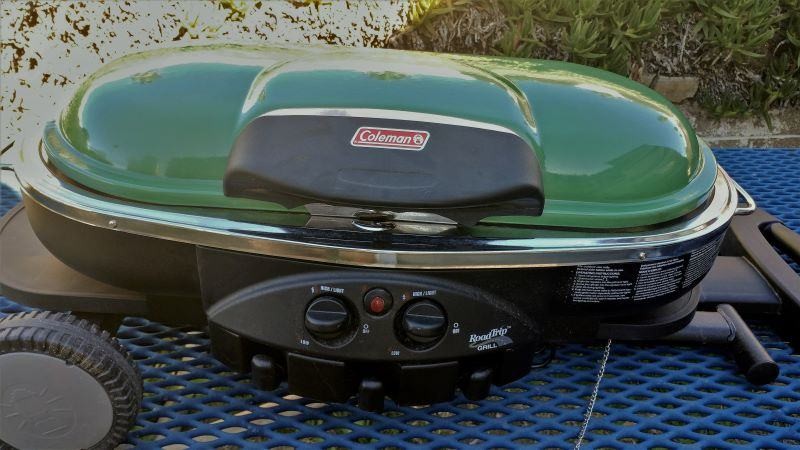 Our previous Coleman two-burner grill has a built-in grill stand and tray tables.
Our old Coleman two-burner propane grill, featuring a built-in stand and convenient side tables, illustrating common portable grill design for camping.
Our previous Coleman two-burner grill, pictured above, seemed like a good option initially. It even had a built-in stand and handy tray tables. In its early days, as you can see, it was a pretty decent grill. We appreciated the versatility of having both a traditional grill grate on one side and a solid cooktop on the other. It took us a little while to realize the purpose of the water trays inside, designed to catch grease. The idea was clever – grease would drip into the water, supposedly making cleanup easier. And to some extent, it worked. Once cooled, the grease-water mixture could be poured out, ideally into a fire pit.
Then came the detour into the world of sous vide cooking. A friend, a former professional chef, introduced me to sous vide. While seasoned culinary experts might not rely on such devices, for home cooks like us, sous vide has been a game-changer in meat preparation. If you’re not familiar, sous vide is a cooking technique that allows for incredibly tender and evenly cooked meat, often rivaling restaurant-quality results.
The following image showcases our sous vide cooker in action, gently slow-cooking a tri-tip roast in the kitchen. The precise temperature of 134 degrees Fahrenheit and an extended cooking time of twenty-one hours are key to transforming a tri-tip into a truly melt-in-your-mouth experience, boasting a perfect pink hue throughout.
 Sous Vide cooker in action. The temperature is 134 degrees Fahrenheit and the cooking time is 21 hours.
Sous vide immersion cooker maintaining a precise 134°F temperature for a 21-hour cook on a tri-tip roast, a modern kitchen appliance for achieving perfectly cooked meat.
After the sous vide process, the next crucial step is searing the meat at a high temperature to develop a flavorful crust. This is where our grill came back into the picture – or rather, where one of our grills met its fiery end.
Without delving into the complete sous vide cooking method, let me just say that the process retains all the natural juices and fats within the meat. When I went to sear a sous vide tri-tip over an open flame on a previous, less robust grill, disaster struck in under a minute.
 This was the result of too much grease on a very inexpensive grill. The meat was only on the grill to sear the outside. It worked great, after that I had to dispose of the grill.
Aftermath of a grease fire on a budget grill, showing melted paint and damage from high heat, a result of searing sous vide cooked meat with rendered fat.
The image above shows the dramatic outcome of too much grease meeting a very hot, budget-friendly grill. The searing process worked a little too well, leading to a grease fire so intense it melted the paint right off the grill. After rescuing the tri-tip from the flames and extinguishing the fire with the lid, the grill was beyond saving. By morning, it was completely rusted and destined for the dumpster.
Seeking a way to manage grease and avoid another grill casualty, I turned to cast iron. Last year, I began using a cast iron skillet on our small propane grill, hoping to contain the grease and shield the grill from excessive heat. The following photo showcases a delicious meal cooked in our cast iron skillet, a testament to its versatility.
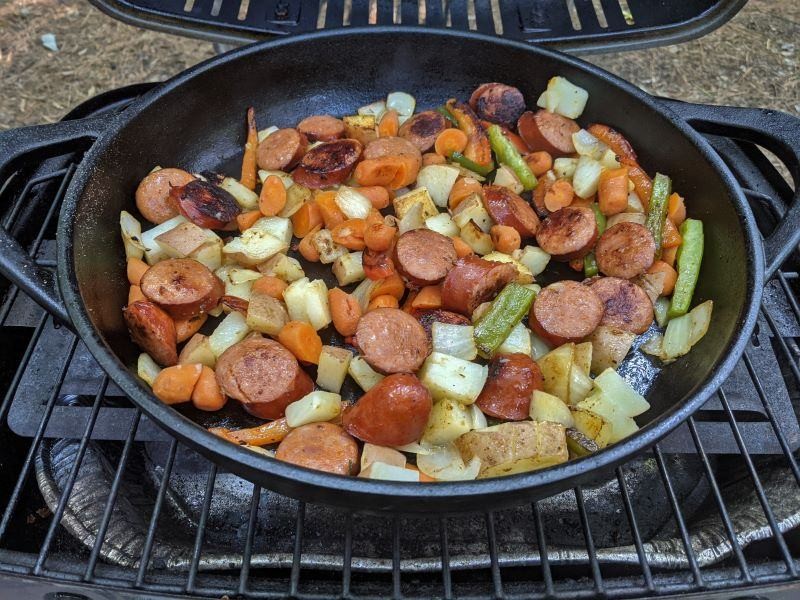 Our previous grill with our cast-iron skillet.
Portable propane grill with a cast iron skillet on top, demonstrating an attempt to use cast iron for controlled cooking and grease management on a smaller grill.
This grill, slightly pricier than the fire-damaged one, held up marginally better. However, the paint still couldn’t withstand the heat over time, and rust gradually crept across its surface. It lasted only about a year before joining its predecessor in the dumpster.
In search of a more durable solution, we replaced it with a Weber grill, a brand renowned for its quality. The picture below shows our brand new Weber grill. Ironically, we never actually used it. While Weber grills are popular for good reason, this particular model proved to be too tall for our RV’s storage compartment.
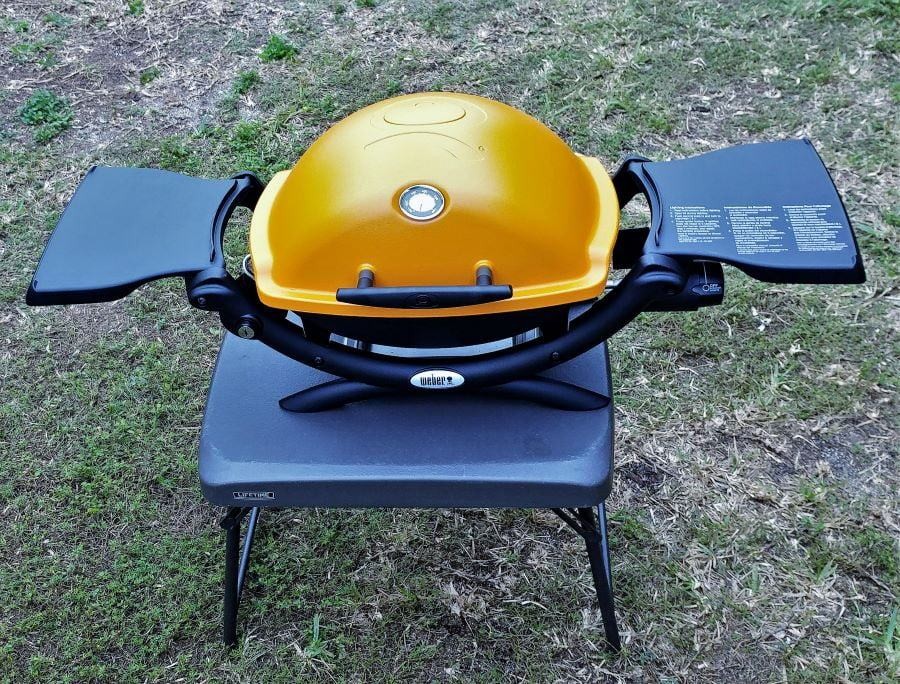 New Weber Q grill that would have been great if it had fit in our slide tray. The grill is a little too tall.
Unused Weber Q series portable grill, highlighting its compact design yet slightly too tall profile for some RV slide-out storage trays.
The Weber, with its porcelain-enameled exterior and cast aluminum construction, likely would have been a long-term answer to the heat-related paint issues and rust. But since it didn’t fit our storage needs, we made the tough decision to give it up while it was still new. That’s when we discovered the Blackstone griddle and made the switch.
The Blackstone isn’t just another grill; it’s a griddle, and it has effectively replaced both our grill and my cast iron skillet. My last grill is now a memory, rusting away in a landfill, though I’m still holding onto the cast iron skillet for now. The Blackstone griddle boasts a flat, thick steel cooking surface situated atop a burner box. Remarkably, the burner box stays cool enough to use on our plastic folding table without any worry of heat damage.
 Blackstone 17-inch griddle on our small table.
Compact Blackstone 17-inch tabletop griddle set up on a small folding table, showcasing its portable size and suitability for outdoor cooking on various surfaces.
Two features set our Blackstone 17-inch griddle apart from other Blackstone models. First, it has a built-in lid. For us, any outdoor cooking appliance without a lid is simply not an option. The lid allows for higher cooking temperatures and provides crucial protection for the griddle surface when not in use. The second key differentiator is its size. Our 17-inch model is the smallest propane-fueled Blackstone griddle available. While electric Blackstone griddles exist, you won’t find an electric version with a lid.
Perfectly Sized for RV Cooking?
A common question we hear is, “Is the 17-inch Blackstone griddle big enough?”. For our RV cooking needs, the answer is a resounding yes. We find the cooking surface to be ample.
 One of the very best uses for the grill is cooking bacon. The Blackstone griddle here in this picture is cooking one-pound of bacon.
Blackstone 17-inch griddle cooking a pound of bacon, highlighting the griddle’s even heat distribution and ample surface for cooking breakfast staples outdoors.
One of the best uses for our Blackstone travel grill is cooking bacon. As shown above, it effortlessly handles a pound of bacon at a time. Beyond the obvious benefit of crispy bacon, cooking bacon on the griddle serves another purpose: the rendered bacon grease seasons the griddle surface, enhancing its non-stick properties over time. We’re even considering getting another identical plastic table just to dedicate it to our Blackstone cooking gear.
Small Enough for RV Storage
The Blackstone 17-inch griddle is also perfectly sized for RV storage. Unlike the Weber grill, it’s not too tall to fit in our slide tray. And unlike our old Coleman grill, it’s not too wide either. Its compact dimensions mean we can easily store it away when not in use, although we often keep it readily accessible. Since we bring everything with us on our travels, dedicating storage space to the Blackstone was a worthwhile trade-off.
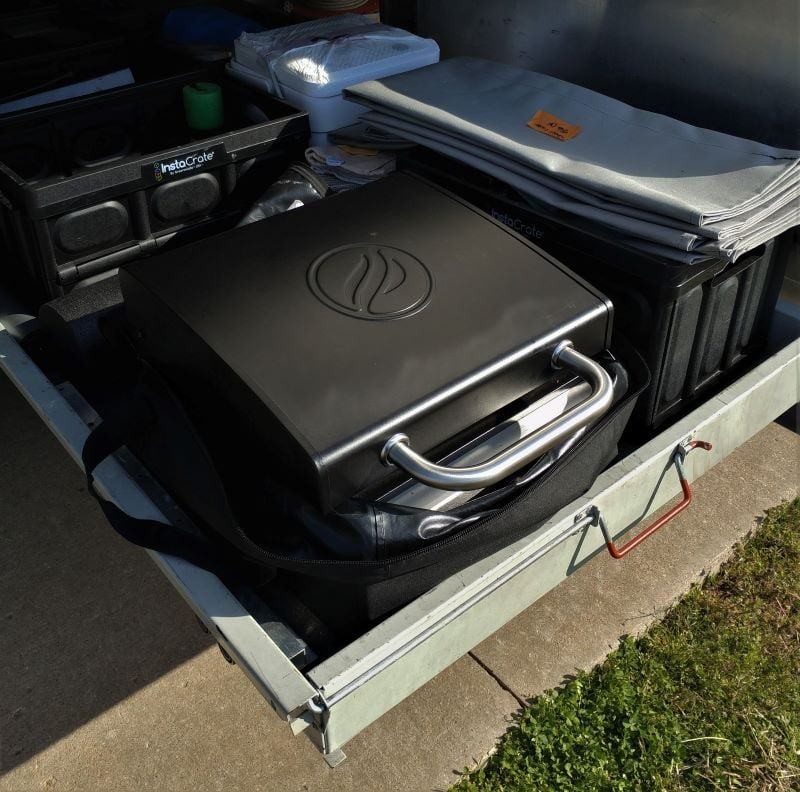 The griddle is in our slide tray which is in our storage bay. I always remove the grill from the storage bag and then use the storage bag for a cover.
Blackstone griddle stored in an RV slide-out tray, showcasing its compact size for easy storage and the carry bag repurposed as a protective cover.
The picture above shows the Blackstone griddle in our RV’s slide tray within the storage bay. We typically remove the griddle from its storage bag and then use the bag itself as a cover when leaving the griddle outside.
 Blackstone 17-inch griddle under the carry bag that doubles as a cover.
Blackstone 17-inch griddle covered with its carry bag, demonstrating the bag’s dual function as both a carrying case and a protective cover during storage or outdoor use.
This next image shows our Blackstone griddle neatly packed in its storage bag, ready for travel.
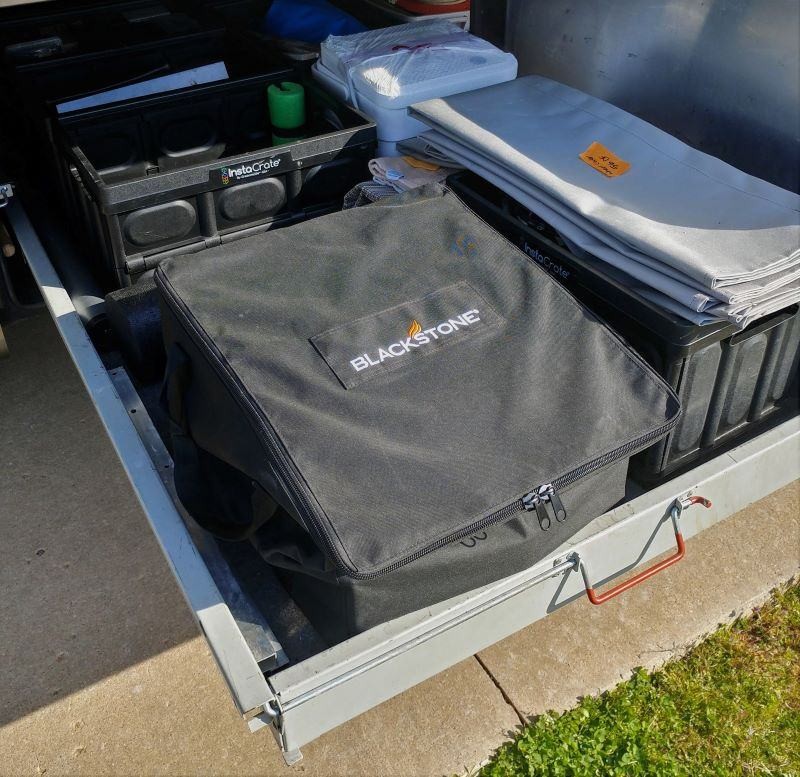 Our Blackstone grill ready to get out and get to cooking.
Blackstone griddle zipped up in its carry bag, emphasizing its portability and readiness for travel or outdoor cooking adventures.
Whether it’s ready for cooking or packed for our next campsite, the Blackstone griddle is a remarkably neat and convenient package. We never achieved this level of clean and compact storage with any other grill we’ve owned.
Construction and Ease of Use
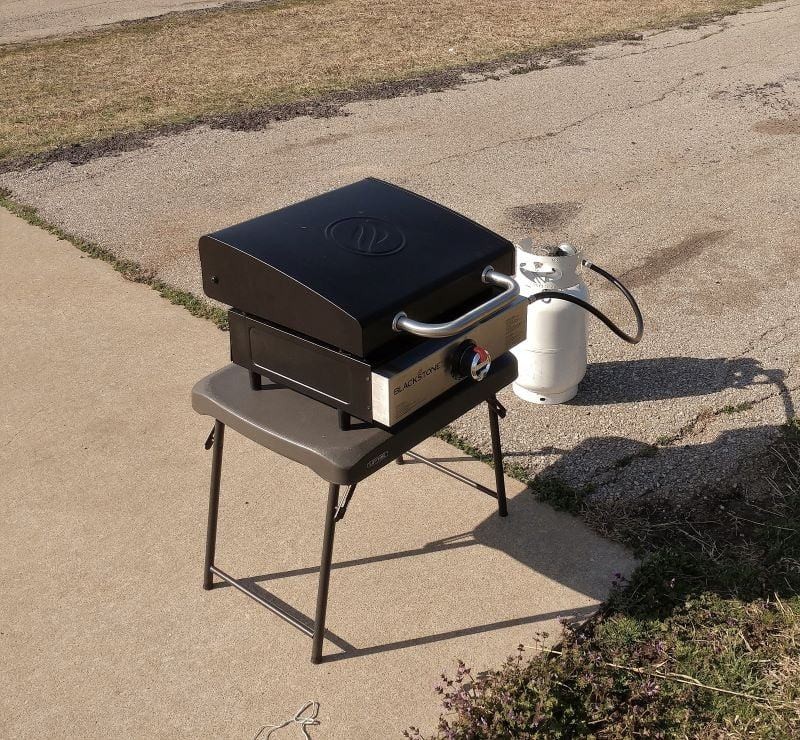
The Blackstone griddle is constructed in two main parts. First, there’s the firebox, pictured below, which houses the burner tube. The burner tube is designed to distribute heat evenly across the entire cooking surface. The firebox is vented at both the back and bottom. At the front, you’ll find the control/ignition knob. To ignite the griddle, simply rotate the knob to release propane and activate the igniter. In our experience, ignition is reliable, usually taking only two or three attempts, even with a fresh propane bottle and an empty hose.
 After removing the griddle from the box. Before putting the griddle surface on the burner.
Blackstone griddle firebox and burner assembly, detached from the cooking surface, illustrating the basic components and construction before initial setup.
The top section is the cooking surface itself, which sits on top of the burner box. The integrated hood is attached to the cooking surface and lifts to reveal the cooking area.
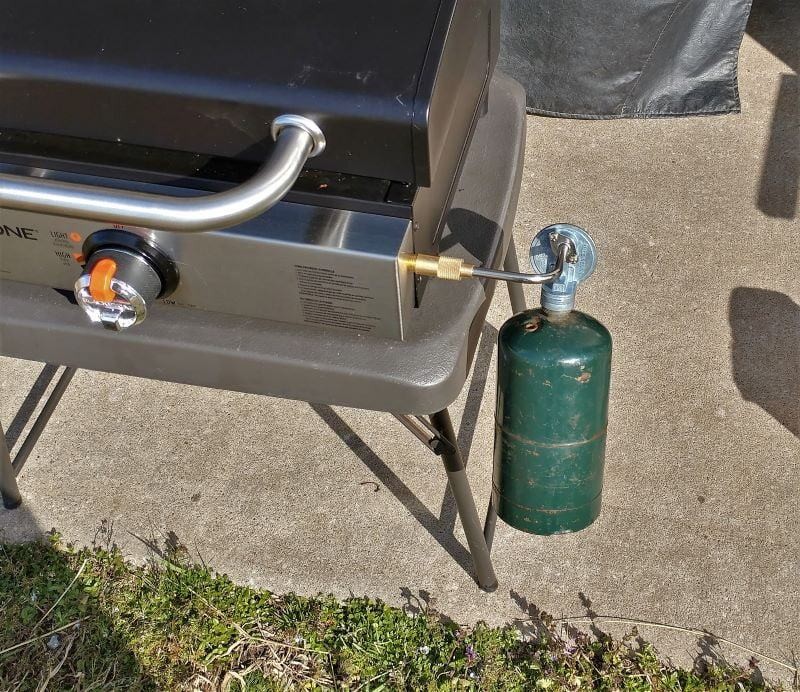 The 17-inch Blackstone comes with an adapter for a one-pound propane cylinder.
Blackstone 17-inch griddle with a propane adapter for one-pound cylinders, showing the included accessories and options for portable propane fuel sources.
The 17-inch Blackstone griddle comes with an adapter for one-pound propane cylinders. However, we opted for a propane extension hose to connect the griddle to a larger portable propane tank. While a longer hose could potentially reach our RV’s built-in propane system, we prefer using a separate tank for safety and convenience. The thought of accidentally leaving the griddle on and draining our 35-gallon RV propane tank is enough to deter us!
Mastering Your Blackstone Travel Grill
As mentioned earlier, I’ll be dedicating a separate article to the specifics of how to use the Blackstone griddle effectively. You can find that detailed guide here: Cooking on our Blackstone
Join Our RV Cooking Journey!
Want to stay updated on our RV adventures and outdoor cooking tips? Subscribe to our email list for weekly updates! Join us here: Subscribe
Blackstone Travel Grill Product Link
Interested in the Blackstone 17-inch Griddle with Hood? You can find it on the Blackstone website:
Blackstone 17-inch Griddle with Hood
Transparency and Recommendations
Please note that the links provided are for your convenience and informational purposes. We do not receive any income or commissions from these links, nor do we engage in paid endorsements. Our articles are based on our genuine experiences and opinions. We share what we like (and sometimes dislike) in the hope that it will be helpful to you, our readers. We appreciate you taking the time to read our articles and hope you find them valuable!