Can Filipino citizens travel to the USA? Yes, Filipino citizens can travel to the USA, but it is essential to understand the requirements and procedures involved. TRAVELS.EDU.VN can help guide you through every step, ensuring a smooth and enjoyable journey. Let’s explore the visa options, application process, and valuable tips for Filipinos planning a trip to the United States, focusing on visa types, travel requirements, and helpful resources.
1. Understanding Visa Requirements for Filipinos Traveling to the USA
Navigating the US visa system can be complex, but understanding the specific requirements for Filipinos is the first step toward a successful trip. Here’s what you need to know:
1.1. Types of US Visas Available to Filipinos
The United States offers various types of visas, each designed for specific purposes. Here are some of the most common ones available to Filipino citizens:
- B-1/B-2 Visa (Tourist/Business Visa): This is the most common visa for Filipinos visiting the US for tourism, leisure, or business purposes like attending conferences, negotiating contracts, or consulting with business associates. It’s a temporary visa that allows stays for a maximum of six months per entry.
- F-1 Visa (Student Visa): For Filipinos seeking to study at a US educational institution. This requires acceptance into a Student and Exchange Visitor Program (SEVP)-approved school.
- J-1 Visa (Exchange Visitor Visa): This visa is for individuals participating in exchange programs, such as cultural exchange, work, or study programs.
- H-1B Visa (Specialty Occupations Visa): Designed for professionals in specialized fields who have a job offer from a US employer.
- Immigrant Visas: For those intending to live permanently in the United States. These visas are often based on family sponsorship or employment.
1.2. Visa Waiver Program (VWP) and Filipinos
Unfortunately, the Visa Waiver Program (VWP), which allows citizens of certain countries to travel to the US for tourism or business for up to 90 days without a visa, is not available to Filipino citizens. Filipinos must apply for a visa to enter the United States.
1.3. Key Differences Between Tourist and Business Visas
- Tourist Visa (B-2):
- Purpose: For leisure, vacation, visiting friends and relatives, medical treatment, or participating in social events.
- Activities Allowed: Sightseeing, relaxation, and recreational activities.
- Restrictions: Cannot be used for employment or long-term study.
- Business Visa (B-1):
- Purpose: For business-related activities, such as attending conferences, consulting with business associates, negotiating contracts, or participating in short-term training.
- Activities Allowed: Professional consultations, business meetings, and short-term training programs.
- Restrictions: Cannot be used for employment or engaging in local labor for hire.
1.4. Factors Influencing Visa Approval for Filipinos
Several factors can impact the approval of a US visa application for Filipino citizens:
- Financial Stability: Applicants must demonstrate sufficient funds to cover their expenses during their stay in the US without relying on public assistance.
- Ties to the Philippines: Applicants need to prove strong ties to the Philippines, such as family, employment, property ownership, and community involvement, to assure the consular officer that they intend to return after their temporary stay.
- Travel History: A history of previous visa refusals or violations can negatively impact the current application.
- Criminal Record: A criminal record or any past immigration violations can lead to visa denial.
- Purpose of Travel: The stated purpose of travel must be clear, legitimate, and consistent with the type of visa applied for.
2. Step-by-Step Guide to Applying for a US Visa from the Philippines
Applying for a US visa involves a detailed process. Here’s a step-by-step guide to help Filipinos navigate it smoothly:
2.1. Completing the DS-160 Form
The first step in applying for a US visa is completing the DS-160 form, the online nonimmigrant visa application. This form collects personal information, travel details, and background information.
- Access the Form: Go to the US Department of State’s Consular Electronic Application Center website.
- Select Location: Choose the US Embassy or Consulate in the Philippines where you plan to apply.
- Complete the Form: Fill out all sections accurately and honestly. Be prepared to provide information about your travel history, education, employment, and family.
- Upload Photo: You will need to upload a recent photograph that meets US visa photo requirements.
- Review and Submit: Review your answers carefully before submitting the form. Once submitted, you cannot make changes.
- Print Confirmation: After submission, print the DS-160 confirmation page. You will need this for your visa interview.
2.2. Paying the Visa Application Fee
The visa application fee, also known as the Machine Readable Visa (MRV) fee, must be paid before scheduling your visa interview.
- Fee Amount: The fee varies depending on the type of visa you are applying for. As of 2024, the B-1/B-2 visa fee is $185 USD.
- Payment Methods: In the Philippines, you can typically pay the fee through authorized banks or online payment systems.
- Keep the Receipt: Save the payment receipt, as you will need it to schedule your visa interview.
2.3. Scheduling Your Visa Interview
After completing the DS-160 form and paying the visa fee, you can schedule your visa interview.
- Access the Scheduling System: Visit the US Embassy or Consulate website in the Philippines and follow the instructions for scheduling an interview.
- Create an Account: You may need to create an account on the scheduling system.
- Enter Information: Provide your DS-160 confirmation number and MRV fee payment receipt number.
- Choose a Date and Time: Select an available date and time for your interview. Be aware that wait times can vary.
- Confirmation: Print the interview confirmation page.
2.4. Preparing for Your Visa Interview
Preparing thoroughly for your visa interview can significantly increase your chances of approval.
- Gather Documents: Collect all required documents, including:
- DS-160 confirmation page
- MRV fee payment receipt
- Valid passport (must be valid for at least six months beyond your intended stay)
- Passport photos
- Proof of ties to the Philippines (e.g., property titles, employment certificates, family photos)
- Travel itinerary (if available)
- Letter of invitation (if applicable)
- Bank statements or other proof of funds
- Practice Answering Questions: Anticipate common questions and practice your answers. Be honest, clear, and concise.
- Dress Professionally: Dress in professional attire for the interview.
- Arrive on Time: Arrive at the US Embassy or Consulate at least 30 minutes before your scheduled interview time.
2.5. Attending the Visa Interview
The visa interview is a crucial part of the application process. Here’s what to expect:
- Security Check: You will go through a security check before entering the embassy or consulate.
- Wait for Your Turn: Wait for your name to be called.
- Answer Questions Honestly: Answer all questions truthfully and to the best of your ability.
- Be Respectful: Maintain a respectful and polite demeanor.
- Provide Documents: Present any documents requested by the consular officer.
- Listen Carefully: Pay close attention to the consular officer’s instructions.
2.6. Potential Outcomes of the Visa Interview
After the interview, the consular officer will make a decision on your visa application. The potential outcomes include:
- Visa Approval: If approved, you will receive instructions on how to retrieve your passport with the visa.
- Visa Refusal: If refused, the consular officer will explain the reasons for the denial. You may be able to reapply if your circumstances change.
- Administrative Processing: In some cases, the application may be placed under administrative processing for further review. You will be notified if additional information is needed.
2.7. Common Reasons for Visa Refusal and How to Avoid Them
Understanding the common reasons for visa refusal can help you avoid them.
- Insufficient Ties to the Philippines: Failure to demonstrate strong ties to the Philippines is a common reason for denial. Provide ample evidence of your employment, family, property, and community involvement.
- Lack of Financial Stability: Inability to prove sufficient funds to cover your expenses in the US can lead to refusal. Provide bank statements, employment certificates, and other financial documents.
- Inconsistent or Untruthful Information: Providing false or inconsistent information on your application or during the interview can result in denial. Always be honest and accurate.
- Previous Visa Violations: A history of overstaying a previous visa or violating immigration laws can negatively impact your application.
- Unclear Purpose of Travel: If your purpose of travel is unclear or inconsistent with the type of visa you are applying for, your application may be denied.
3. Essential Documents for Your US Visa Application
Having all the necessary documents is crucial for a successful visa application. Here’s a detailed list:
3.1. Required Documents Checklist
- Valid Passport: Must be valid for at least six months beyond your intended stay in the US.
- DS-160 Confirmation Page: Printed confirmation page from the online DS-160 application form.
- MRV Fee Payment Receipt: Proof of payment of the visa application fee.
- Passport Photos: Two recent passport photos that meet US visa photo requirements.
- Proof of Ties to the Philippines:
- Employment certificate or letter from your employer
- Property titles or lease agreements
- Family photos
- Bank statements
- Membership in professional or community organizations
- Travel Itinerary (if available): A detailed plan of your intended activities in the US.
- Letter of Invitation (if applicable): If you are visiting friends or relatives, a letter of invitation from them.
- Additional Documents:
- For students: Acceptance letter from a US educational institution
- For business travelers: Letter of invitation from a US company, business cards, and company profile.
3.2. How to Provide Proof of Strong Ties to the Philippines
Providing convincing evidence of your ties to the Philippines is essential to demonstrate your intention to return after your temporary stay.
- Employment Documents:
- A certificate of employment stating your position, salary, and length of employment.
- A letter from your employer granting you leave of absence for your trip.
- Property Ownership:
- Copies of property titles or deeds to show that you own property in the Philippines.
- Lease agreements if you are renting a property.
- Family Ties:
- Marriage certificate if you are married.
- Birth certificates of your children.
- Photos of your family.
- Financial Documents:
- Bank statements showing your savings and investments.
- Income tax returns.
- Community Involvement:
- Certificates of membership in professional or community organizations.
- Letters of support from community leaders.
3.3. Financial Documents to Show Sufficient Funds
Demonstrating that you have sufficient funds to cover your expenses during your stay in the US is crucial.
- Bank Statements: Provide recent bank statements showing your savings and checking account balances.
- Credit Card Statements: Include copies of your credit card statements.
- Employment Verification: A letter from your employer stating your salary and length of employment.
- Sponsorship Letter (if applicable): If someone is sponsoring your trip, provide a letter from them along with their bank statements and employment verification.
4. Tips for a Successful US Visa Interview
The visa interview is a critical step in the application process. Here are some tips to help you succeed:
4.1. Dos and Don’ts During the Interview
- Dos:
- Be Honest: Always answer questions truthfully and to the best of your ability.
- Be Concise: Provide clear and concise answers. Avoid rambling or giving irrelevant information.
- Be Respectful: Maintain a polite and respectful demeanor.
- Be Prepared: Bring all required documents and be familiar with the information on your DS-160 form.
- Dress Professionally: Dress in professional attire.
- Don’ts:
- Don’t Lie: Never provide false information.
- Don’t Argue: Avoid arguing with the consular officer.
- Don’t Be Nervous: Try to stay calm and relaxed.
- Don’t Bring Unnecessary Items: Leave unnecessary items at home, as they may not be allowed inside the embassy or consulate.
- Don’t Speculate: If you don’t know the answer to a question, say so. Don’t guess or speculate.
4.2. Common Questions Asked During the Interview and How to Answer Them
- What is the purpose of your trip to the US?
- Be clear and specific about your travel plans. For example, “I am planning to visit the US for a two-week vacation to see the sights in California.”
- How long do you plan to stay in the US?
- State the exact duration of your intended stay. Be sure that it aligns with your visa type and travel itinerary.
- Where will you be staying in the US?
- Provide the address of your hotel, or the address of the friends or relatives you will be visiting.
- Who will be paying for your trip?
- Explain how you will be funding your trip. If someone is sponsoring you, provide their information and explain their relationship to you.
- What do you do for a living?
- Describe your job or business in detail. Provide your job title, responsibilities, and length of employment.
- Do you have any family in the US?
- Be honest about any family members you have in the US. Provide their names, relationships to you, and immigration status.
- What ties do you have to the Philippines?
- Highlight your strong ties to the Philippines, such as your job, family, property, and community involvement.
4.3. How to Handle Potential Language Barriers
If you are not fluent in English, you may be concerned about the language barrier during the visa interview. Here’s how to handle it:
- Practice English: Improve your English skills by taking classes, watching movies, or practicing with a language partner.
- Prepare Key Phrases: Learn key phrases related to your travel plans and be prepared to answer common questions in English.
- Ask for Clarification: If you don’t understand a question, politely ask the consular officer to repeat or rephrase it.
- Consider a Translator: In some cases, you may be allowed to bring a translator to the interview. Check with the US Embassy or Consulate in the Philippines for their policy on translators.
5. Navigating US Customs and Immigration as a Filipino Traveler
Once you have your US visa, the next step is navigating US customs and immigration upon arrival.
5.1. What to Expect at the Port of Entry
Upon arrival at a US port of entry (airport or border crossing), you will go through customs and immigration.
- Immigration Inspection:
- Present your passport and visa to the immigration officer.
- Answer questions about your purpose of travel, intended length of stay, and other relevant information.
- The officer will review your documents and may take your fingerprints and photo.
- Customs Inspection:
- Collect your baggage and proceed to the customs area.
- Fill out a customs declaration form, declaring any items you are bringing into the US.
- A customs officer may inspect your baggage to ensure you are not bringing in any prohibited items.
5.2. Tips for a Smooth Entry Process
- Be Prepared: Have your passport and visa readily available.
- Answer Honestly: Answer all questions truthfully and to the best of your ability.
- Declare All Items: Declare all items you are bringing into the US, including food, plants, and other agricultural products.
- Know the Restrictions: Be aware of any restrictions on items you can bring into the US.
- Be Polite: Maintain a polite and respectful demeanor.
5.3. Items You Can and Cannot Bring into the USA
It’s important to know what items are allowed and prohibited when entering the US.
- Allowed Items:
- Personal belongings, such as clothing and toiletries.
- Gifts, up to a certain value.
- Small amounts of alcohol and tobacco (subject to state laws).
- Prohibited Items:
- Illegal drugs
- Certain types of firearms and ammunition
- Counterfeit goods
- Certain agricultural products and plants
- Meat products from certain countries
Consult the US Customs and Border Protection website for a complete list of prohibited items.
5.4. Understanding the I-94 Form
The I-94 form is a record of your entry into the United States. It shows your admission date, visa type, and authorized length of stay.
- Electronic I-94: Most travelers arriving by air or sea will receive an electronic I-94 record. You can access it online on the CBP website.
- Paper I-94: Travelers entering the US by land may receive a paper I-94 form.
- Keep Your I-94 Record: It is important to keep a copy of your I-94 record, as you will need it when you depart the US.
6. What to Do if Your Visa Application is Denied
If your US visa application is denied, it can be disappointing, but it’s not the end of the road.
6.1. Understanding the Reasons for Denial
The first step is to understand the reasons for the denial. The consular officer will provide a written explanation for the refusal. Common reasons include:
- Insufficient Ties to the Philippines: Failure to demonstrate strong ties to the Philippines.
- Lack of Financial Stability: Inability to prove sufficient funds to cover your expenses in the US.
- Inconsistent or Untruthful Information: Providing false or inconsistent information on your application or during the interview.
- Previous Visa Violations: A history of overstaying a previous visa or violating immigration laws.
- Unclear Purpose of Travel: If your purpose of travel is unclear or inconsistent with the type of visa you are applying for.
6.2. Steps to Take After a Visa Refusal
- Review the Denial Letter: Carefully review the denial letter to understand the specific reasons for the refusal.
- Gather Additional Evidence: Gather additional evidence to address the concerns raised in the denial letter.
- Reapply: You can reapply for a visa if your circumstances have changed or if you have additional evidence to support your application.
- Seek Legal Advice: If you believe your visa was wrongly denied, you may want to seek legal advice from an immigration attorney.
6.3. When and How to Reapply for a US Visa
- When to Reapply: You can reapply for a visa as soon as your circumstances have changed or you have gathered additional evidence to support your application.
- How to Reapply: To reapply for a visa, you will need to complete a new DS-160 form, pay the visa application fee, and schedule another visa interview.
- Address the Concerns: In your new application, be sure to address the concerns raised in the previous denial letter. Provide additional evidence to demonstrate your ties to the Philippines and your intention to return after your temporary stay.
7. Exploring Travel Opportunities in the USA for Filipinos
The United States offers a wide range of travel opportunities for Filipinos, from bustling cities to stunning natural landscapes.
7.1. Popular Destinations for Filipino Tourists
- California: Los Angeles, San Francisco, and San Diego are popular destinations for Filipinos, offering a mix of culture, entertainment, and beautiful scenery.
- New York: New York City is a must-see destination, with iconic landmarks, world-class museums, and vibrant neighborhoods.
- Hawaii: The Hawaiian Islands offer beautiful beaches, lush landscapes, and a unique cultural experience.
- Las Vegas: Known for its casinos, entertainment, and nightlife, Las Vegas is a popular destination for Filipinos seeking excitement and adventure.
- Florida: Orlando and Miami offer a mix of theme parks, beaches, and cultural attractions.
7.2. Tips for Planning Your Trip to the USA
- Book Flights and Accommodation in Advance: To get the best deals, book your flights and accommodation well in advance.
- Create a Detailed Itinerary: Plan your activities and attractions in advance to make the most of your time in the US.
- Purchase Travel Insurance: Protect yourself against unexpected events by purchasing travel insurance.
- Learn About Local Customs: Familiarize yourself with local customs and etiquette.
- Stay Connected: Purchase a local SIM card or international roaming plan to stay connected with family and friends.
7.3. Cultural Considerations for Filipino Travelers
- Tipping: Tipping is customary in the US. Tip 15-20% at restaurants, and tip service providers such as taxi drivers and bartenders.
- Greetings: A handshake is a common greeting.
- Personal Space: Americans tend to value personal space, so avoid standing too close to others.
- Dining Etiquette: Wait to be seated at restaurants. Don’t talk with your mouth full.
- Public Transportation: Be aware of the rules and etiquette for using public transportation.
7.4. Budgeting Tips for Traveling in the USA
- Set a Budget: Determine how much you can afford to spend on your trip and stick to your budget.
- Look for Deals: Take advantage of deals on flights, accommodation, and attractions.
- Eat Like a Local: Save money by eating at local restaurants and cafes.
- Use Public Transportation: Use public transportation instead of taxis or rental cars.
- Free Activities: Take advantage of free activities, such as visiting parks, museums, and landmarks.
8. How TRAVELS.EDU.VN Can Help Filipinos Travel to the USA
Planning a trip to the USA can be overwhelming, but TRAVELS.EDU.VN is here to help Filipino citizens navigate the process smoothly and enjoy a memorable travel experience.
8.1. Visa Application Assistance
TRAVELS.EDU.VN provides comprehensive visa application assistance to Filipinos, including:
- DS-160 Form Guidance: Expert guidance on completing the DS-160 form accurately and efficiently.
- Document Checklist: A detailed checklist of all required documents for your visa application.
- Interview Preparation: Mock interview sessions and tips to help you prepare for your visa interview.
- Visa Application Tracking: Assistance with tracking the status of your visa application.
8.2. Travel Planning Services
TRAVELS.EDU.VN offers personalized travel planning services to help you create the perfect trip to the USA:
- Customized Itineraries: Tailored itineraries based on your interests, budget, and travel style.
- Accommodation Booking: Assistance with finding and booking the perfect hotel, resort, or vacation rental.
- Flight Booking: Help with finding the best deals on flights to the USA.
- Tour and Activity Booking: Assistance with booking tours, activities, and attractions in the USA.
8.3. Exclusive Travel Packages for Filipinos
TRAVELS.EDU.VN offers exclusive travel packages designed specifically for Filipino travelers:
- Family Vacation Packages: Packages for families traveling to popular destinations like California, Florida, and Hawaii.
- Adventure Travel Packages: Packages for adventure seekers, including hiking, camping, and water sports.
- City Break Packages: Packages for those looking to explore iconic cities like New York, Los Angeles, and San Francisco.
- Luxury Travel Packages: Packages for travelers seeking a luxurious and unforgettable experience.
8.4. Why Choose TRAVELS.EDU.VN for Your US Travel Needs?
- Expertise: Our team of travel experts has extensive knowledge of US travel and visa requirements.
- Personalized Service: We provide personalized service tailored to your specific needs and preferences.
- Convenience: We handle all aspects of your travel planning, from visa application assistance to booking flights and accommodation.
- Value: We offer competitive prices and exclusive deals to help you save money on your trip.
- Support: We provide ongoing support throughout your travel journey, from pre-departure to your return home.
Planning a trip to the USA as a Filipino citizen requires careful preparation and attention to detail. By understanding the visa requirements, following the application process, and preparing for your interview, you can increase your chances of a successful trip. Let TRAVELS.EDU.VN assist you in making your dream trip a reality.
Ready to start planning your unforgettable trip to Napa Valley? Contact TRAVELS.EDU.VN today for personalized assistance and exclusive travel packages. Our expert team is here to guide you through every step, ensuring a seamless and memorable experience. Reach out to us at 123 Main St, Napa, CA 94559, United States. Whatsapp: +1 (707) 257-5400. Or visit our website at TRAVELS.EDU.VN to explore our offerings and book your dream getaway now!
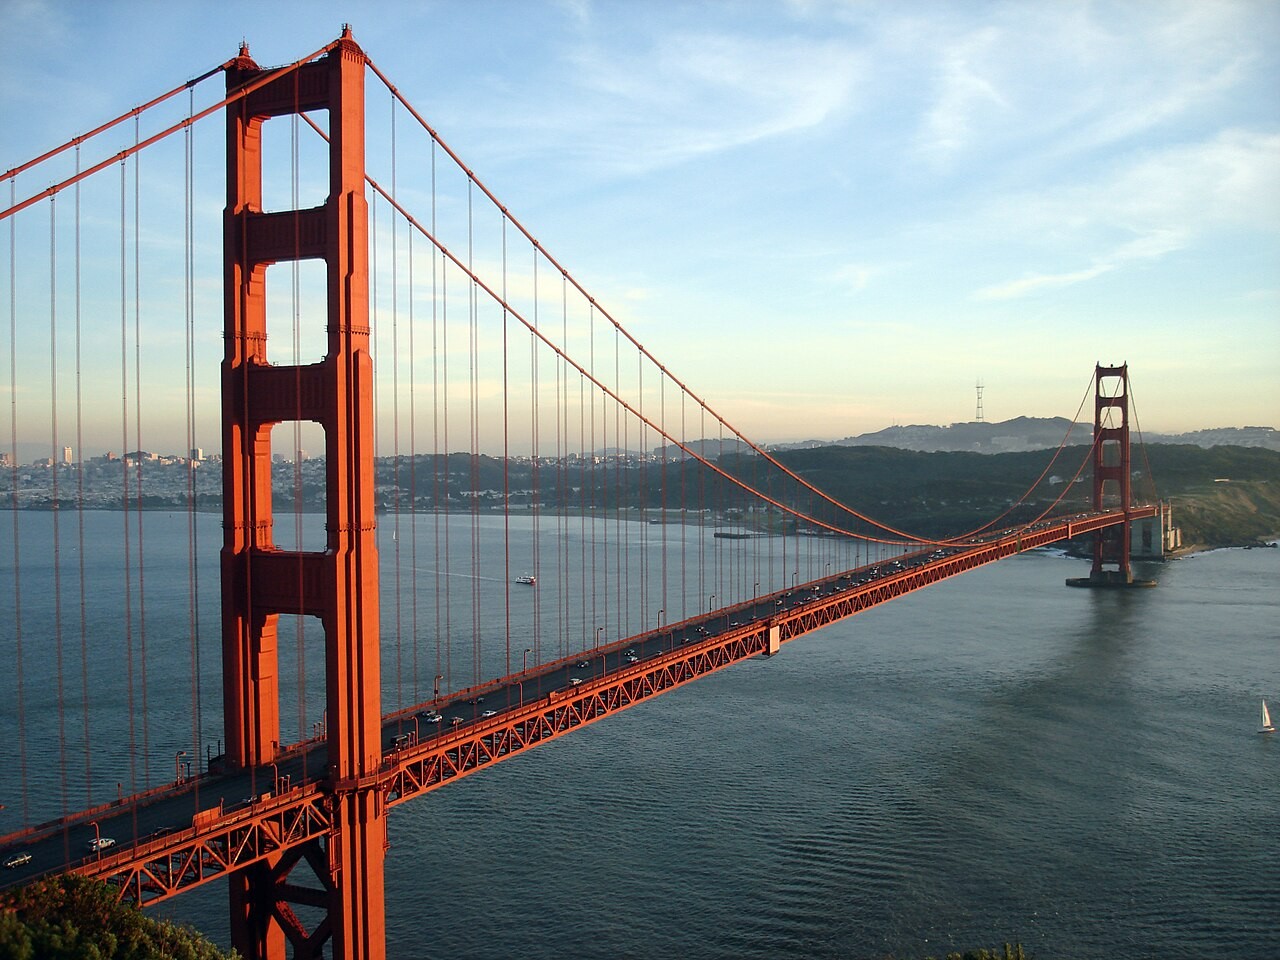 Golden Gate Bridge in San Francisco
Image alt text: The iconic Golden Gate Bridge in San Francisco, shrouded in a light mist, showcasing the city’s famous landmark and serene beauty.
9. Napa Valley Travel Guide for Filipino Tourists
Napa Valley, California, is a world-renowned destination for wine lovers and food enthusiasts. Here’s what Filipino tourists need to know to plan a memorable trip to this picturesque region.
9.1. Getting to Napa Valley from the Philippines
- Flights: The nearest major airport to Napa Valley is San Francisco International Airport (SFO). From the Philippines, you can take direct flights to SFO from Manila (MNL) via Philippine Airlines or connecting flights through other Asian hubs.
- Ground Transportation: From SFO, you can rent a car, take a shuttle, or use ride-sharing services to get to Napa Valley, which is about a 1.5 to 2-hour drive.
- Example Flight Itinerary:
- Departure: Manila (MNL) to San Francisco (SFO) – Philippine Airlines
- Arrival: San Francisco (SFO)
- Ground Transfer: Rent a car or shuttle to Napa Valley
9.2. Best Time to Visit Napa Valley
- Spring (March-May): Offers pleasant weather, blooming wildflowers, and fewer crowds.
- Fall (September-November): The harvest season brings vibrant colors and wine-making activities.
- Summer (June-August): Warmest weather, ideal for outdoor activities but can be crowded.
- Winter (December-February): Cooler temperatures, fewer tourists, and cozy wine-tasting experiences.
9.3. Must-Visit Wineries and Vineyards
- Domaine Carneros: Known for its sparkling wines and stunning château.
- Robert Mondavi Winery: Offers educational tours and tastings.
- Castello di Amorosa: A beautiful 13th-century-style Tuscan castle and winery.
- Sterling Vineyards: Features an aerial tramway to reach the winery with panoramic views.
- Beringer Vineyards: Napa Valley’s oldest continuously operating winery.
9.4. Top Attractions and Activities
- Wine Tasting Tours: Explore various wineries and sample award-winning wines.
- Hot Air Balloon Rides: Experience breathtaking views of Napa Valley from above.
- Culinary Experiences: Enjoy gourmet meals at Michelin-starred restaurants.
- Spa and Wellness: Relax and rejuvenate at luxurious spas.
- Shopping: Browse unique boutiques and art galleries in downtown Napa.
9.5. Recommended Napa Valley Itinerary
Day 1: Arrival and Wine Tasting
- Morning: Arrive at SFO and transfer to Napa Valley.
- Afternoon: Check into your hotel and visit Domaine Carneros for sparkling wine tasting.
- Evening: Dinner at The French Laundry (reservations required well in advance).
Day 2: Exploring Napa Valley
- Morning: Hot air balloon ride over Napa Valley.
- Afternoon: Visit Robert Mondavi Winery for a tour and tasting.
- Evening: Dinner at Oenotri, known for its Italian cuisine.
Day 3: Cultural and Relaxation
- Morning: Explore downtown Napa and visit local shops.
- Afternoon: Relax at a spa like Solage Calistoga.
- Evening: Farewell dinner at Angele Restaurant & Bar.
9.6. Accommodation Options in Napa Valley
- Luxury Hotels:
- The French Laundry Inn
- Meadowood Napa Valley
- Solage Calistoga
- Boutique Hotels:
- Hotel Yountville
- Bardessono Hotel
- Las Alcobas Napa Valley
- Bed and Breakfasts:
- Churchill Manor Bed and Breakfast
- The Inn on First
- Cedar Gables Inn
9.7. Budgeting for a Trip to Napa Valley
| Expense | Estimated Cost (per day) |
|---|---|
| Accommodation | $300 – $1000+ |
| Wine Tasting | $75 – $200+ |
| Meals | $100 – $500+ |
| Transportation | $50 – $150 |
| Activities & Tours | $50 – $300+ |
| Total (per person) | $575 – $2150+ |
9.8. Transportation Options in Napa Valley
- Rental Cars: Provide flexibility to explore at your own pace.
- Shuttles & Private Cars: Convenient for wine tours and airport transfers.
- Ride-Sharing Services: Uber and Lyft are available but can be limited in certain areas.
- Napa Valley Wine Train: A unique way to experience the valley with gourmet dining.
9.9. Local Cuisine to Try
- The French Laundry: Renowned for its innovative tasting menus.
- Oenotri: Offers authentic Southern Italian cuisine.
- Bottega Napa Valley: Celebrated for its rustic Italian dishes.
- Gott’s Roadside: A casual spot for burgers, fries, and milkshakes.
- Oxbow Public Market: A vibrant marketplace with diverse food vendors.
9.10. Tips for Filipino Tourists in Napa Valley
- Book Wine Tastings in Advance: Popular wineries often require reservations.
- Stay Hydrated: Drink plenty of water, especially during wine tastings.
- Dress Comfortably: Wear comfortable shoes for walking tours.
- Learn Basic Wine Terminology: Familiarize yourself with terms like “tannins,” “bouquet,” and “finish.”
- Respect Local Customs: Be mindful of local etiquette and traditions.
10. Frequently Asked Questions (FAQ) About US Travel for Filipinos
Here are some frequently asked questions to help Filipinos plan their trip to the USA:
10.1. Can a Filipino citizen travel to the USA without a visa?
No, Filipino citizens cannot travel to the USA without a visa. The Visa Waiver Program (VWP) does not apply to the Philippines.
10.2. How long can a Filipino stay in the USA with a B-1/B-2 visa?
The maximum stay allowed on a B-1/B-2 visa is typically six months per entry. The exact duration is determined by the immigration officer at the port of entry.
10.3. How much does it cost to apply for a US visa from the Philippines?
As of 2024, the B-1/B-2 visa fee is $185 USD. Other visa types may have different fees.
10.4. How long does it take to get a US visa in the Philippines?
The processing time for a US visa can vary. It typically takes a few weeks to schedule an interview and several more weeks to process the visa after the interview. Check the US Embassy or Consulate website for current wait times.
10.5. What should I do if my US visa application is denied?
Review the denial letter to understand the reasons for the refusal. Gather additional evidence to address the concerns and reapply.
10.6. Can I work in the USA with a tourist visa?
No, you cannot work in the USA with a tourist visa (B-1/B-2). You need a specific work visa, such as the H-1B visa.
10.7. What are the requirements for a Filipino student to study in the USA?
You need to be accepted into a Student and Exchange Visitor Program (SEVP)-approved school and obtain an F-1 student visa.
10.8. Can I extend my stay in the USA with a tourist visa?
It is generally difficult to extend your stay in the USA with a tourist visa. You must apply for an extension before your authorized stay expires, and it is not guaranteed to be approved.
10.9. What documents do I need to bring to the visa interview?
You need to bring your DS-160 confirmation page, MRV fee payment receipt, valid passport, passport photos, and proof of ties to the Philippines.
10.10. How can TRAVELS.EDU.VN help me with my US travel plans?
travels.edu.vn provides visa application assistance, travel planning services, and exclusive travel packages tailored to Filipino travelers, making your trip to the USA seamless and enjoyable.