Painting your travel trailer can breathe new life into your mobile home and protect it from the elements. TRAVELS.EDU.VN presents a comprehensive guide on how to paint a travel trailer, ensuring a professional and lasting finish, while exploring the best travel destinations. This guide covers everything from preparation and material selection to the actual painting process, including RV painting tips, camper makeover ideas, and mobile home improvement strategies.
1. Understanding the Importance of Painting Your Travel Trailer
Painting a travel trailer is more than just an aesthetic upgrade; it’s a crucial step in maintaining and protecting your investment. The exterior of a travel trailer is constantly exposed to harsh weather conditions, UV rays, road debris, and other environmental factors that can degrade its surface over time. A fresh coat of paint not only enhances the appearance but also provides a protective barrier against these elements, preventing rust, corrosion, and water damage.
1.1. Benefits of Painting Your Travel Trailer
- Protection from the elements: A quality paint job acts as a shield against sun, rain, snow, and extreme temperatures.
- Prevention of rust and corrosion: Paint seals the metal surfaces, preventing moisture from causing rust and corrosion.
- Enhanced aesthetics: A new paint job can transform the look of your travel trailer, making it more appealing and modern.
- Increased resale value: A well-maintained and aesthetically pleasing travel trailer will fetch a higher price on the resale market.
- Personalization: Painting allows you to customize your travel trailer to reflect your personal style and preferences.
1.2. Signs Your Travel Trailer Needs a New Paint Job
- Faded paint: If the paint on your travel trailer looks dull or faded, it’s time for a fresh coat.
- Cracked or peeling paint: These are clear signs that the existing paint is failing and needs to be replaced.
- Rust spots: Any signs of rust indicate that the protective layer of paint has been compromised.
- Water damage: If you notice water stains or leaks inside the travel trailer, the exterior paint may be failing to protect it from moisture.
- Outdated graphics: If your travel trailer has outdated or unsightly graphics, painting is an excellent way to modernize its appearance.
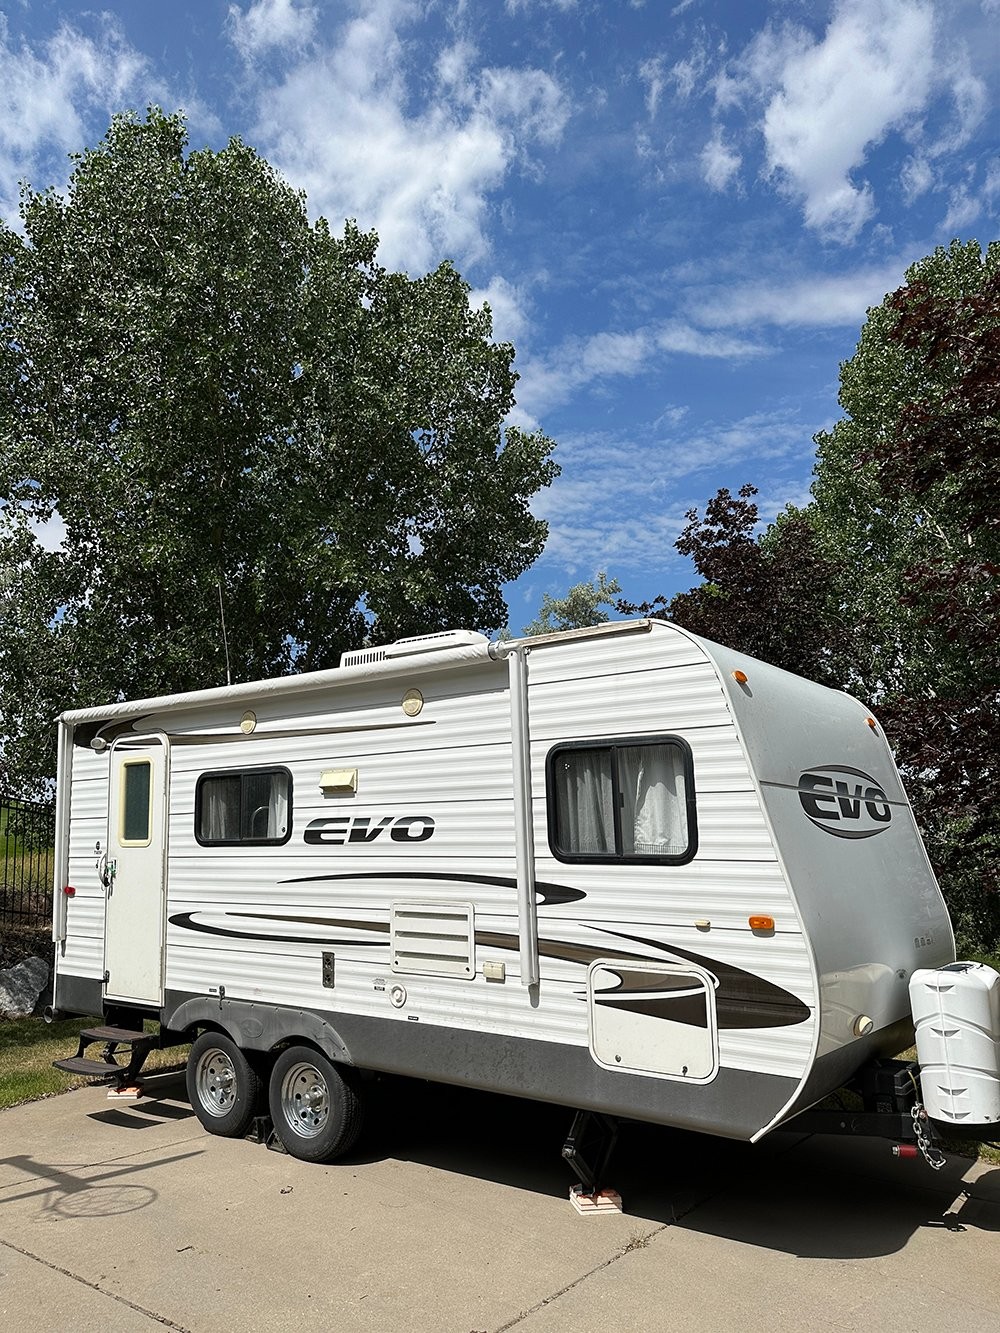 Travel trailer with faded and peeling paint, indicating the need for a new paint job.
2. Planning Your Travel Trailer Painting Project
Before you start painting, careful planning is essential to ensure a successful outcome. This involves assessing the condition of your travel trailer, selecting the right materials, and preparing a detailed plan of action.
2.1. Assessing the Condition of Your Travel Trailer
- Inspect the exterior: Look for any signs of damage, such as dents, scratches, rust, or water damage.
- Check the existing paint: Evaluate the condition of the existing paint to determine if it needs to be completely removed or if it can be prepped for a new coat.
- Identify any problem areas: Note any areas that require special attention, such as rust spots or areas with peeling paint.
- Consider the weather: Plan your painting project for a time when the weather is favorable, with low humidity and moderate temperatures.
2.2. Choosing the Right Paint and Materials
Selecting the right paint and materials is crucial for achieving a professional and long-lasting finish. Automotive paint is highly recommended due to its durability and resistance to the elements.
- Automotive paint: Offers superior durability and resistance to UV rays, chemicals, and abrasion. Brands like Dupli-Color, Rust-Oleum, and Eastwood offer a range of automotive paints suitable for travel trailers.
- Primer: Essential for creating a smooth and even surface for the paint to adhere to. Choose a primer that is compatible with automotive paint.
- Clear coat: Provides an additional layer of protection and enhances the shine of the paint.
- Sandpaper: Use various grits of sandpaper to prepare the surface for painting, starting with a coarse grit to remove any imperfections and finishing with a fine grit to create a smooth surface.
- Masking tape: Use high-quality masking tape to protect areas that you don’t want to paint, such as windows, trim, and lights.
- Drop cloths: Protect the ground and surrounding areas from paint splatters.
- Paint sprayer: A paint sprayer is essential for achieving a professional finish. Choose a sprayer that is suitable for automotive paint.
- Safety gear: Wear safety glasses, a respirator, and gloves to protect yourself from paint fumes and chemicals.
2.3. Estimating Costs and Time
The cost of painting a travel trailer can vary depending on the size of the trailer, the type of paint used, and whether you hire a professional or do it yourself. It’s essential to create a budget and estimate the time required to complete the project.
- Materials: Estimate the cost of paint, primer, clear coat, sandpaper, masking tape, drop cloths, and other materials.
- Tools: Factor in the cost of renting or purchasing a paint sprayer and other tools.
- Labor: If you hire a professional, get quotes from several contractors to compare prices.
- Time: Estimate the time required to complete each step of the project, including preparation, painting, and cleanup.
| Material | Estimated Cost |
|---|---|
| Automotive Paint | $200 – $400 |
| Primer | $50 – $100 |
| Clear Coat | $50 – $100 |
| Sandpaper | $20 – $50 |
| Masking Tape | $10 – $20 |
| Drop Cloths | $10 – $20 |
| Paint Sprayer | $100 – $300 |
| Safety Gear | $30 – $50 |
| Total | $470 – $1040 |
TRAVELS.EDU.VN recommends planning your Napa Valley getaway meticulously. For budget-conscious travelers, remember to look for deals and discounts, which can significantly reduce your overall expenses. Contact our experts at +1 (707) 257-5400 for a free consultation.
3. Step-by-Step Guide to Painting Your Travel Trailer
3.1. Preparing the Surface
Proper surface preparation is the most critical step in achieving a professional and long-lasting paint job. This involves cleaning, sanding, and masking the travel trailer’s exterior.
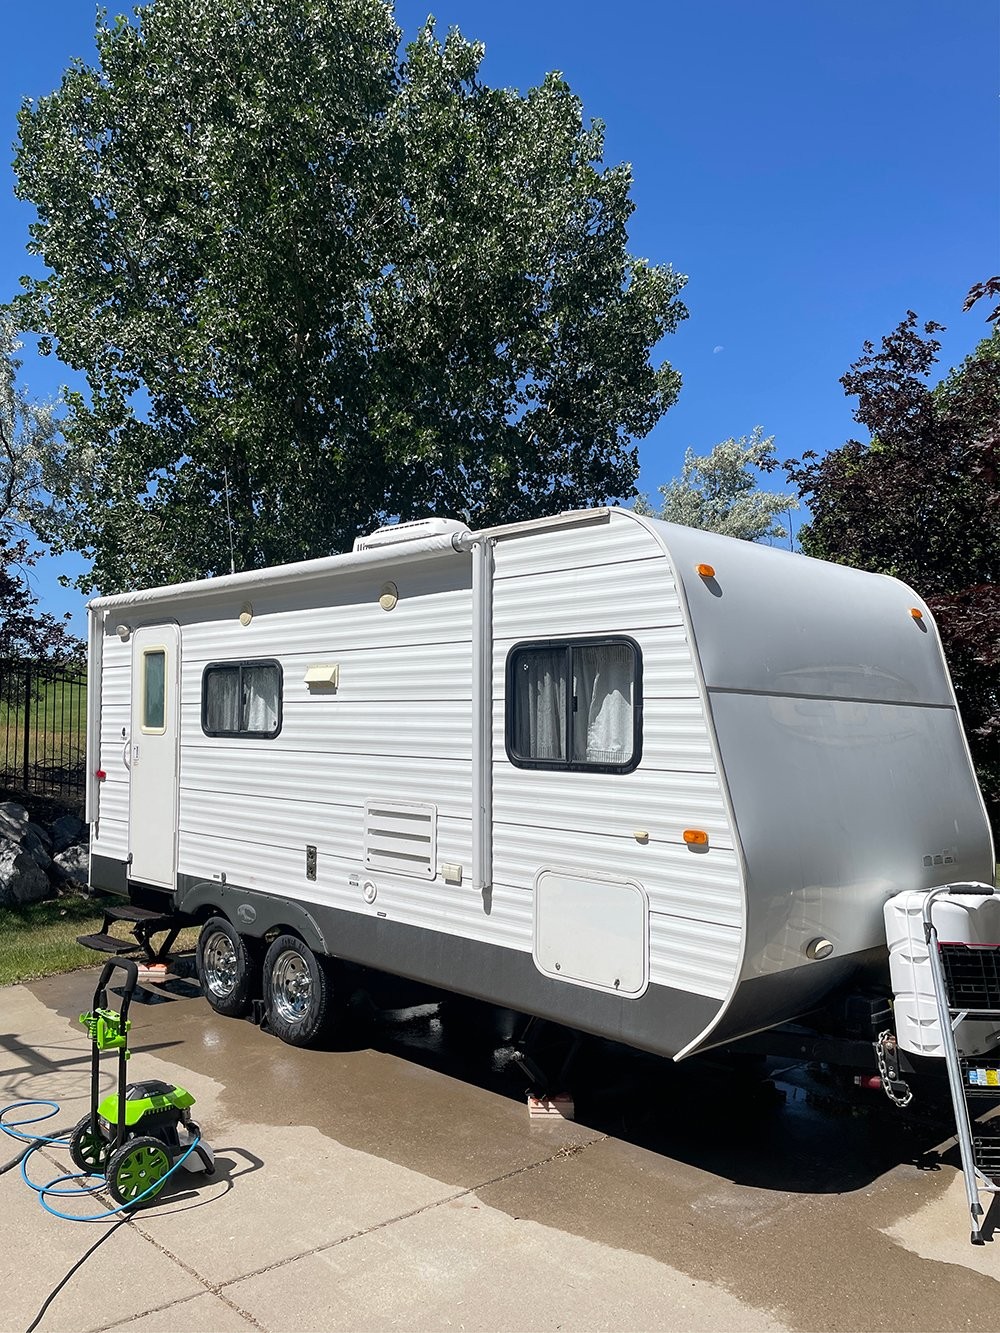
- Cleaning: Wash the travel trailer thoroughly with soap and water to remove any dirt, grease, or grime. Use a pressure washer for best results.
- Removing Decals: Use a heat gun to soften the adhesive and peel off any decals or stickers. Use a rubber wheel attached to a power drill to remove any remaining residue.
- Sanding: Sand the entire surface with coarse-grit sandpaper to remove any imperfections and create a smooth surface for the paint to adhere to. Follow up with a medium-grit sandpaper and then a fine-grit sandpaper to refine the surface.
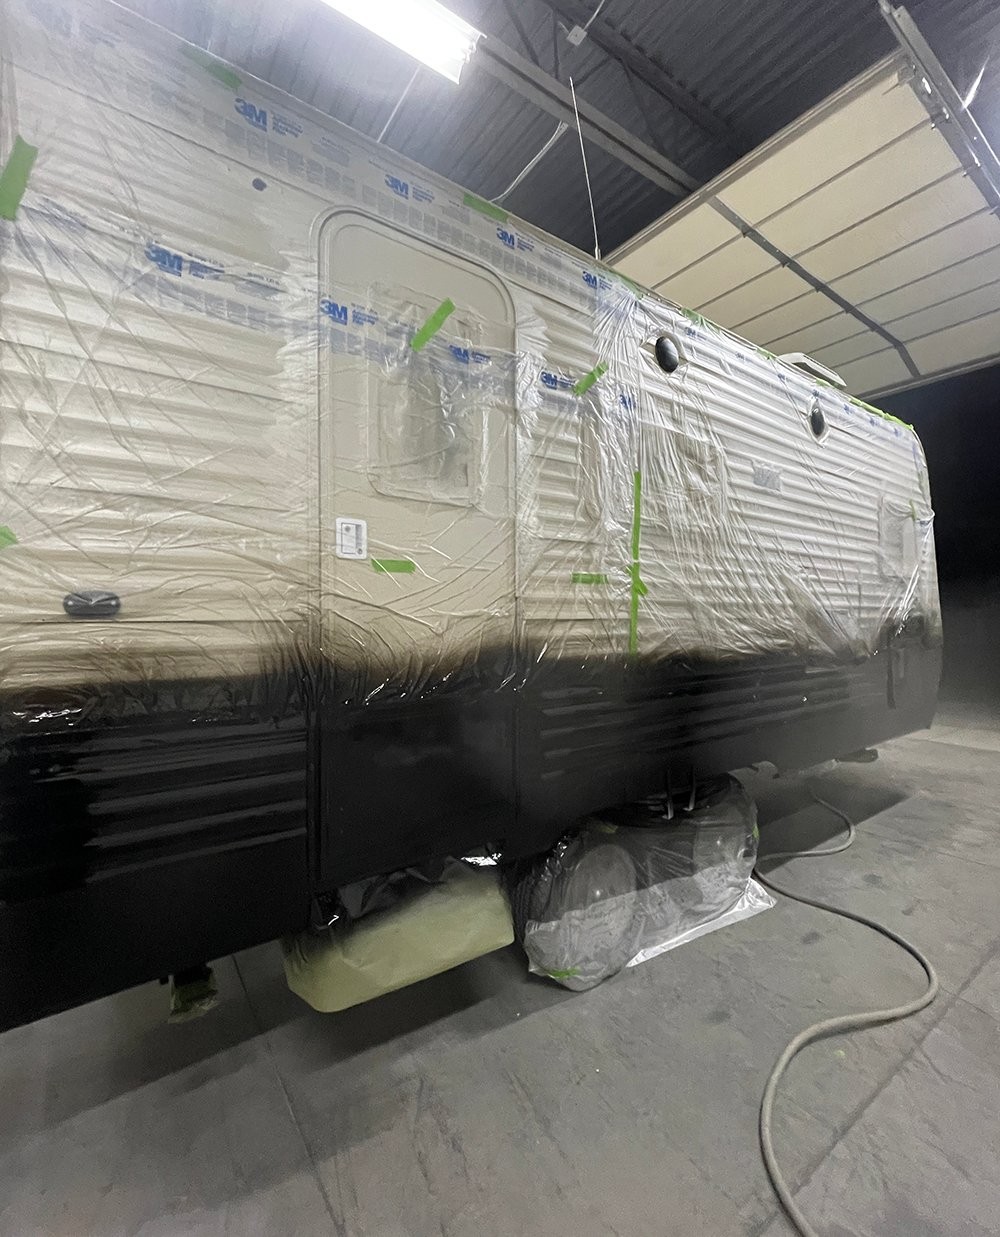
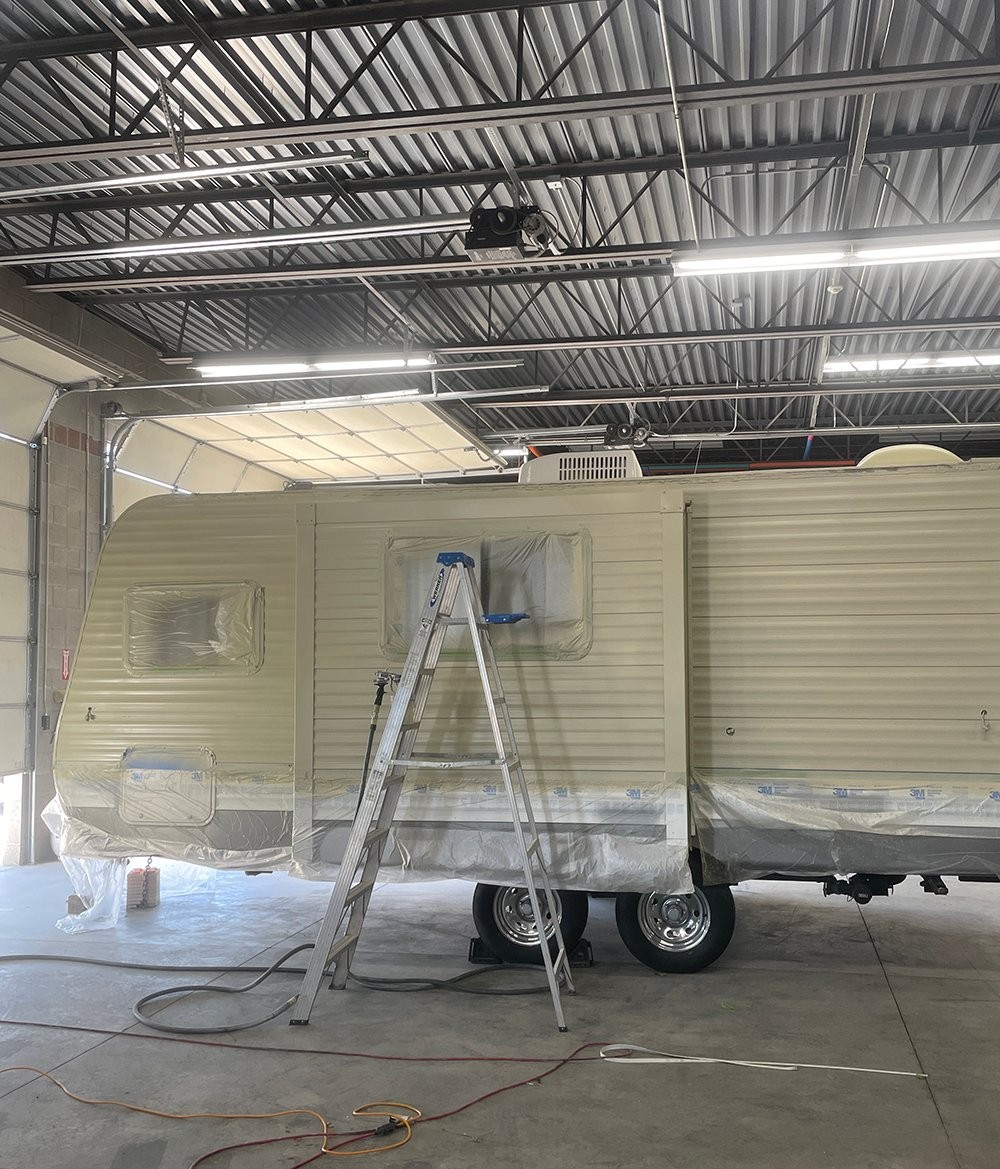
- Masking: Use high-quality masking tape to protect any areas that you don’t want to paint, such as windows, trim, and lights.
- Priming: Apply a thin, even coat of primer to the entire surface. This will help the paint adhere better and provide a more uniform finish.
 Sanding the surface of a travel trailer to prepare it for painting.
3.2. Applying the Paint
- Mixing the Paint: Follow the manufacturer’s instructions for mixing the automotive paint and hardener.
- Spraying Technique: Hold the paint sprayer about 8-10 inches from the surface and apply the paint in smooth, even strokes. Overlap each stroke slightly to ensure complete coverage.
- Applying Multiple Coats: Apply multiple thin coats of paint, allowing each coat to dry completely before applying the next. This will help prevent runs and drips and create a more uniform finish.
- Applying Clear Coat: Once the paint has dried completely, apply two coats of clear coat to protect the paint and enhance its shine.
3.3. Finishing Touches
- Removing Masking Tape: Carefully remove the masking tape while the clear coat is still slightly tacky. This will help prevent the paint from peeling or chipping.
- Buffing and Polishing: Once the clear coat has dried completely, buff the surface with a polishing compound to remove any imperfections and create a smooth, glossy finish.
- Reinstalling Trim: Reinstall any trim or hardware that was removed during the preparation process.
TRAVELS.EDU.VN offers tailored travel packages to Napa Valley, ensuring you experience the best of the region’s vineyards and culinary delights without the stress of planning. Let us take care of every detail. Call us at +1 (707) 257-5400 or visit our office at 123 Main St, Napa, CA 94559, United States.
4. Choosing the Right Design and Color Scheme
Selecting the right design and color scheme can significantly enhance the appearance of your travel trailer. Consider your personal style, the overall aesthetic of your travel trailer, and the environment in which you plan to use it.
4.1. Color Psychology in Travel Trailer Design
- White: Creates a clean, modern, and spacious feel. Reflects heat, keeping the interior cooler in hot climates.
- Gray: Offers a sophisticated and neutral look. Hides dirt and scratches well.
- Blue: Evokes a sense of calm and tranquility. Works well in coastal or beach-themed designs.
- Green: Creates a connection to nature and the outdoors. Ideal for travel trailers used in wooded areas.
- Beige: Provides a warm and inviting feel. A versatile neutral that complements a variety of styles.
- Black: Adds a touch of elegance and sophistication. Can make a travel trailer look more modern and luxurious.
4.2. Popular Travel Trailer Color Combinations
- White and Gray: A classic and versatile combination that creates a clean and modern look.
- Blue and White: Evokes a coastal feel and creates a sense of calm and relaxation.
- Green and Beige: Creates a connection to nature and provides a warm and inviting atmosphere.
- Black and White: A bold and dramatic combination that adds a touch of elegance and sophistication.
- Tan and Brown: Perfect for creating a natural, earthy look that blends well with outdoor environments.
4.3. Incorporating Graphics and Accents
Adding graphics and accents can personalize your travel trailer and make it stand out from the crowd.
- Stripes: Add a sporty and dynamic look to your travel trailer.
- Geometric patterns: Create a modern and eye-catching design.
- Nature-inspired graphics: Reflect your love of the outdoors with images of trees, mountains, or wildlife.
- Custom decals: Add a personal touch with custom decals featuring your name, logo, or favorite quote.
 Travel trailer with a modern color scheme and geometric graphics.
5. Maintaining Your Newly Painted Travel Trailer
Proper maintenance is essential to keep your newly painted travel trailer looking its best for years to come.
5.1. Regular Cleaning
Wash your travel trailer regularly with soap and water to remove any dirt, grime, or road debris. Use a soft brush or sponge to avoid scratching the paint.
5.2. Waxing
Apply a coat of automotive wax every few months to protect the paint from UV rays and other environmental factors.
5.3. Inspecting for Damage
Regularly inspect your travel trailer for any signs of damage, such as scratches, dents, or rust spots. Repair any damage promptly to prevent it from spreading.
5.4. Storing Your Travel Trailer
When not in use, store your travel trailer in a covered area or under a tarp to protect it from the elements.
6. Optimizing Your Travel Trailer for Travel Adventures
6.1. Essential Gear and Equipment
Before embarking on your travel adventures, ensure your travel trailer is equipped with the necessary gear and equipment:
- Navigation system: GPS or smartphone app for route planning.
- Emergency kit: First-aid supplies, flashlight, batteries, and tools.
- Cooking equipment: Portable stove, cookware, and utensils.
- Sleeping arrangements: Comfortable mattresses, bedding, and pillows.
- Storage solutions: Bins, shelves, and organizers to maximize space.
- Power source: Generator or solar panels for electricity.
6.2. Travel Trailer Safety Tips
- Pre-trip inspection: Check tires, brakes, lights, and fluid levels.
- Proper weight distribution: Load cargo evenly to prevent swaying.
- Safe driving practices: Avoid speeding and maintain a safe following distance.
- Awareness of surroundings: Be mindful of low bridges, narrow roads, and other obstacles.
- Emergency preparedness: Know how to handle unexpected situations like breakdowns or accidents.
6.3. Must-Visit Destinations in Your Travel Trailer
- Napa Valley, California: Indulge in wine tasting, gourmet dining, and scenic vineyards.
- Yellowstone National Park: Explore geysers, hot springs, and abundant wildlife.
- Grand Canyon National Park: Witness breathtaking views of the iconic canyon.
- Acadia National Park: Hike along rocky coastlines and enjoy stunning ocean vistas.
- Zion National Park: Discover towering sandstone cliffs and scenic hiking trails.
- Great Smoky Mountains National Park: Experience the beauty of the Appalachian Mountains, filled with lush forests and diverse wildlife. This park offers something for everyone, from scenic drives to challenging hikes.
TRAVELS.EDU.VN specializes in crafting unforgettable travel experiences in Napa Valley, offering exclusive access to renowned wineries, gourmet dining, and breathtaking landscapes. Contact us today to design your dream getaway. Reach out to us at +1 (707) 257-5400.
7. RV Painting Ideas and Inspiration
7.1. Modern and Minimalist Designs
Embrace clean lines, neutral colors, and a clutter-free aesthetic. White, gray, and black are popular choices for creating a modern look.
7.2. Rustic and Vintage Styles
Incorporate natural elements like wood accents, earthy tones, and vintage-inspired graphics. This style evokes a sense of nostalgia and adventure.
7.3. Bold and Colorful Themes
Express your personality with vibrant colors, eye-catching patterns, and playful designs. This option is perfect for those who want to make a statement.
 Travel trailer with a rustic and vintage-inspired design.
8. Common Mistakes to Avoid When Painting Your Travel Trailer
8.1. Skipping Surface Preparation
Proper surface preparation is crucial for a long-lasting paint job. Skipping this step can lead to peeling, chipping, and other problems.
8.2. Using the Wrong Type of Paint
Using the wrong type of paint can result in a poor finish and premature failure. Always use automotive paint for travel trailers.
8.3. Applying Paint Too Thickly
Applying paint too thickly can cause runs, drips, and uneven coverage. Apply multiple thin coats for best results.
8.4. Painting in Unfavorable Weather Conditions
Painting in humid or extreme temperatures can affect the drying time and the quality of the finish.
8.5. Neglecting Safety Precautions
Always wear safety gear, such as safety glasses, a respirator, and gloves, to protect yourself from paint fumes and chemicals.
9. The Benefits of Using TRAVELS.EDU.VN for Your Travel Needs
TRAVELS.EDU.VN offers a wide range of travel services to help you plan and execute your dream vacation, including:
- Customized travel packages: Tailored to your specific interests and budget.
- Expert travel advice: Our experienced travel professionals can provide valuable insights and recommendations.
- Exclusive deals and discounts: Save money on flights, hotels, and activities.
- 24/7 customer support: We’re here to assist you with any questions or concerns.
- Unforgettable experiences: We’ll help you create memories that will last a lifetime.
TRAVELS.EDU.VN is your premier partner for planning exceptional journeys, especially to enchanting destinations like Napa Valley. Our expertise ensures a seamless and memorable travel experience. Contact us at +1 (707) 257-5400.
10. Frequently Asked Questions (FAQ) About Painting Travel Trailers
10.1. How much does it cost to paint a travel trailer?
The cost can range from $500 to $2,000, depending on the size of the trailer, the type of paint used, and whether you hire a professional or do it yourself.
10.2. What type of paint is best for a travel trailer?
Automotive paint is the best choice due to its durability and resistance to the elements.
10.3. Can I paint my travel trailer myself?
Yes, but it requires careful preparation, the right materials, and attention to detail.
10.4. How long does it take to paint a travel trailer?
It can take several days to a week, depending on the size of the trailer and the complexity of the design.
10.5. Do I need to remove the windows and trim before painting?
It’s recommended to remove or mask them to protect them from paint.
10.6. How do I remove old decals from my travel trailer?
Use a heat gun to soften the adhesive and peel them off. Use a rubber wheel to remove any remaining residue.
10.7. Do I need to prime the surface before painting?
Yes, primer is essential for creating a smooth and even surface for the paint to adhere to.
10.8. How many coats of paint do I need to apply?
Apply multiple thin coats for best results, typically two to three coats of paint and two coats of clear coat.
10.9. How do I maintain my newly painted travel trailer?
Wash it regularly with soap and water, apply wax every few months, and inspect it for any damage.
10.10. Where can I find inspiration for travel trailer paint designs?
Online resources like Pinterest, Instagram, and travel trailer forums are great sources of inspiration.
TRAVELS.EDU.VN is committed to providing you with the best travel experiences and resources. Whether you’re planning a painting project or a dream vacation, we’re here to help you every step of the way. For personalized assistance, call us at +1 (707) 257-5400 or visit our website at travels.edu.vn. Our office is located at 123 Main St, Napa, CA 94559, United States.