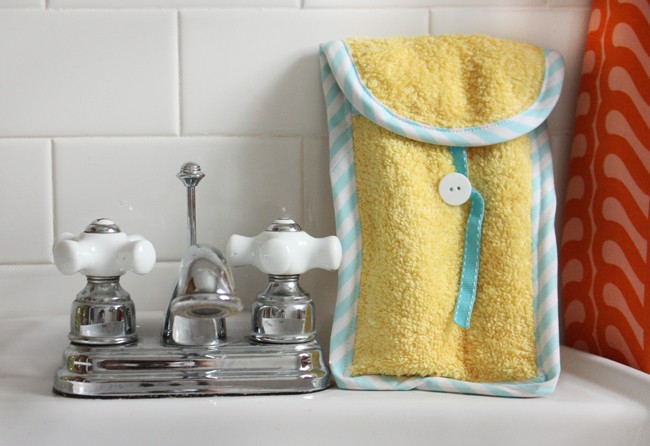
Are you tired of your toothbrush rolling around in your travel bag, unprotected and exposed to who-knows-what? Or perhaps you’re using a plastic baggie that’s flimsy and not exactly eco-friendly? Say goodbye to those travel hygiene woes! This easy-to-follow DIY tutorial will guide you through creating your own adorable and practical Travel Toothbrush Holder. It’s the perfect solution for keeping your toothbrush and toothpaste clean, dry, and neatly contained, making your travels more hygienic and organized. Plus, it’s a fun and quick sewing project, ideal for using up fabric scraps and adding a personal touch to your travel gear.
Materials You’ll Need to Sew a Travel Toothbrush Case
Before we begin, gather these simple materials. You likely have many of them already if you enjoy sewing! This project is perfect for using upcycled materials, making it both budget-friendly and environmentally conscious.
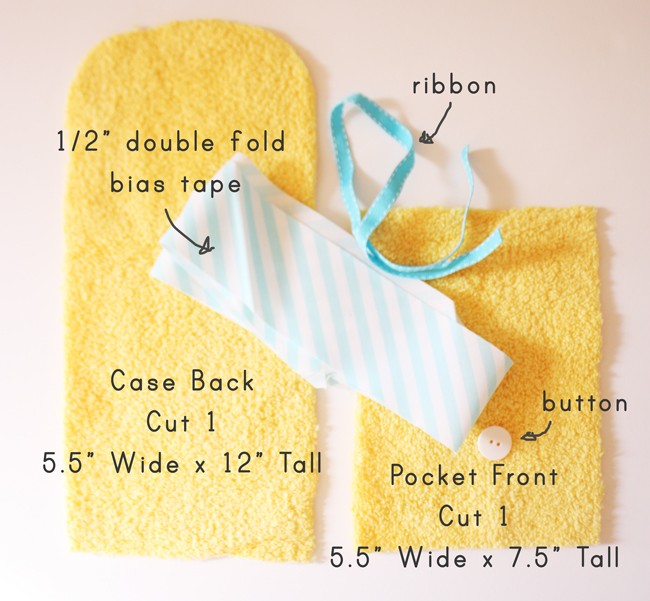
- Bathroom Hand Towel: A new or up-cycled hand towel works wonderfully. Vintage printed towels add a charming, unique touch! You’ll get enough fabric for at least two toothbrush holders, maybe more.
- 1/2″ Double Fold Bias Tape: You can use store-bought bias tape or make your own. If making it, cut bias strips 2.25″ wide. A yard of bias tape is more than enough.
- Small Fabric Scrap: This is for reinforcing the button area, adding durability.
- Button: Choose a button that complements your fabric and is easy to use with the ribbon closure.
- Small Ribbon Length: For creating the loop closure.
- Sewing Machine: A walking foot is recommended, especially when working with thicker towel fabric, but not essential.
- Scissors, Pins, Thread, and other basic sewing supplies.
 Close up of a handmade travel toothbrush holder showcasing the button and ribbon closure.
Step-by-Step Tutorial: Sewing Your Own Travel Toothbrush Holder
Now, let’s get sewing! Follow these straightforward steps to create your personalized travel toothbrush holder.
1. Cut the Fabric Pieces:
Cut one piece for the case back and one for the pocket front according to the dimensions shown in the original pattern. Round the top two corners of the case back piece to give it a nice shape. If you’re feeling creative, you can adjust the dimensions slightly to fit a larger toothbrush or add extra pockets.
 Fabric pieces cut out for the travel toothbrush holder, including the back and pocket pieces.
2. Prepare the Pocket Front with Bias Tape:
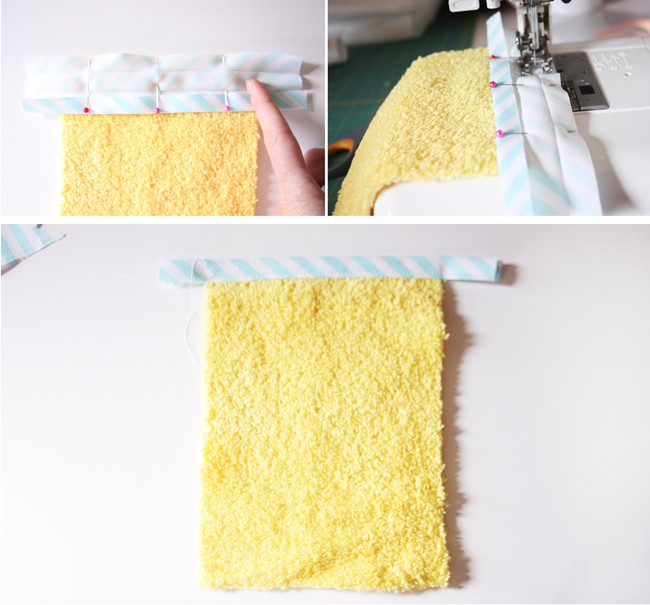
If you are making your own bias tape, now is the time. Otherwise, take your store-bought bias tape. Apply bias tape to the top edge of the front pocket piece for a clean and finished look. Open up the bias tape and align one raw edge of the tape with the raw edge of the front pocket top. Pin it in place and sew along the first fold of the bias tape. Flip the bias tape to the back of the pocket, covering the raw edge, and stitch close to the inside fold to secure it. Trim any excess edges for a neat finish.
 Step-by-step image showing how to apply bias tape to the edge of the fabric.
3. Assemble the Travel Toothbrush Holder Case:
Lay the prepared front pocket piece on top of the case back piece, aligning the bottom and side raw edges. If you desire a divided pocket – perfect for separating your toothbrush and toothpaste or adding a floss pick – sew a vertical line down the center of the front pocket through both layers of fabric. This creates two compartments within your travel toothbrush holder, enhancing its functionality.
Place your ribbon length at the top center of the flap (the rounded part of the case back), positioning it between the pocket and back layers. Sew it securely in place, ensuring it will be used for the button closure.
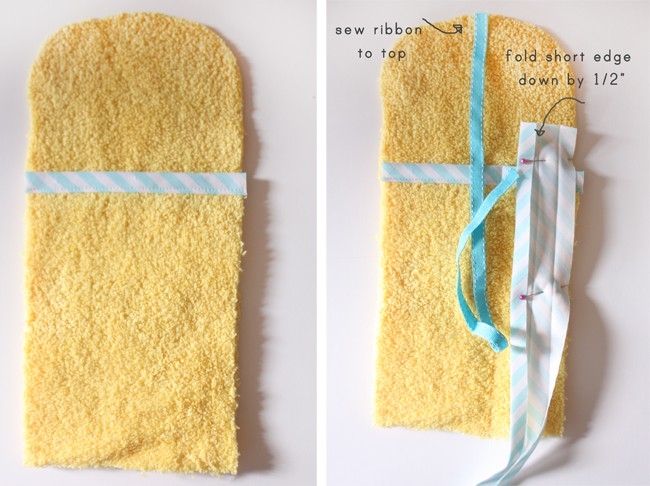 Image illustrating how to sew bias tape around the edges of the travel toothbrush holder.
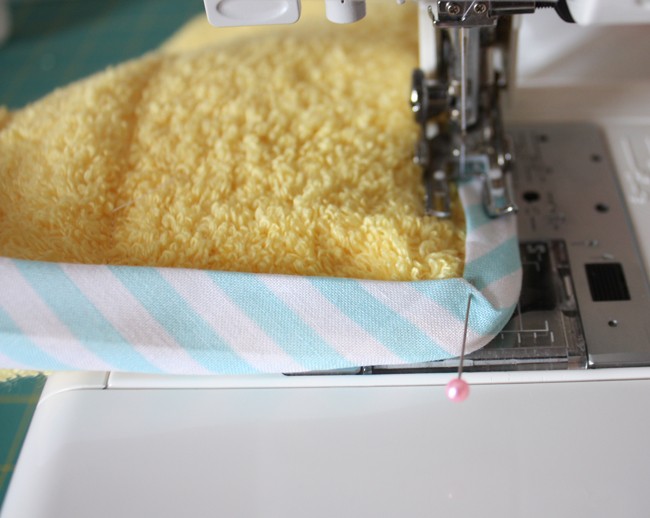
4. Finish the Edges with Bias Tape:
Open up your bias tape. Fold a short edge of the bias tape to the wrong side to create a clean starting point. Pin the bias tape around the entire case, starting from the folded edge. Sew along the first fold of the bias tape, going all the way around and slightly overlapping where the ends meet.
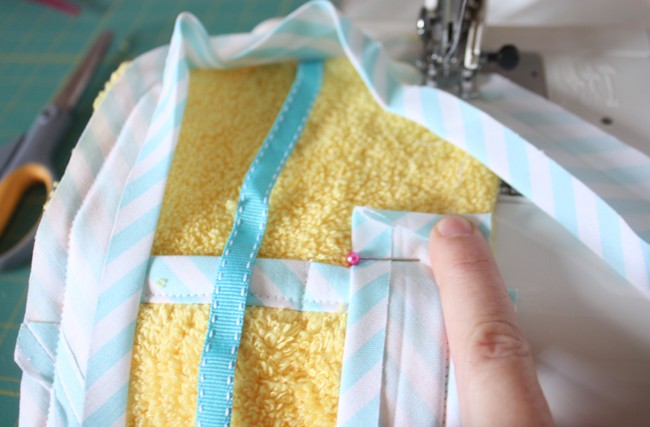 Image showing the overlapping of bias tape edges for a seamless finish.
Fold the bias tape over to the other side, wrapping it around the raw edge of the case. Miter the corners as you go for sharp, professional-looking corners. Stitch close to the inside fold of the bias tape all around the case to secure it, completing the edging.
 Close-up showing how to miter the corners when applying bias tape.
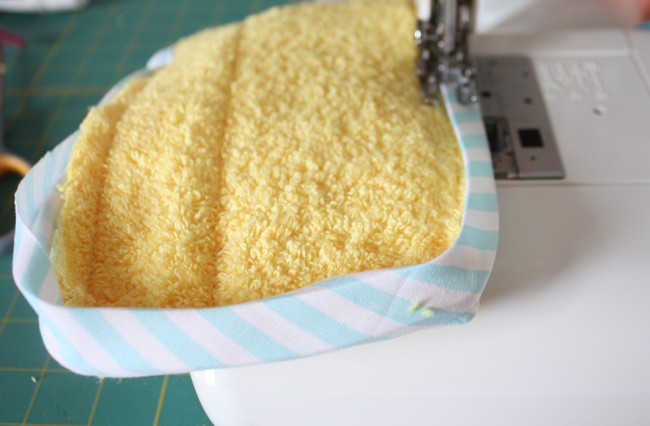 Image of sewing around the edges of the travel toothbrush holder with bias tape.
5. Add the Button Closure:
Take your small scrap of fabric and tuck it behind the front layer where you will sew the button. This reinforces the area and prevents the button from pulling through the fabric over time. Hand sew the button securely in place through all layers, including the reinforcing scrap.
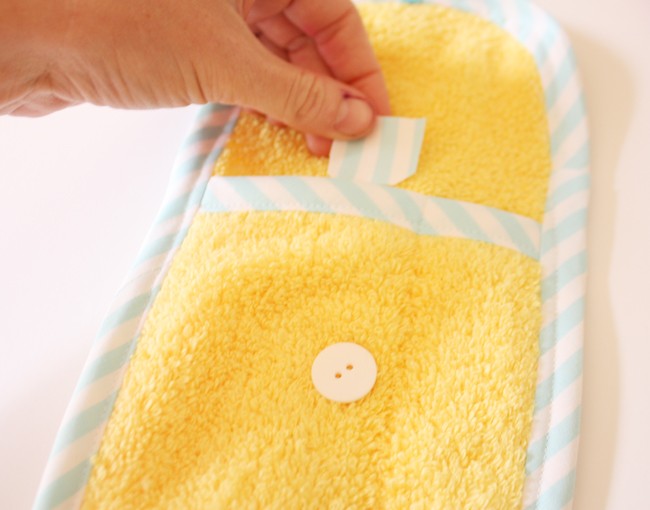 Image demonstrating how to sew the button onto the travel toothbrush holder.
Enjoy Your Handmade Travel Toothbrush Holder!
Congratulations! You’ve just created your own travel toothbrush holder! To close the case, simply fold over the flap and wind the ribbon around the button. Now you have a cute, functional, and eco-friendly way to keep your toothbrush protected and your travel bag organized. This handmade toothbrush travel case is not only practical but also makes a thoughtful and personalized gift for travel enthusiasts. Happy travels and happy sewing!